

The ornament we are making
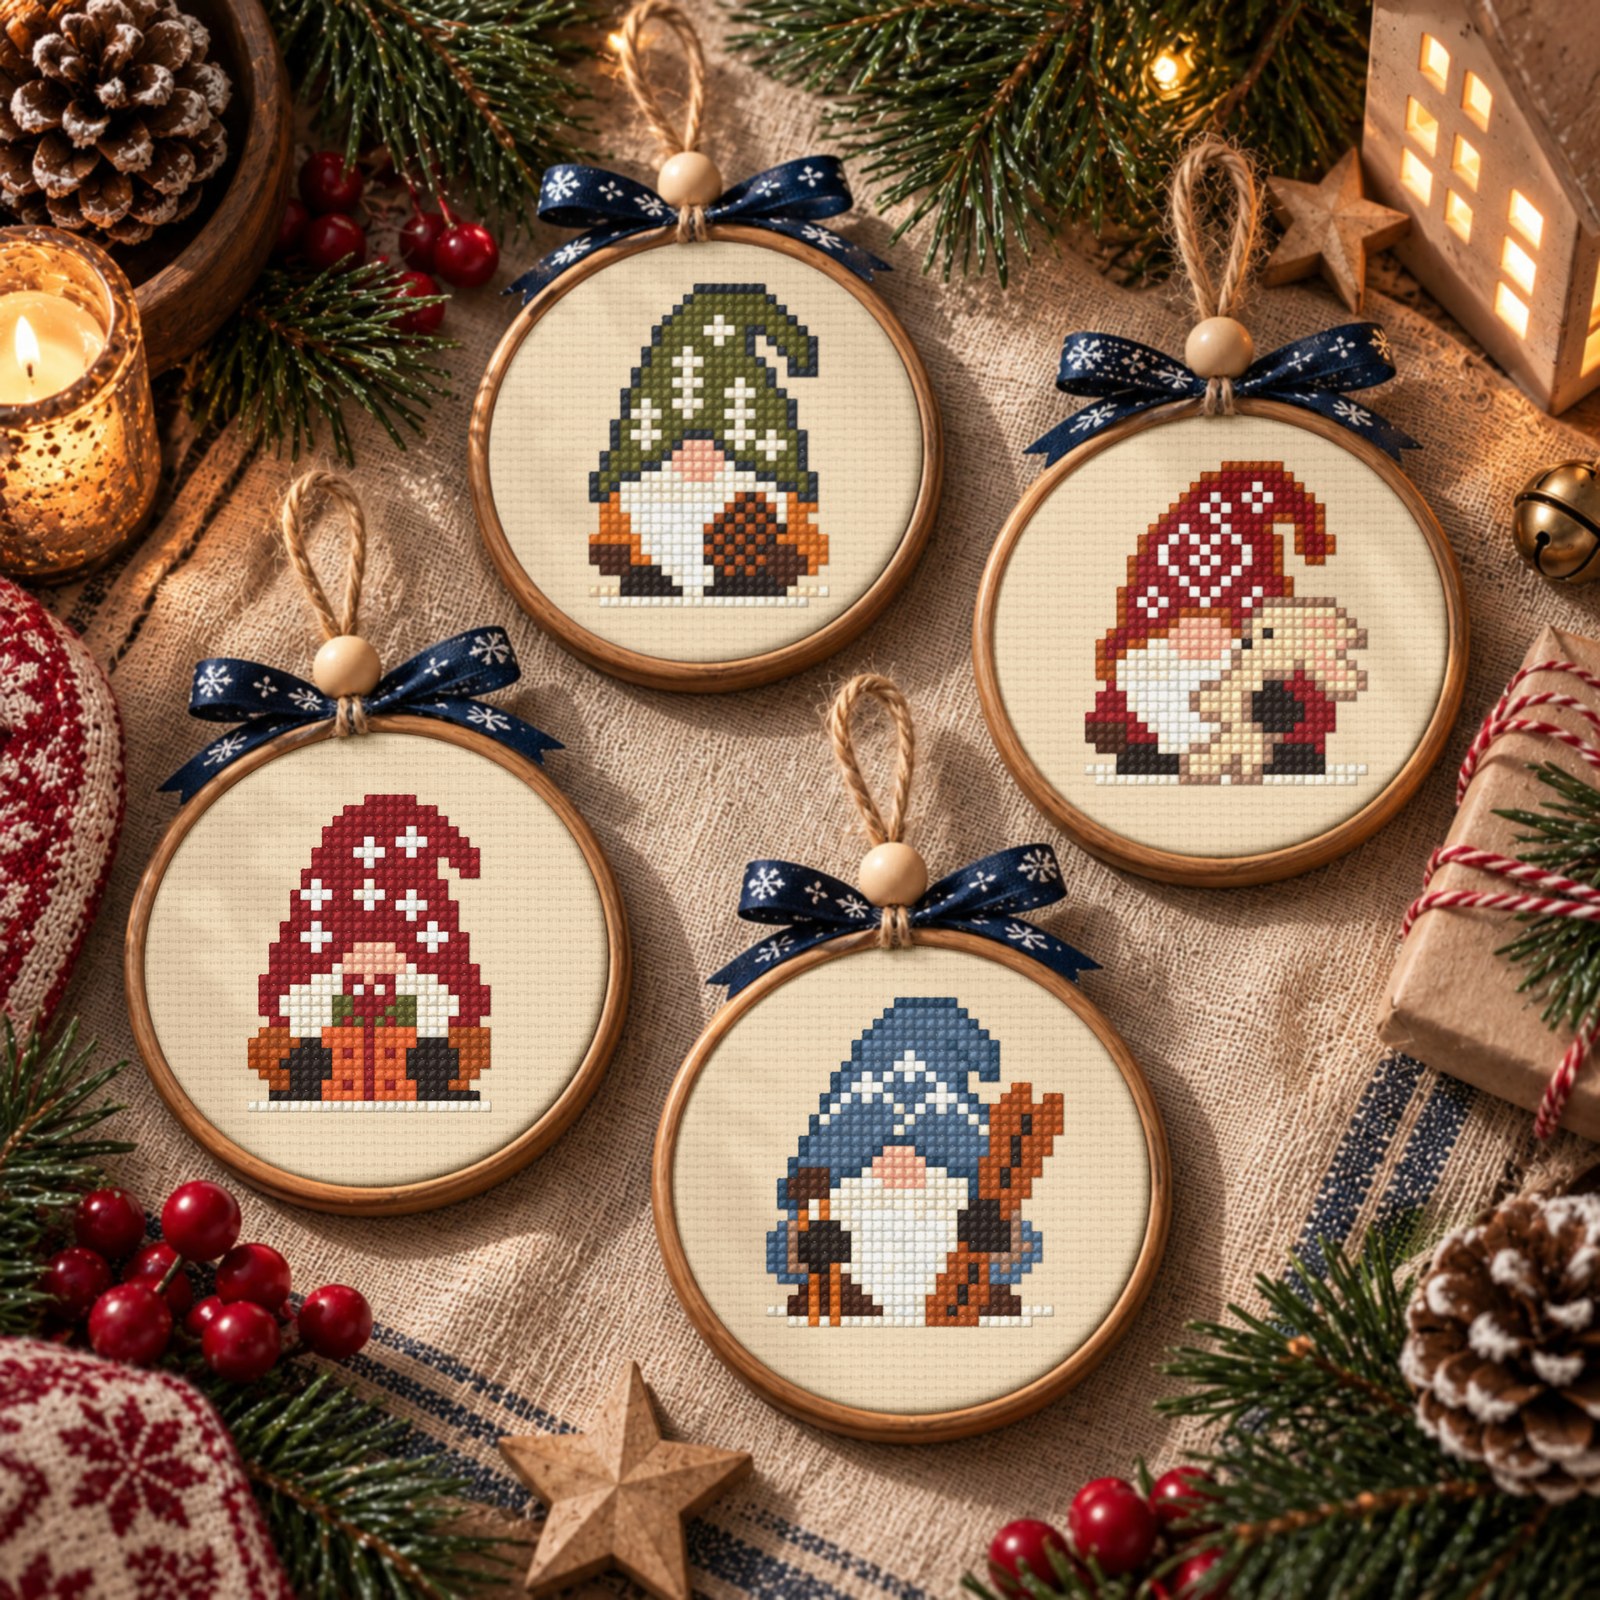
We are making one flat, felt-backed ornament from one stitched motif, using a two-ring wooden embroidery hoop with a tension screw. Cream fabric, natural wood, a navy bow and a cord loop echo the styling of our gnome mockup.
The product mockup is finishing inspiration, not a measurement template. Check the actual stitched motif against your hoop before cutting. A mini frame with solid backing discs needs its manufacturer’s mounting method instead of the gathering method here.
Gather your materials
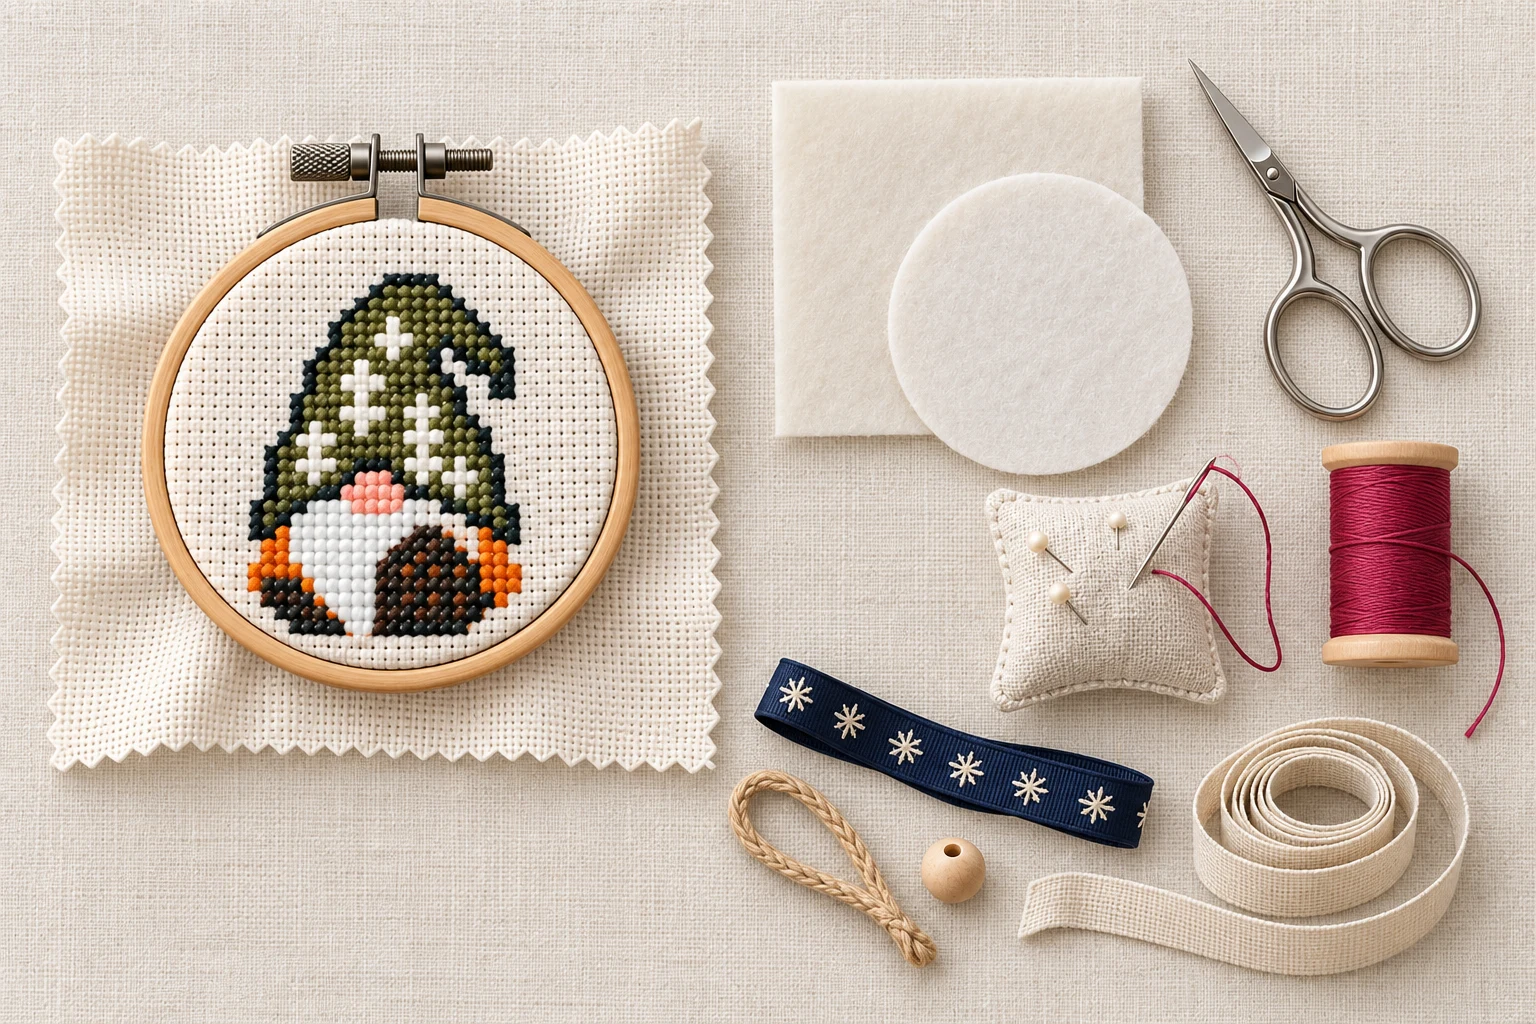
- One finished gnome on Aida, with generous unstitched fabric around it.
- A smooth wooden screw hoop that comfortably frames the motif.
- Soft felt, approximately 1–2 mm thick, large enough to cover the back.
- Strong sewing thread or fine perle cotton, a sharp sewing needle, pins and scissors. Use a needle that passes through the felt without forcing it.
- A ruler, pencil for marking the backing, and scrap paper for a size template.
- Approximately 25–30 cm (10–12 in) of hanging cord and 30–40 cm (12–16 in) of ribbon for a small bow; adjust to your hoop.
- Optional: a bead with a hole wide enough for the cord, and a small stitched name or date on the felt.
Reserve roughly 30–60 minutes for finishing your first ornament, in addition to stitching and any drying time. No glue is needed for the felt-backed method.
Choose the hoop before cutting the fabric
Use the dimensions of one motif, not the size of the full 16-gnome chart. For full crosses over one Aida square, divide its width and height in stitches by the fabric count to get inches. Multiply inches by 2.54 for centimetres.
Planning example, not a gnome specification:
A 28 × 35-stitch motif on 14-count Aida is 2 × 2.5 in (5.1 × 6.4 cm). Its rectangular bounding box has a diagonal of about 3.2 in, so a 3 in circular opening cannot contain that whole rectangle. A larger opening still needs a visual check for breathing room.
Trace the hoop’s actual inner opening on paper and cut it out. Hold the opening over your stitching to check the hat tip, boots and side details. Look all the way around: a circle narrows toward its top and bottom. Leave a visible border that looks balanced to you.
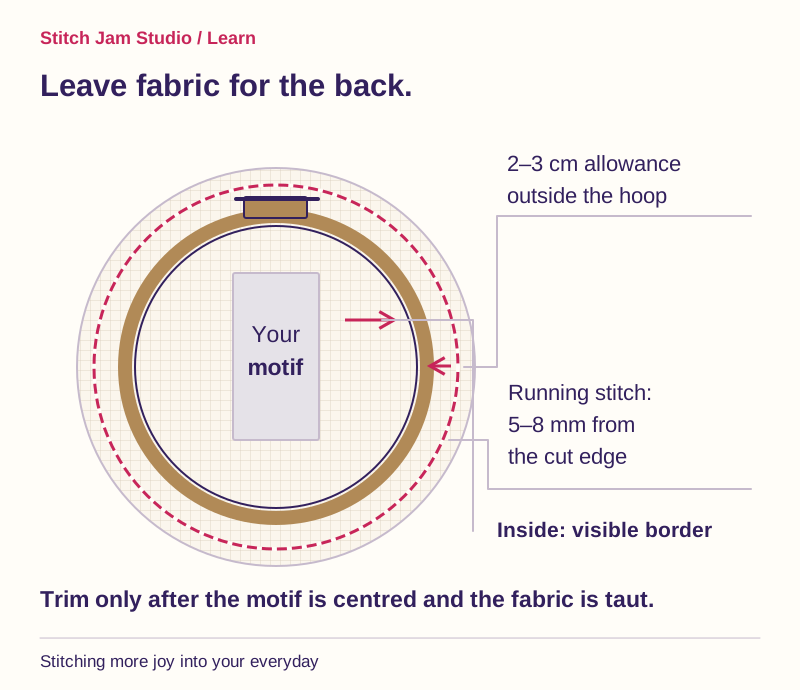
For a new piece of fabric, a starting cut about 10 cm (4 in) wider and taller than the hoop’s outside diameter gives a useful handling margin. Only trim to the final 2–3 cm allowance after centering. If motifs were stitched close together on one piece, check that each has its own finishing allowance before separating them.
1. Prepare and centre your stitching
Check for missed stitches and loose ends first. If cleaning is needed, follow the fabric and thread care instructions and check colorfastness before wetting. Let the work dry fully. Press gently from the reverse on a clean soft towel, using a temperature suitable for the materials.
Before assembling the hoop, trace around the outside of the inner ring onto felt. Cut just inside your line, then test the circle against the back; it should cover the gathering without projecting past the wood. Add a name or date to the felt now if you wish.
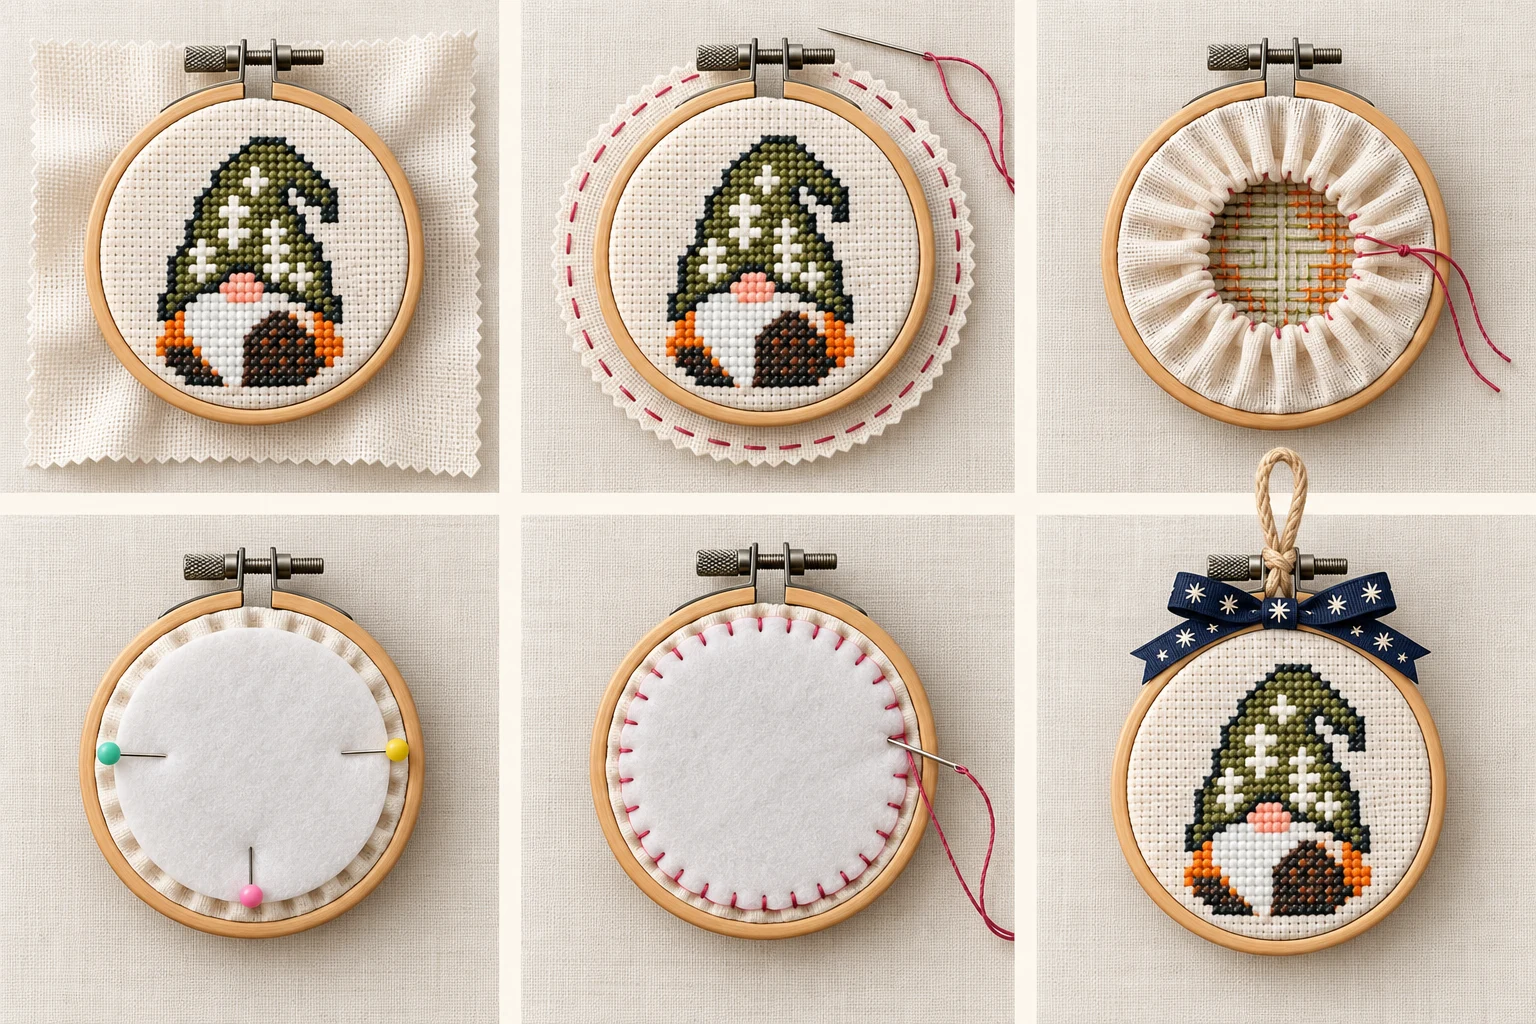
Place the inner ring below the fabric and the outer ring above, with the screw at the top. Centre the motif, tighten gradually and gently ease the fabric evenly around the edge. Keep the Aida grid straight. It should be smooth, with no sagging or stretched, diamond-shaped squares.
2. Trim, stitch and gather the back
- Check the front once more. When the placement is right, cut a circle of fabric leaving about 2–3 cm (¾–1¼ in) beyond the hoop all around. For a very small hoop, fold the allowance back first to check that it will not become excessively bulky.
- Sew a running stitch in the allowance. Work about 5–8 mm (¼ in) in from the cut edge with small, roughly even in-and-out stitches. Leave a thread tail at the beginning and end. Stitch through fabric only.
- Turn the hoop over. Pull the two tails gradually while easing the gathers toward the centre. Spread the folds around the ring, keeping the front smooth.
- Secure the thread. Tie the tails firmly with a double knot. If the front puckers, loosen and redistribute the gathers before securing. The fabric at the centre of the back can remain visible; the felt will cover it.
3. Sew on the felt backing
Lay the felt over the gathered back and pin it in place. If it rides onto the rim, trim a little at a time. It should sit flat, hide the reverse stitches and overlap enough folded Aida for you to sew the two fabrics together.
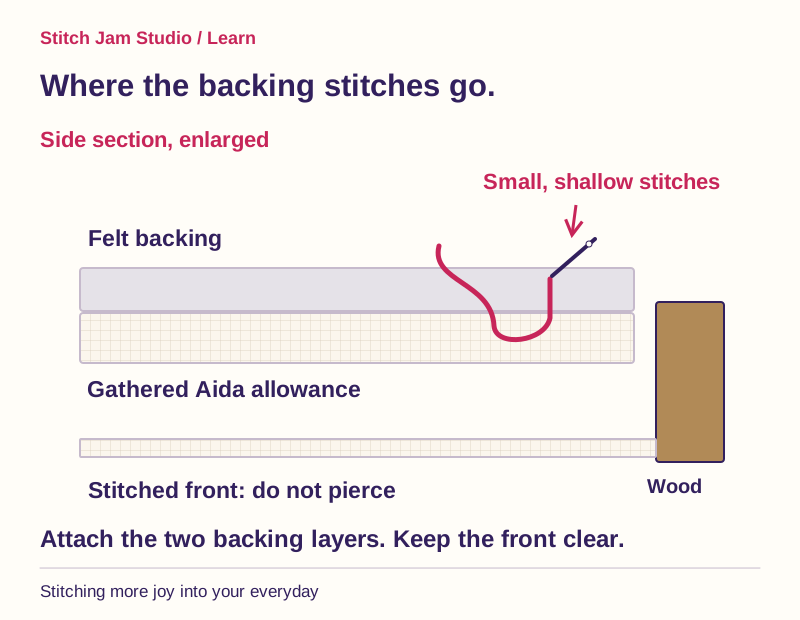
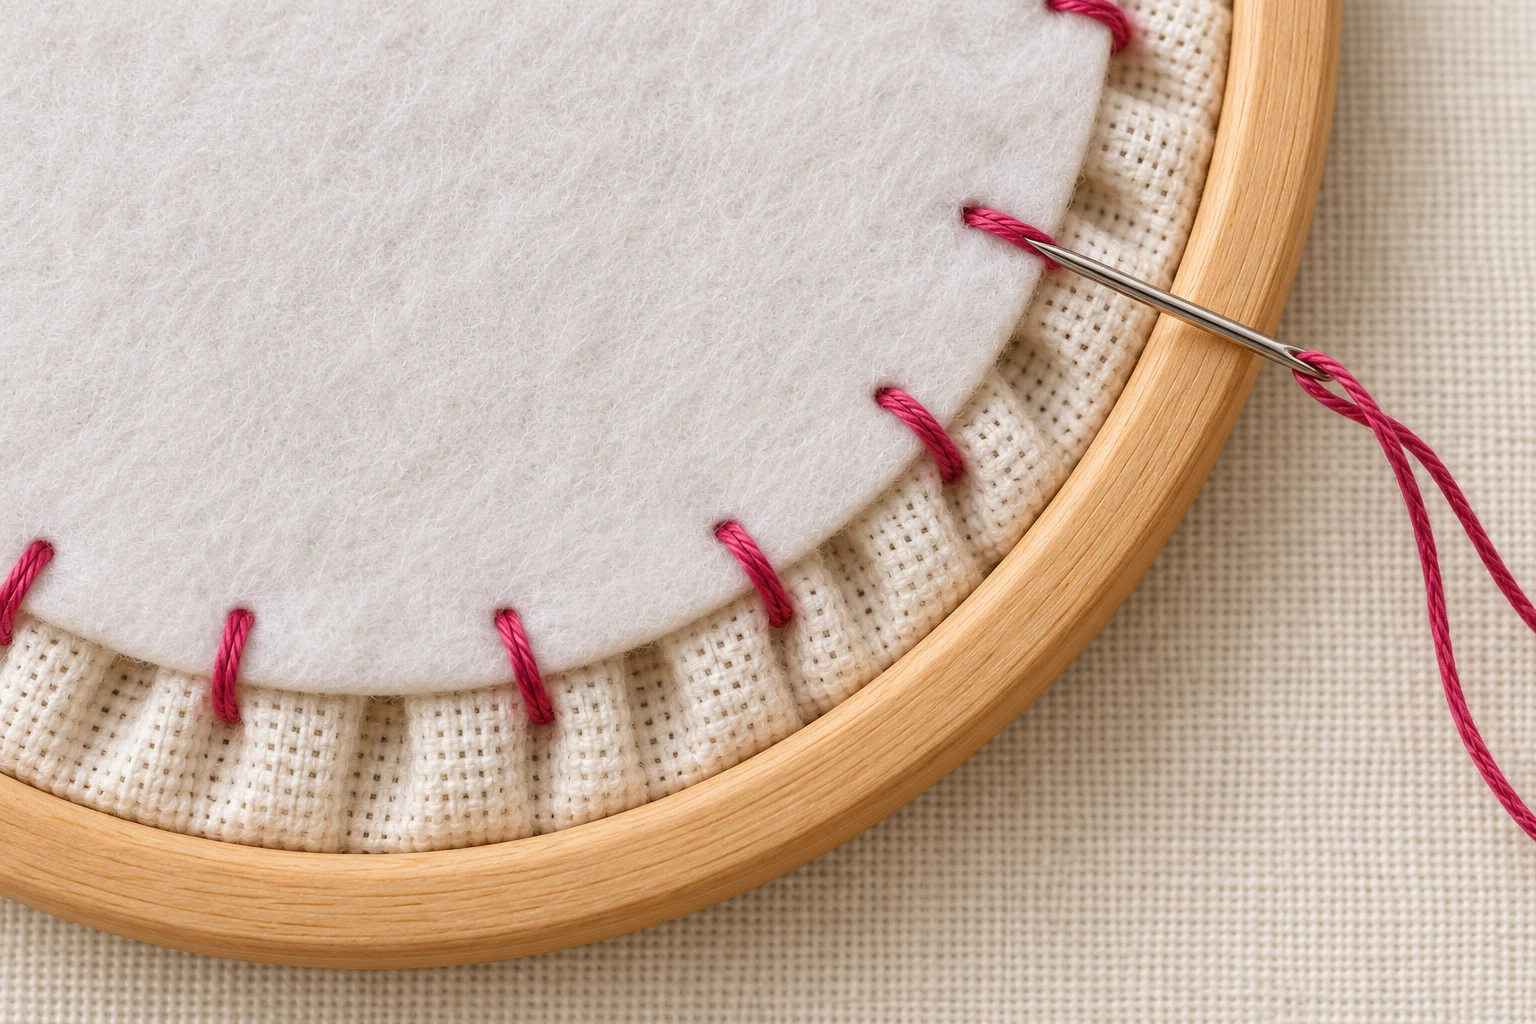
A small whipstitch is the simplest option: hide the starting knot in a fold, take a small bite of the gathered Aida just outside the felt edge, then bring the needle through the felt close to its edge. Repeat around the circle at roughly 4–6 mm intervals. Keep your needle in the backing layers so it does not emerge through the stitched front.
For a blanket-stitch edge: take the same small bites through felt and folded Aida, but keep the working thread in a loop and pass the needle through that loop before tightening. A neat line of thread will sit along the felt edge. Practise on two scraps if this stitch is new to you.
Use matching thread for a quiet finish or a contrasting color for a decorative edge. Pull only enough to bring the layers together. At the end, make two small securing stitches in the backing, bury the tail between the layers and remove every pin.
4. Add the hanging loop and bow
Pass the cord through or around the hoop’s metal screw bracket, without loosening the screw, and tie a secure loop. Check that the knot cannot slip off the bracket. If your hoop has no suitable bracket or hanger, use the hanging fitting designed for that frame.
For a wooden bead, thread both cord ends through it before tying them together to close the loop. The knot should be too large to pass back through the bead. Tie a separate navy bow around the bracket and trim the ribbon ends neatly. The cord carries the weight; the decorative bow does not have to.
Hold the loop and gently test the ornament’s weight over a soft surface. Check that the hoop stays closed and the bow leaves the hat visible. Small beads, cords and pins make this a decorative ornament, not a child’s toy. Keep it away from candles and other heat sources.
Optional: a removable card backing
Felt is our main method. For a firmer removable back, trace the hoop’s inner opening onto acid-free card, cut slightly smaller and test-fit it without forcing. Gather the fabric loosely first; allow enough space for the disc above the reverse stitches.
The disc should sit flat without pushing on the embroidered front. If it falls out, use a few removable tacking stitches into the surrounding folded allowance. A thin felt layer between the stitching and card can soften any raised thread tails. Avoid thick packing cardboard and permanent glue against the needlework.
Small fixes and a final check
- The gnome looks tilted.
- Loosen the hoop and realign the Aida grid before trimming or sewing the back. Check the screw is centred above the motif.
- The front sags after gathering.
- Check the hoop tension and ease the fabric evenly. Pulling the gathering thread harder is not a substitute for a properly fitted hoop.
- The felt puckers or the back bulges.
- Loosen tight backing stitches, redistribute the folds and check the felt fit. Do not trim close to the ring just to hide bulk; you still need fabric to secure the back.
- A stitch appears on the front.
- Remove that backing stitch and take a shallower bite through the folded allowance only.
- Can I reframe it later?
- The sewn backing can be unpicked. The trimming is permanent, so leave a larger allowance if future framing matters to you.
Before gifting: check for pins, tuck away thread tails, test the hanging knot and dust off the felt. Store the ornament flat in a dry box, with the ribbon uncrushed, ready for next winter.
Ready to hang?
Front
- Motif upright
- Fabric smooth
- Hat and boots clear of the rim
Back
- Felt lies flat
- No pins remain
- Thread ends tucked away
Hanger
- Loop secured to the bracket
- Knot holds under a gentle test
- Bow leaves the motif visible