

1. Plan a panel that gives every bag space
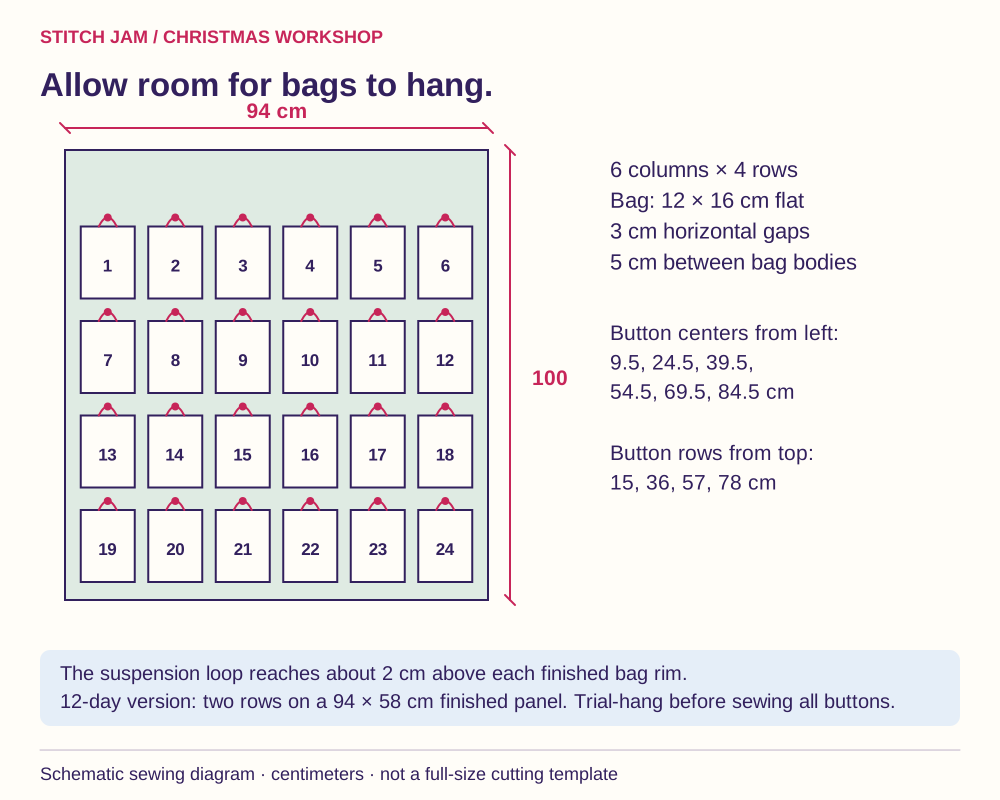
This example uses 24 bags, each 12 × 16 cm when flat, on a 94 × 100 cm finished panel. Six columns and four rows give the bags room to hang without hiding their neighbors. The drawstring casing occupies the top 2 cm of each bag, leaving about 14 cm below it before filling.
Make paper bag shapes and try the arrangement on your wall first. For 12 days, keep six columns but use two rows on a 94 × 58 cm finished panel. A full-sized calendar is substantial; if your space is narrower, use fewer columns and recalculate the panel rather than squeezing the bags together.
2. Pick an embroidered face for each bag
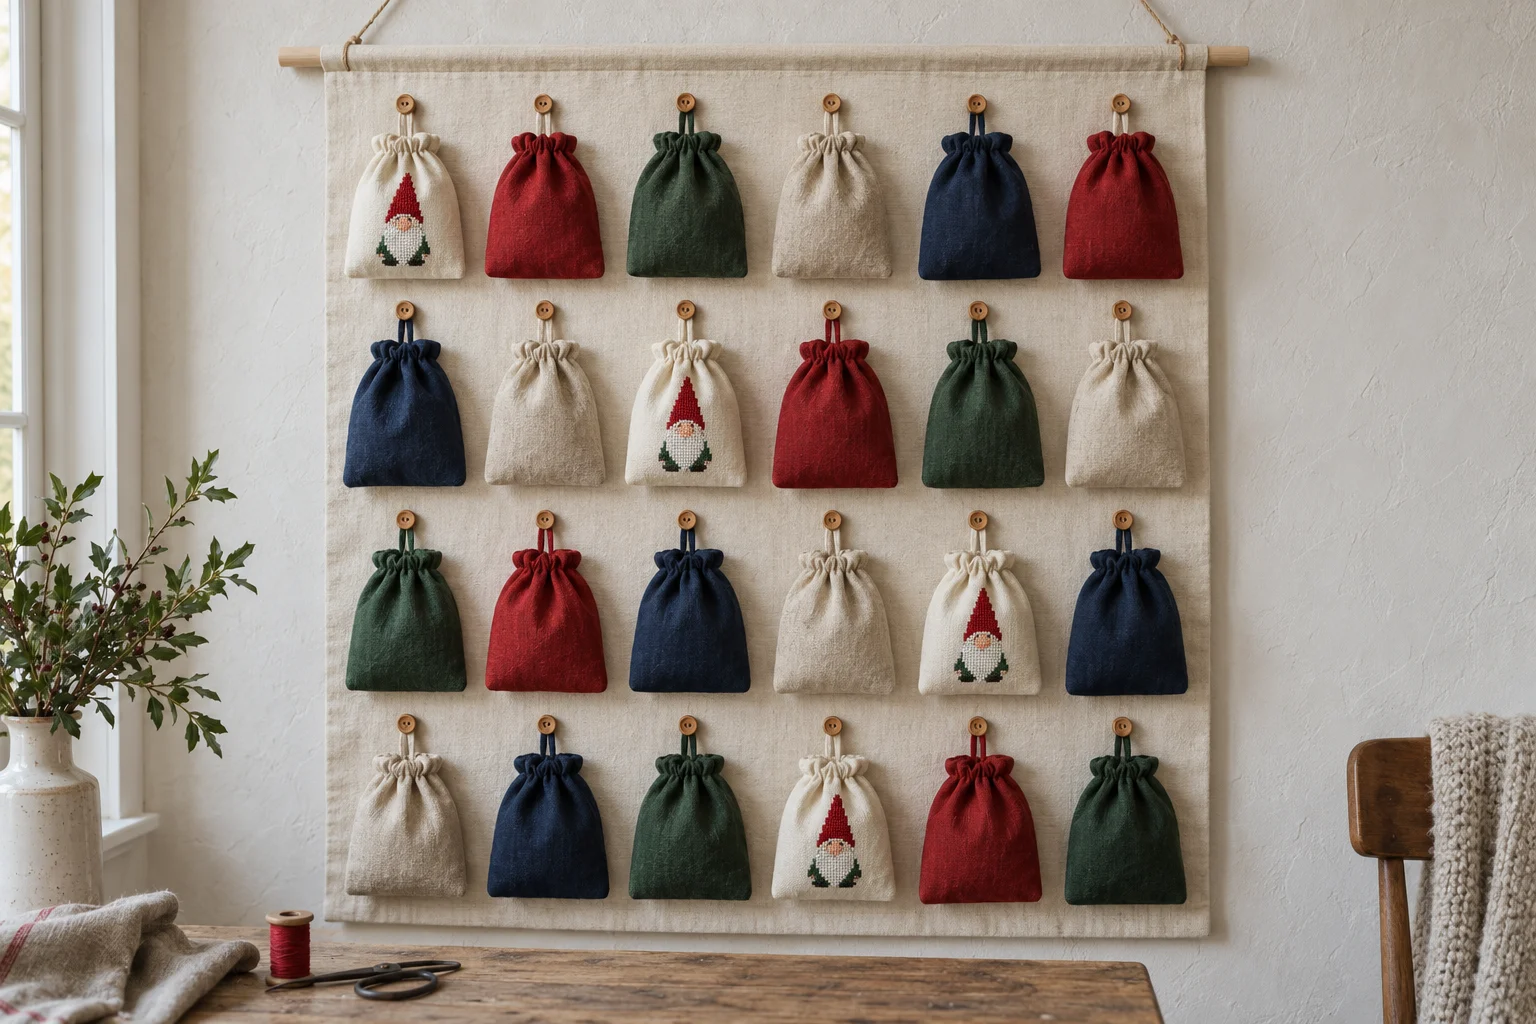
Use a gnome from the 16 Mini Christmas Gnomes Ornaments Set on a turned-edge Aida patch. Sixteen different gnomes plus eight repeats make 24 bags. The Nordic monochrome ornaments are another starting point. Measure individual motifs before allocating them; larger Nordic trees and winter motifs may suit the panel header or a larger gift bag.
For this construction, the finished patch is 10 × 10 cm, with a stitched zone no larger than 8 × 8 cm. Calculate the chosen motif's own width and height from its chart. A hypothetical 40-stitch width on 14-count Aida is 40 ÷ 14 × 2.54, or about 7.26 cm. That example is not a product specification. A complete-set listing dimension does not describe one motif.
Add numbered fabric labels separately. Your own painted, stitched or printed numbers are finishing details, not files promised with the motif PDF.
3. Cut for one trial bag first
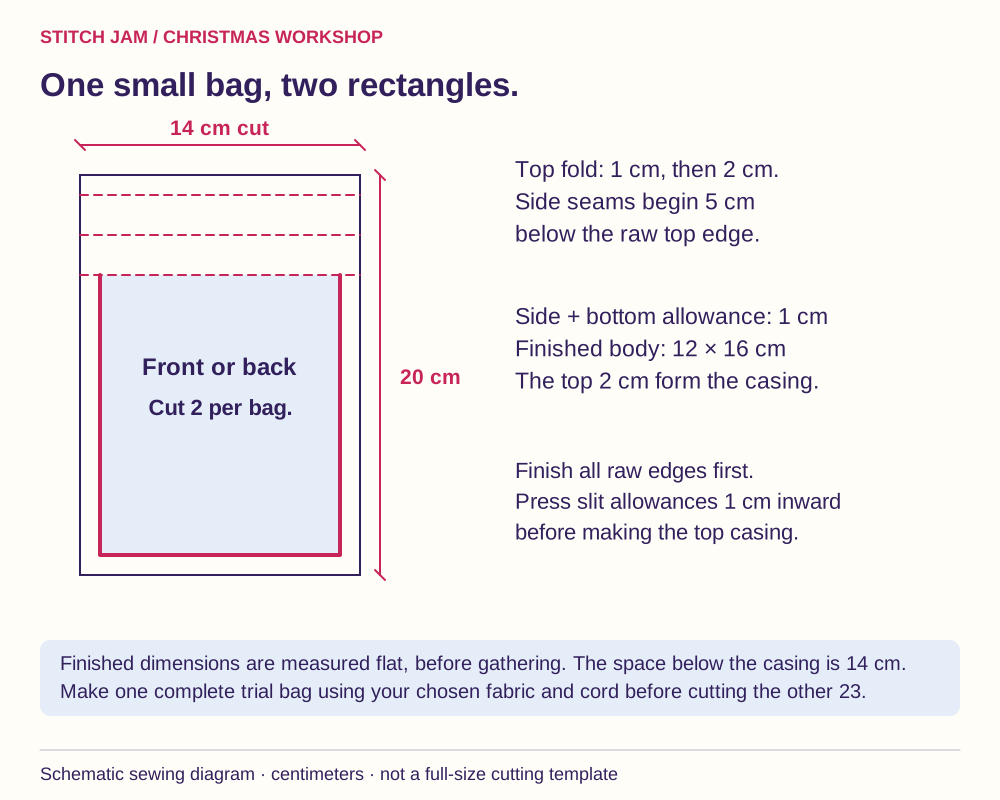
- Per bag: two plain woven cotton rectangles, 14 × 20 cm.
- One embroidered Aida patch, trimmed after stitching to 12 × 12 cm.
- One backing reinforcement patch, 4 × 5 cm, and one 14 cm length of 1 cm-wide cotton tape.
- Two 50 cm drawcords that slide easily in a 2 cm casing.
- For the calendar: front, backing and sew-in support, each 96 × 102 cm; four 8 × 14 cm tab strips; 24 sew-on buttons around 15 mm wide; a smooth dowel and suitable wall fixing.
Also gather floss, needles, sewing thread, scissors, ruler, marker, iron and a bodkin. Prepare materials according to their care labels. The bag is unlined; finish its raw edges with a suitable overcast or zigzag before construction. A lining would need its own revised casing plan.
4. Stitch and attach the Aida patch
Stitch the chosen motif on fabric large enough to hold comfortably. Complete any appropriate cleaning and pressing, then trim to 12 × 12 cm. Turn 1 cm to the wrong side on all four edges, folding the corner bulk neatly without cutting into the weave. Baste the folded patch.
On the bag-front rectangle, position the patch 2 cm from each raw side and 6 cm below the raw top. Its bottom then sits 4 cm above the raw bottom. Edge-stitch the patch to this single layer, close to its folded edge. Make the number label now, placing it where the finished drawstring gathering will not hide it.
5. Add the suspension loop to the back
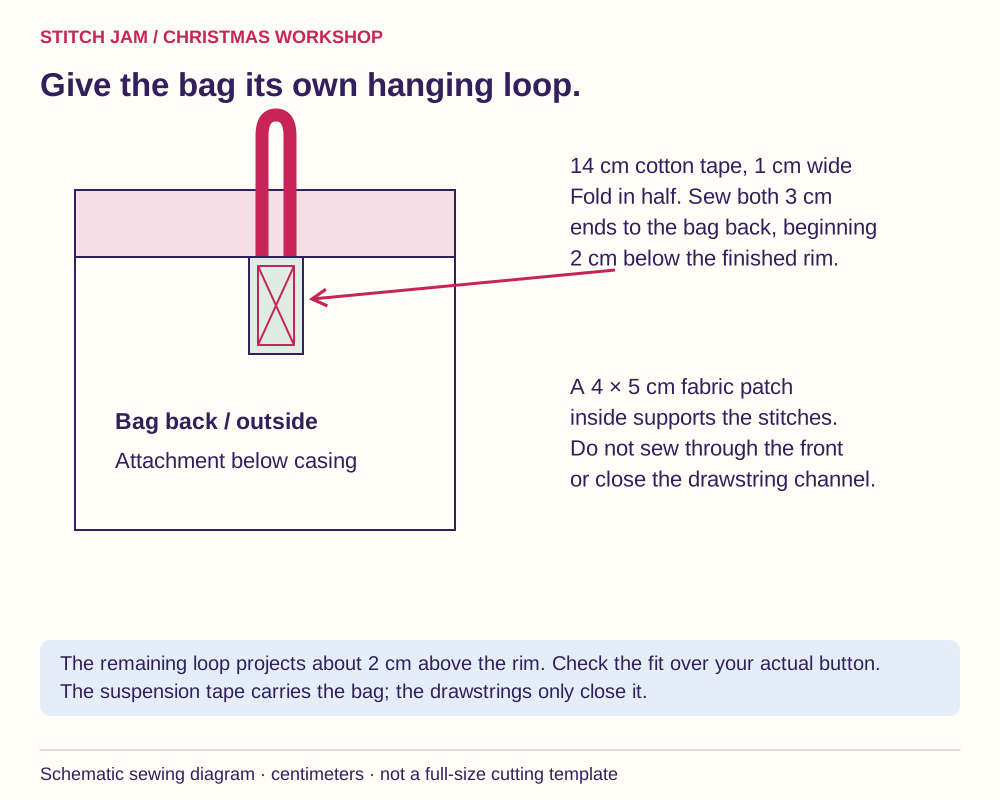
Fold the 14 cm tape in half. Its doubled 3 cm ends attach to the bag back, centered across the width. Position their upper attachment point 5 cm below the raw top and their lower ends 8 cm below it. Put the 4 × 5 cm reinforcement patch on the wrong side behind this area.
Sew a narrow rectangle with a diagonal through both tape ends, the bag back and the reinforcement. Keep the upper stitch just below the future casing's lower edge. The remaining loop extends about 2 cm above the finished bag rim. Trial-fit it over your button. This loop carries the bag; the drawstrings close it.
6. Sew the sides and bottom
Put the front and back right sides together. Mark 5 cm down from the raw top on both sides. Beginning at one mark, sew down the side, across the bottom and up to the other mark, using a 1 cm allowance. Secure both ends. Leave the upper 5 cm of each side unsewn.
Press the side allowances open. Continue the same 1 cm turn along each unsewn upper edge and stitch those short folded edges down. Trim only excess bottom-corner bulk, then turn the bag right side out. Do not box the corners; doing so would change its finished height and capacity.
7. Fold two open-ended casings
Working separately on the front and back upper edge, fold 1 cm inward, then another 2 cm inward. Press. The new finished top is 3 cm below the original raw top; the lower casing edge reaches the 5 cm side-seam mark.
Stitch close to each casing's lower folded edge, leaving both ends open. The upper side slits now become the entrances to the channels. Before threading, slide the bodkin through each channel to check that the hanging-loop seam has not caught it.
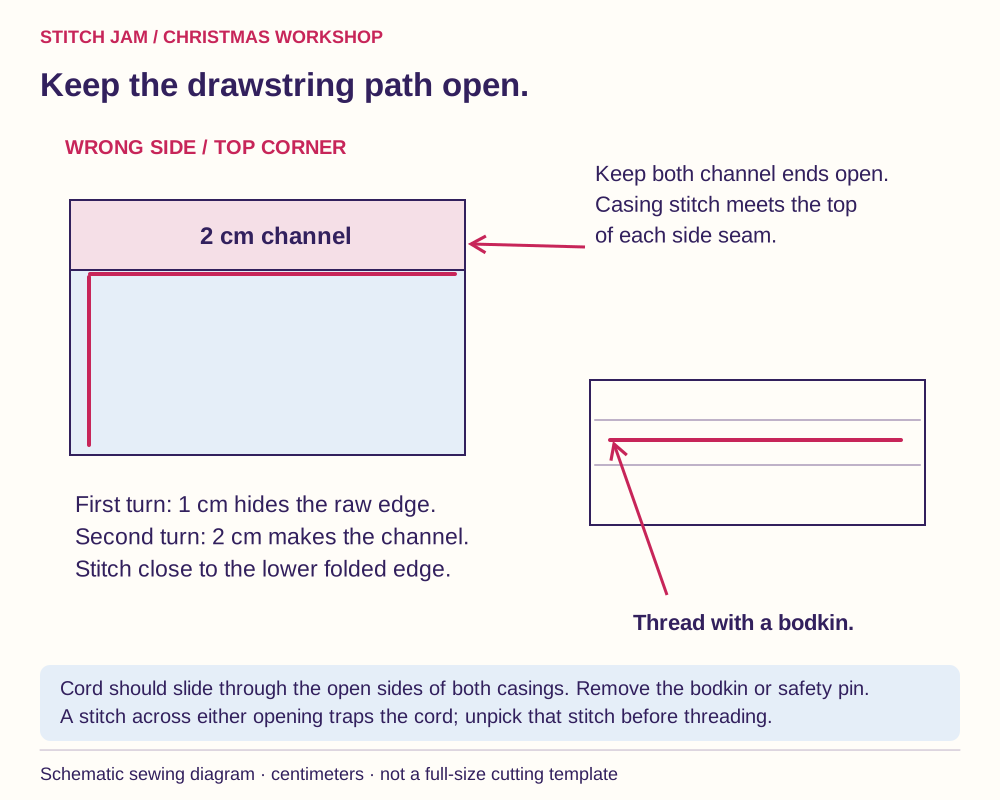
8. Thread from both directions
Feed the first 50 cm cord into the left opening, through the front channel, then through the back channel so both ends emerge on the left. Knot its ends together. Feed the second cord from the right in the opposite direction, again returning to its starting side. Remove the threading tool.
Pull the two knotted ends apart to close the bag. Test with your intended light contents, open it again and check that the patch sits comfortably below the gathers. Adjust cord length only after testing. Finish this whole sample before repeating the cutting and sewing for 23 more bags.
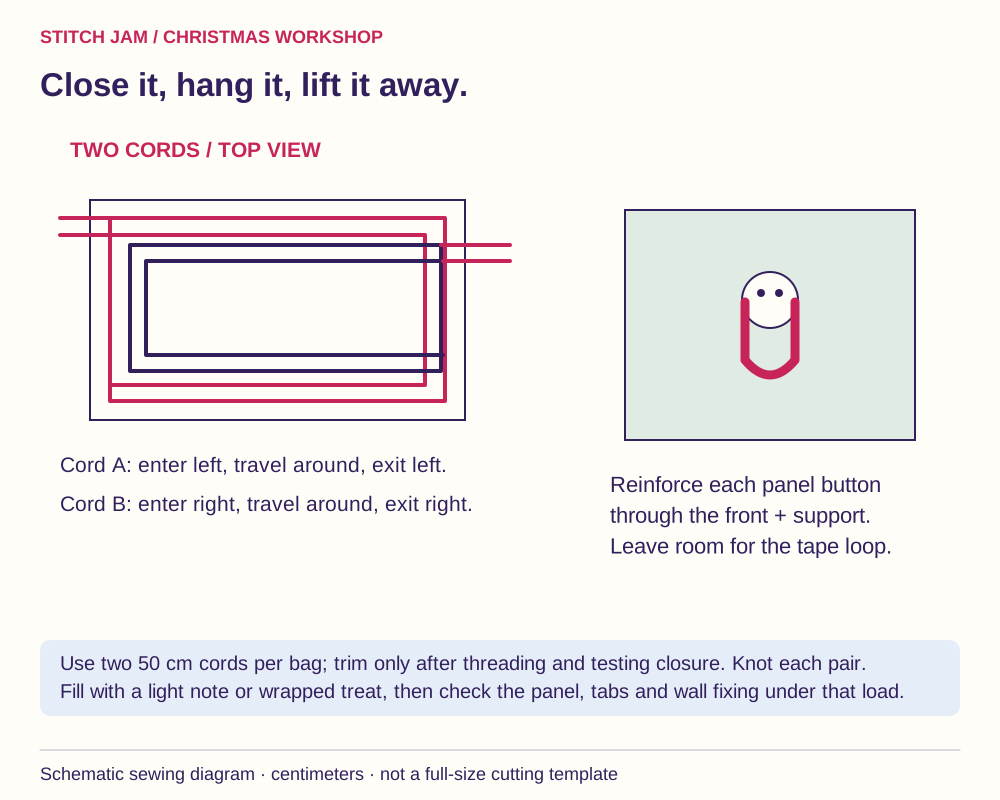
9. Sew and reinforce the display panel
Baste the support behind the front. Mark button centers from the finished left edge at 9.5, 24.5, 39.5, 54.5, 69.5 and 84.5 cm, and from the finished top at 15, 36, 57 and 78 cm. Remember the finished edges sit 1 cm inside the cut edges. Trial-hang two neighboring bags before sewing all the buttons.
Sew the buttons through front and support, adding reinforcement patches if your fabric pulls. Leave enough thread-shank clearance for the tape. Make four tabs from 8 × 14 cm strips: fold long edges to the center, fold again to 2 cm wide, edge-stitch, then fold the length in half. Center them near 10, 34, 60 and 84 cm across the finished top; align raw ends with the top raw edge and point loops inward.
Enclose the tabs between front and backing, right sides together. Sew a 1 cm perimeter seam with a 15 cm bottom turning gap. Reinforce the tab seams, trim corners, turn and press. Close the gap. The pocket-calendar tutorial illustrates this panel finish in detail.
10. Fill, hang and reuse
Support both ends of the dowel and add filled bags gradually. Use light contents; this handmade assembly has no rated capacity. If the dowel bows, tabs stretch or buttons pull the fabric, reduce the load and improve the support. Keep long cords and detachable buttons away from very young children and pets.
For a garland variation, tie each suspension loop independently to a securely supported rail or cord; space it using the actual filled bags and allow for cord sag. For larger presents, sew the separate embroidered gift-bag project. If you prefer a countdown that grows without bags, use the ornament-only panel.
Sew4Home's gift-bag tutorial offers another reusable gift-bag construction. The specific mini-bag measurements and independent hanging loop above are this tutorial's own plan; check one sample before batch sewing.
Stitch Jam patterns to make it yours
These are real designs from our catalog. The images show finishing inspiration, and the product pages describe the PDF patterns. Fabric, filling, hardware, sewing templates and calendar numbers are separate unless a listing explicitly says they are included.
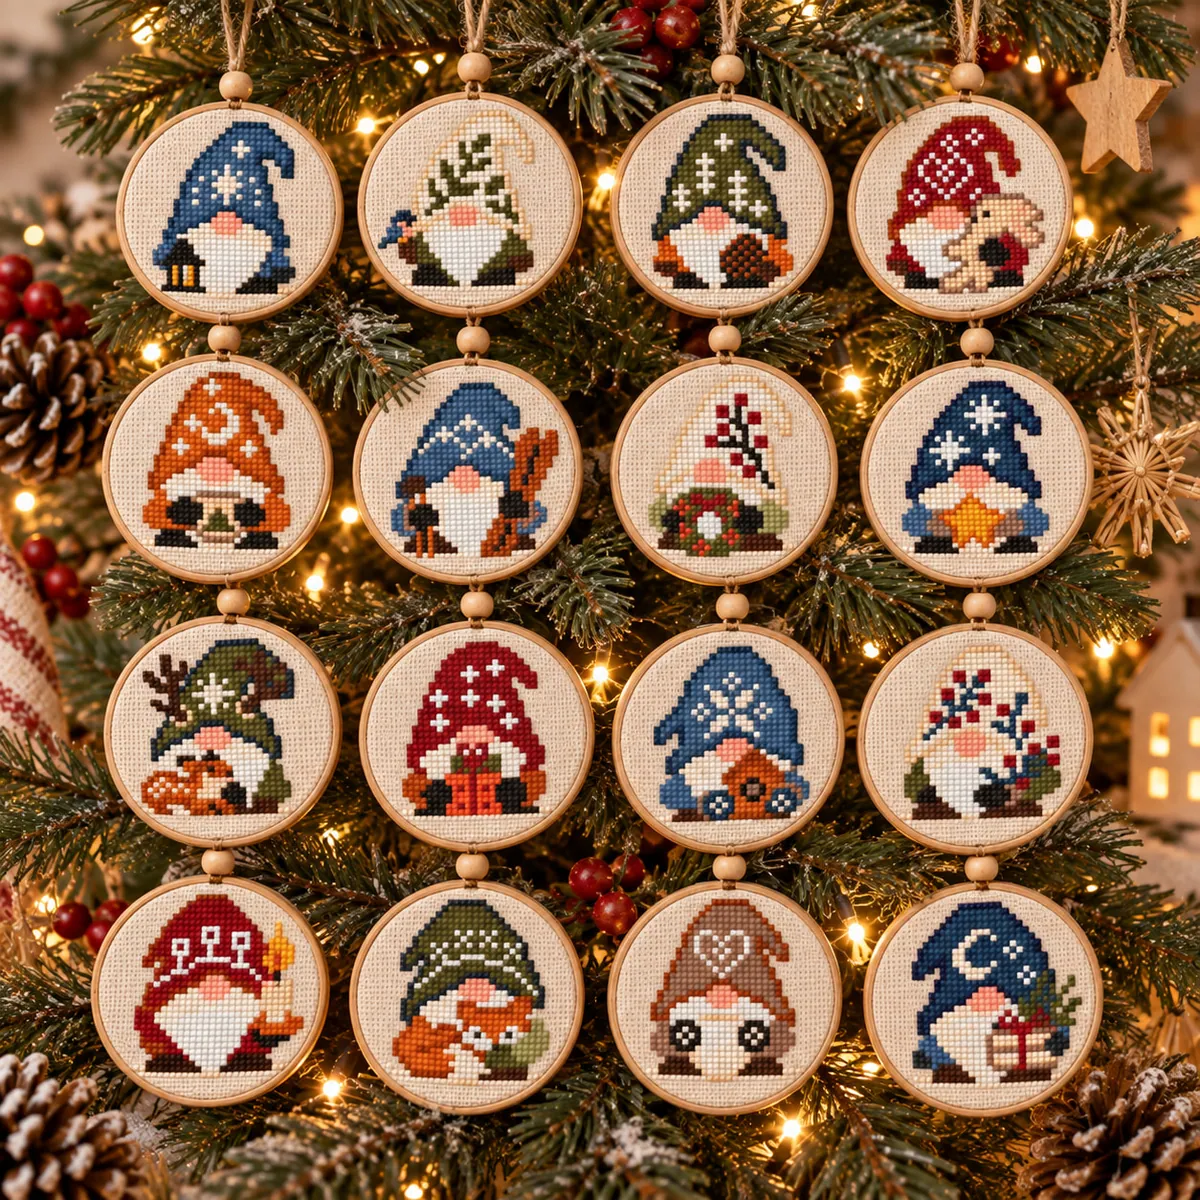 16 Mini Christmas Gnomes Ornaments SetView the pattern and included designs
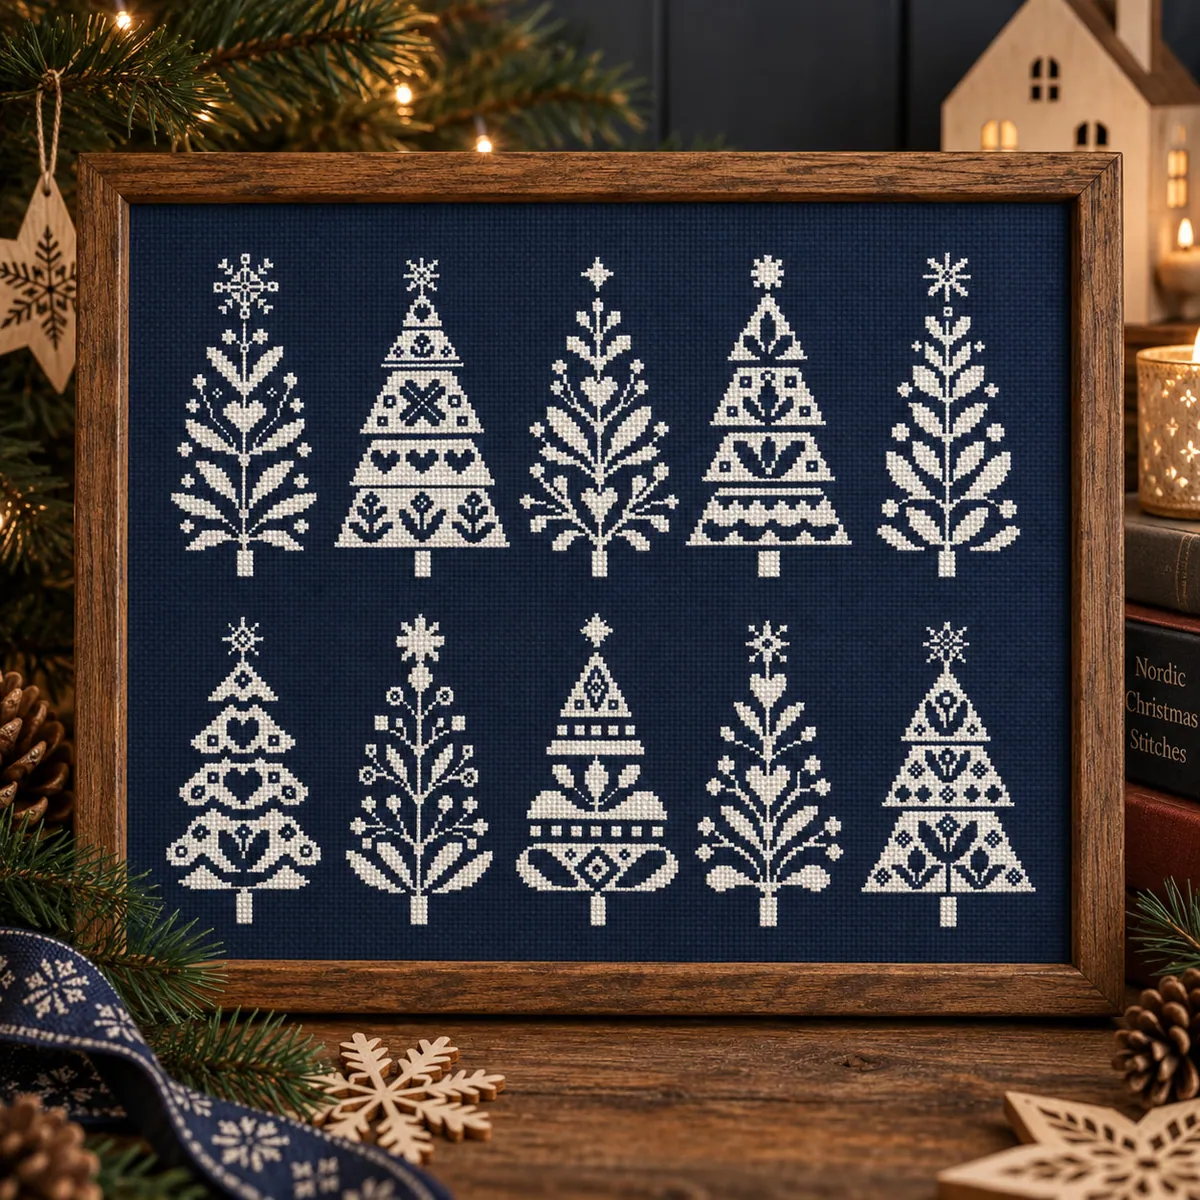 10 Nordic Christmas Trees SetView the pattern and included designs
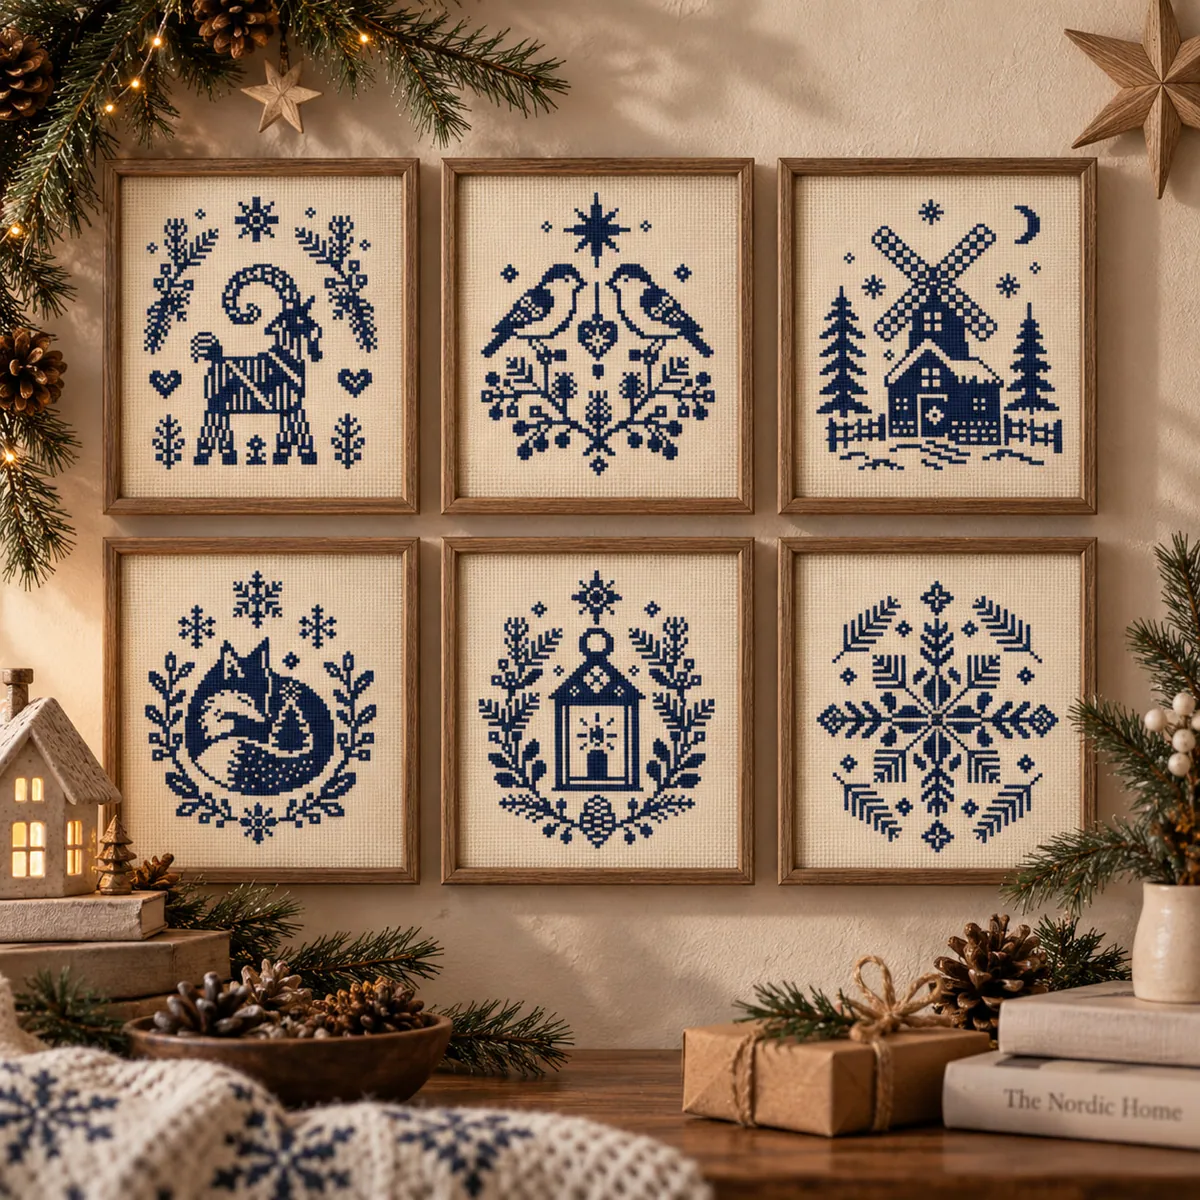 Christmas Nordic Winter MotifsView the pattern and included designs
 Christmas Nordic Ornaments MonochromeView the pattern and included designs
Measure the individual motif you choose. A set’s overall stitch count or width is not the size of each piece. To make 24 days with 16 gnomes, repeat eight favourites or combine them with another set.