

1. Decide what the pockets need to hold
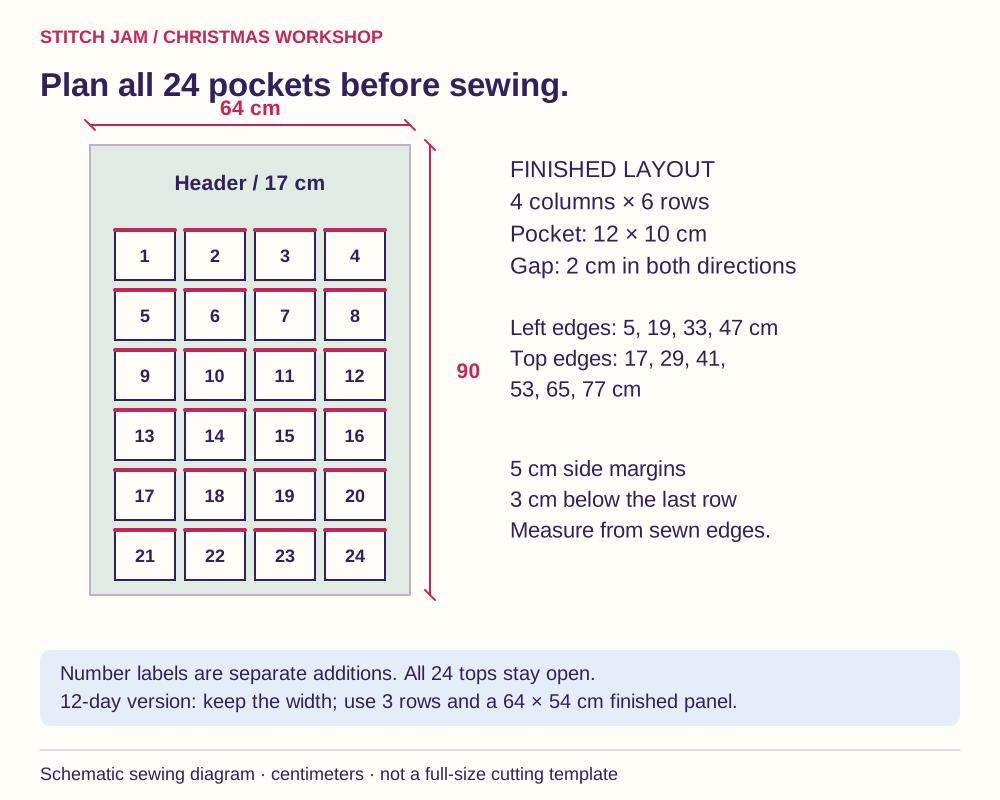
Start with the contents: folded notes, paper activities or a small wrapped treat. This plan makes flat pockets with no gusset; large gifts belong beside the calendar. The finished panel is 64 × 90 cm, excluding its hanging loops. Each pocket finishes at 12 × 10 cm; seams reduce the usable space slightly.
Make a paper rectangle for one pocket and try your proposed contents. A smaller 12-day version uses four columns and three rows on a 64 × 54 cm finished panel. Keep the same pocket sizes and spacing. These are project measurements for this tutorial, not dimensions supplied with a Stitch Jam PDF.
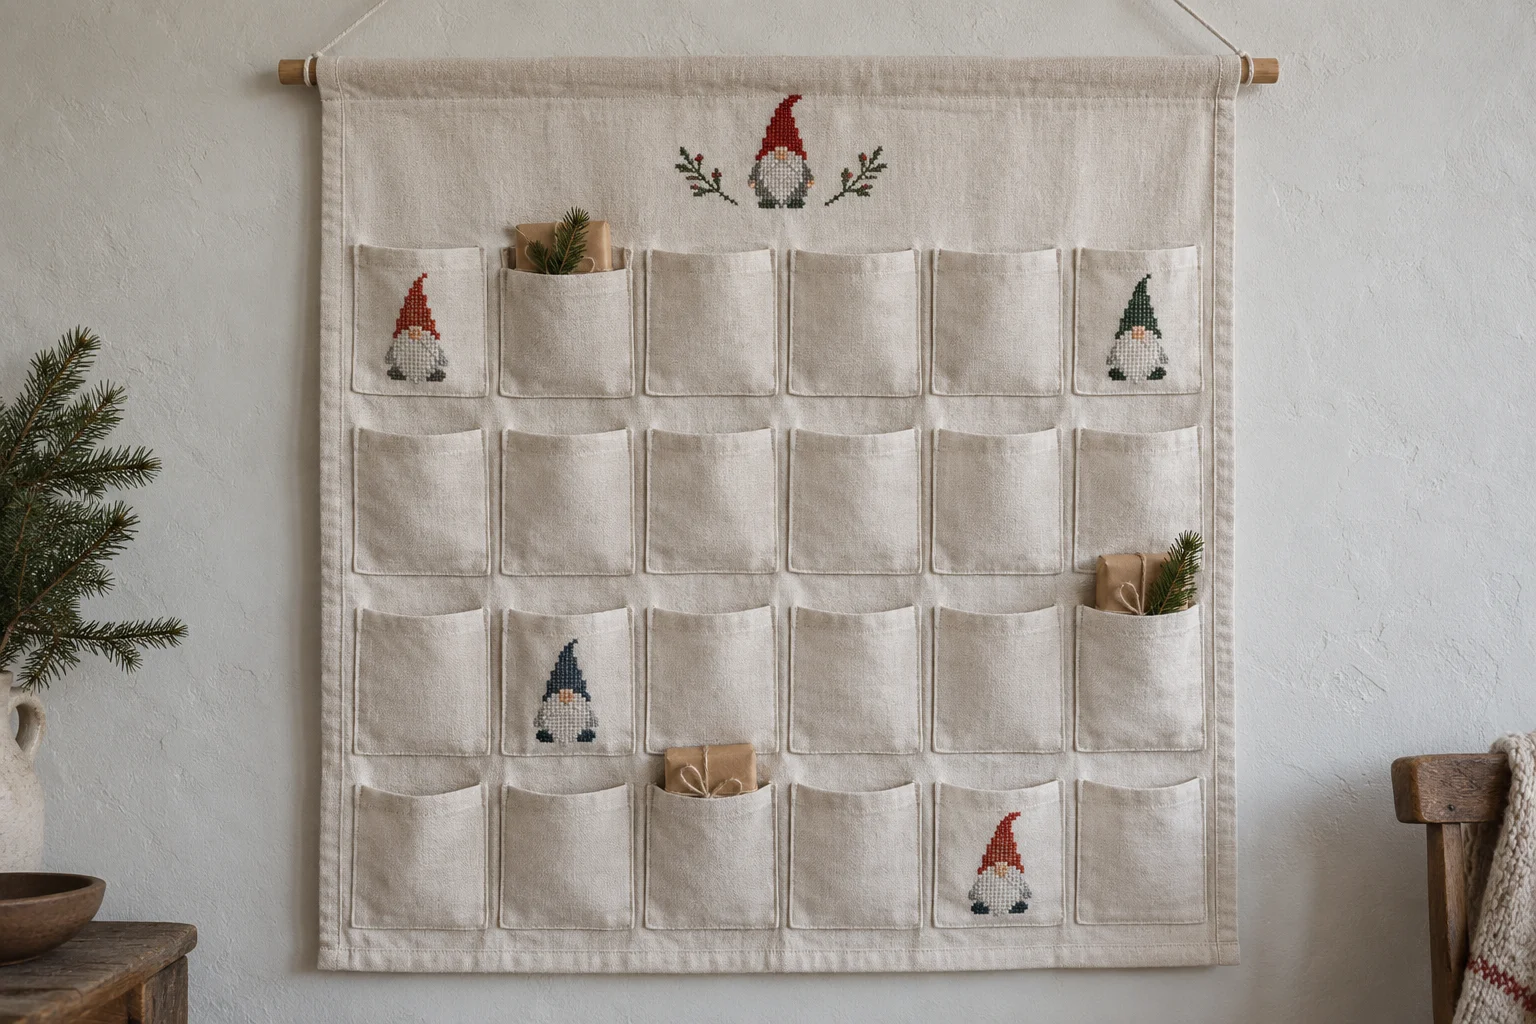
2. Choose small motifs and measure each one
The 16 Mini Christmas Gnomes Ornaments Set makes a cheerful family of characters: use all 16 and repeat eight favorites for 24 pockets. For quieter color, compare Christmas Nordic Ornaments Monochrome. A tree from the 10 Nordic Christmas Trees Set or a larger Nordic Winter Motif can become the header instead.
Count the selected motif's own bounding rectangle in its chart. The catalog size of an entire set is not the size of one character. On Aida over one square, stitches ÷ fabric count × 2.54 = centimeters. For example, an imagined 40 × 40-stitch motif is about 7.26 × 7.26 cm on 14-count Aida. This is a calculation example, not a verified gnome size.
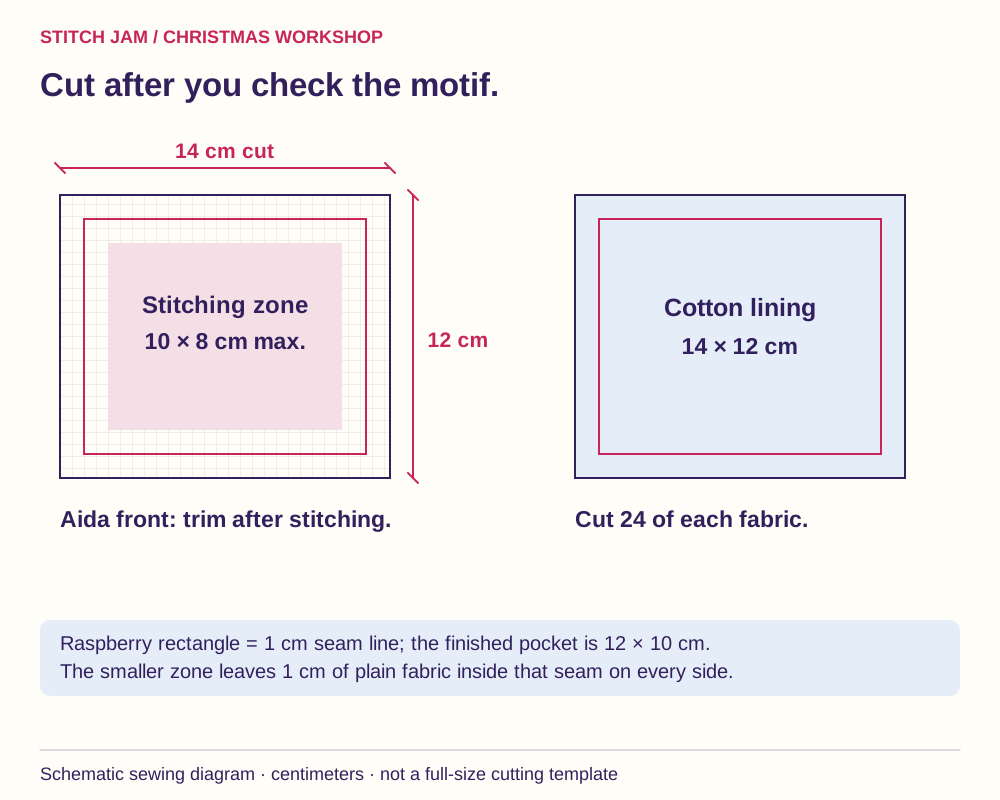
Keep the pocket's stitched area within 10 × 8 cm, leaving plain fabric beside the sewing line. Choose another motif or enlarge the pockets and panel if necessary. Use separate number tags, fabric paint or your own numeral chart; numbers 1–24 are your additions and are not promised in these pattern PDFs.
3. Gather and prepare the fabric
- Firm woven fabric for the panel front, cotton backing and a sew-in support layer: one 66 × 92 cm rectangle of each.
- Aida for 24 pocket fronts, each eventually trimmed to 14 × 12 cm, plus working fabric around the embroidery.
- Light cotton lining: 24 rectangles, 14 × 12 cm.
- Firm cotton for four 8 × 14 cm hanging-tab strips.
- Chart, listed floss, tapestry needle, sewing needle or machine, matching sewing thread, ruler, removable marker, scissors, pins and iron.
- A smooth dowel longer than the 64 cm panel, with a fixing that supports both ends.
Prepare the plain fabrics according to their care instructions before cutting. Check the care requirements of the Aida and every thread too. Make one sample using the actual layers to set a balanced stitch and avoid puckering; a thick support layer is not needed for paper notes.
4. Stitch first, then trim the pocket fronts
Mark the future 12 × 10 cm finished rectangle with temporary basting. Center the motif inside it, reserving the upper edge for a small number if you want one there. Work on a larger piece of Aida or temporarily extend its edges for hooping; do not expect the final small rectangle to fit every hoop.
Finish and press the embroidery from the back on a soft clean towel, following the material care instructions. Square it gently without stretching. Cut each front to 14 × 12 cm, with the finished rectangle 1 cm inside every edge. Cut its matching lining and keep the two pieces together.
5. Line and turn every pocket
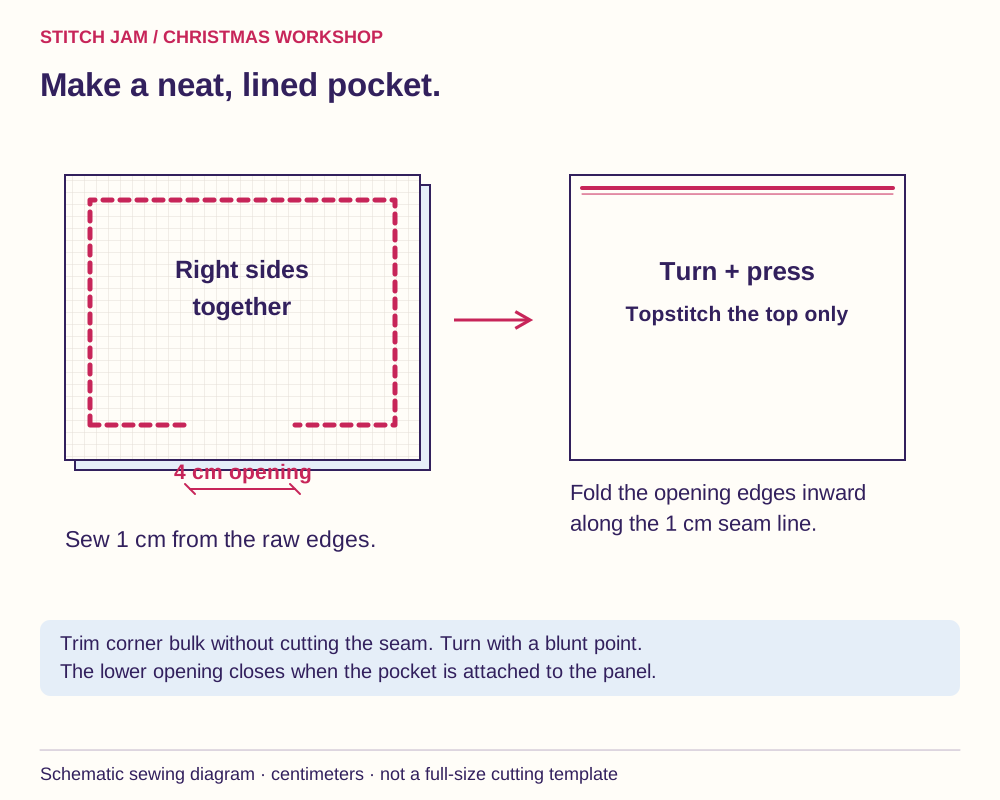
Place a front and lining right sides together, aligning their edges. Sew around with a 1 cm seam allowance, leaving a 4 cm opening in the bottom edge. Secure the beginning and end. Trim the corner bulk diagonally, staying clear of the stitches.
Turn through the opening and ease the corners out with a blunt tool. Press flat without crushing the crosses. Fold the opening allowances inward along the original seam line. Topstitch only the upper edge, about 2–3 mm from the fold. That edge will remain the pocket mouth.
6. Arrange the calendar on the flat front
Baste the support to the wrong side of the panel front, inside the seam allowances. Mark the finished panel edges 1 cm from the raw edges. From those finished edges, mark pocket left edges at 5, 19, 33 and 47 cm; mark top edges at 17, 29, 41, 53, 65 and 77 cm.
Lay out all 24 pockets. Check the numbers read in your chosen order and the final row ends 3 cm above the finished bottom. Pin or baste without stretching the panel. Place any header embroidery now, inside the free space above the first row and below the top seam.
7. Attach the sides and bottom
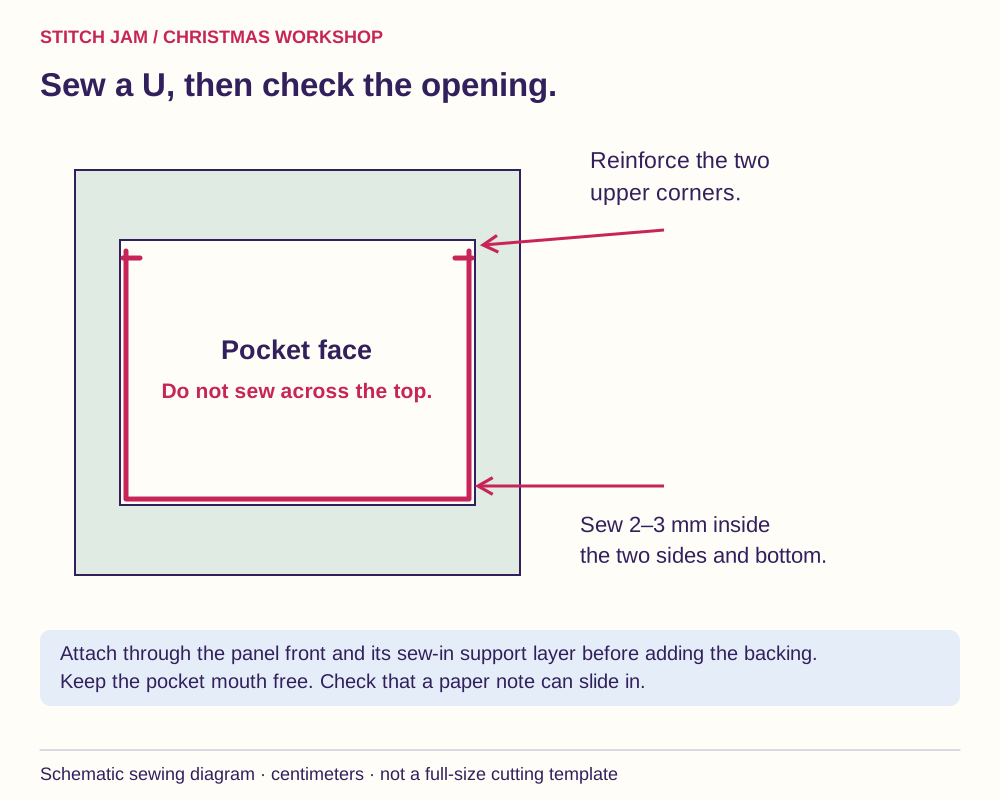
Sew each pocket to the front and support with a U-shaped line, 2–3 mm inside its side and bottom edges. This also closes the turning opening. Reinforce the two top corners with a few extra securing stitches, keeping the mouth clear. Try a paper note in every pocket before moving on.
Check the reverse for caught folds and loose threads. If a pocket pulls the panel into a ripple, undo that attachment and rebaste it flat. Adding the backing cannot correct a stretched row.
8. Make four hanging tabs
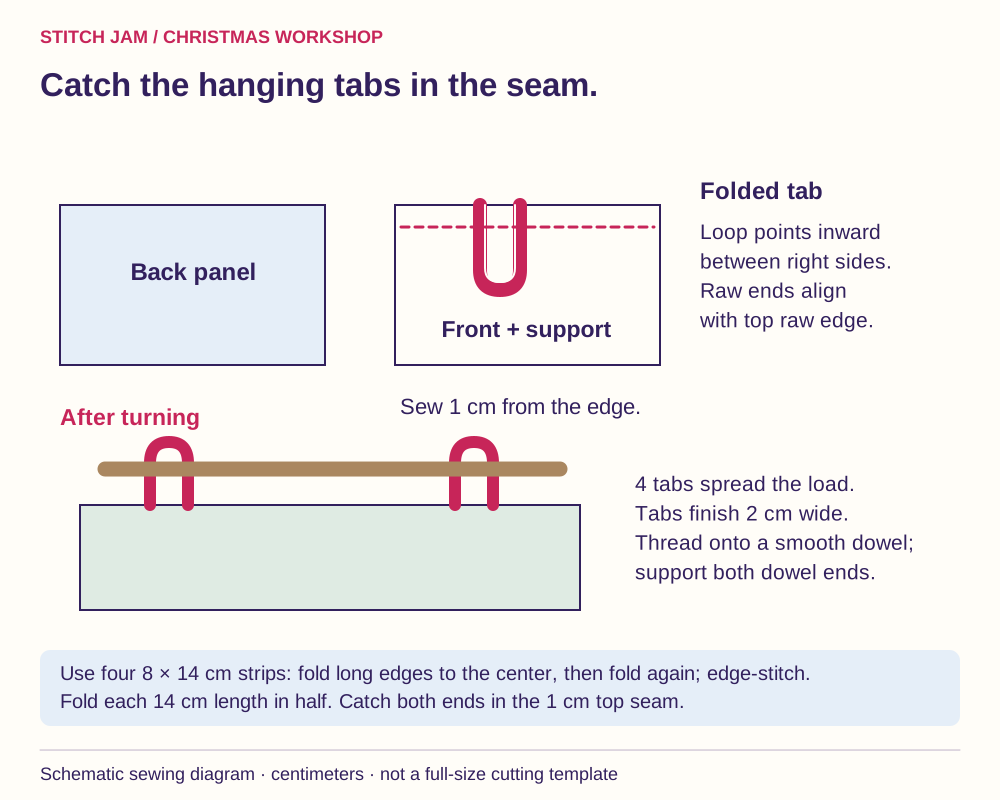
For each 8 × 14 cm strip, press the two long edges to the center, then fold again lengthwise to make a 2 × 14 cm strip. Edge-stitch both long sides. Fold the strip across its length, bringing the raw short ends together.
Place the four folded tabs on the right side of the panel front, centered approximately 8, 24, 40 and 56 cm from the finished left edge. Align both raw ends with the top raw edge; the loops point down toward the pockets. Baste inside the 1 cm seam allowance. Check that your dowel fits through a sample tab.
9. Add the back and turn the panel
Lay the backing right side down over the decorated front, enclosing the tabs. Sew around with a 1 cm allowance, leaving a 15 cm turning opening along the bottom. Reinforce the top seam where it crosses the tabs. Trim corner bulk, turn carefully and press the plain edges.
Fold the lower opening allowances inward and close it with a ladder stitch or edge-stitch around the panel, keeping pockets clear. The finished panel should lie flat; press the border rather than flattening the embroidered surfaces.
10. Fill lightly and make it your December ritual
Insert the dowel, secure both ends and add the intended contents gradually. Watch for a bending dowel, stretching tabs or pocket corners pulling away. There is no universal load rating for this handmade combination of fabric and fixings. Reduce the contents if anything distorts. Position cords and small detachable decorations out of reach of very young children and pets.
Try a mix of tiny treats and written invitations: choose tonight's story, make a paper star or leave a kind note. Empty the pockets for storage and keep the panel dry. Next year, check all seams before filling it again.
Prefer pieces that lift away? Make the detachable-bag calendar. For a growing display with no hidden treats, try the ornament countdown panel. Spare stitched motifs can become little pillow ornaments.
A note on the instructions
This is an original dimensional plan; make one pocket and check it with your fabric before repeating. BERNINA's WeAllSew Advent tutorial offers a separate pocket-strip construction and useful views of reinforced attachment stitching. DMC's Aida guidance explains the fabric-count principle used in the sizing calculation. The diagrams here show construction, not printable cross-stitch charts.
Stitch Jam patterns to make it yours
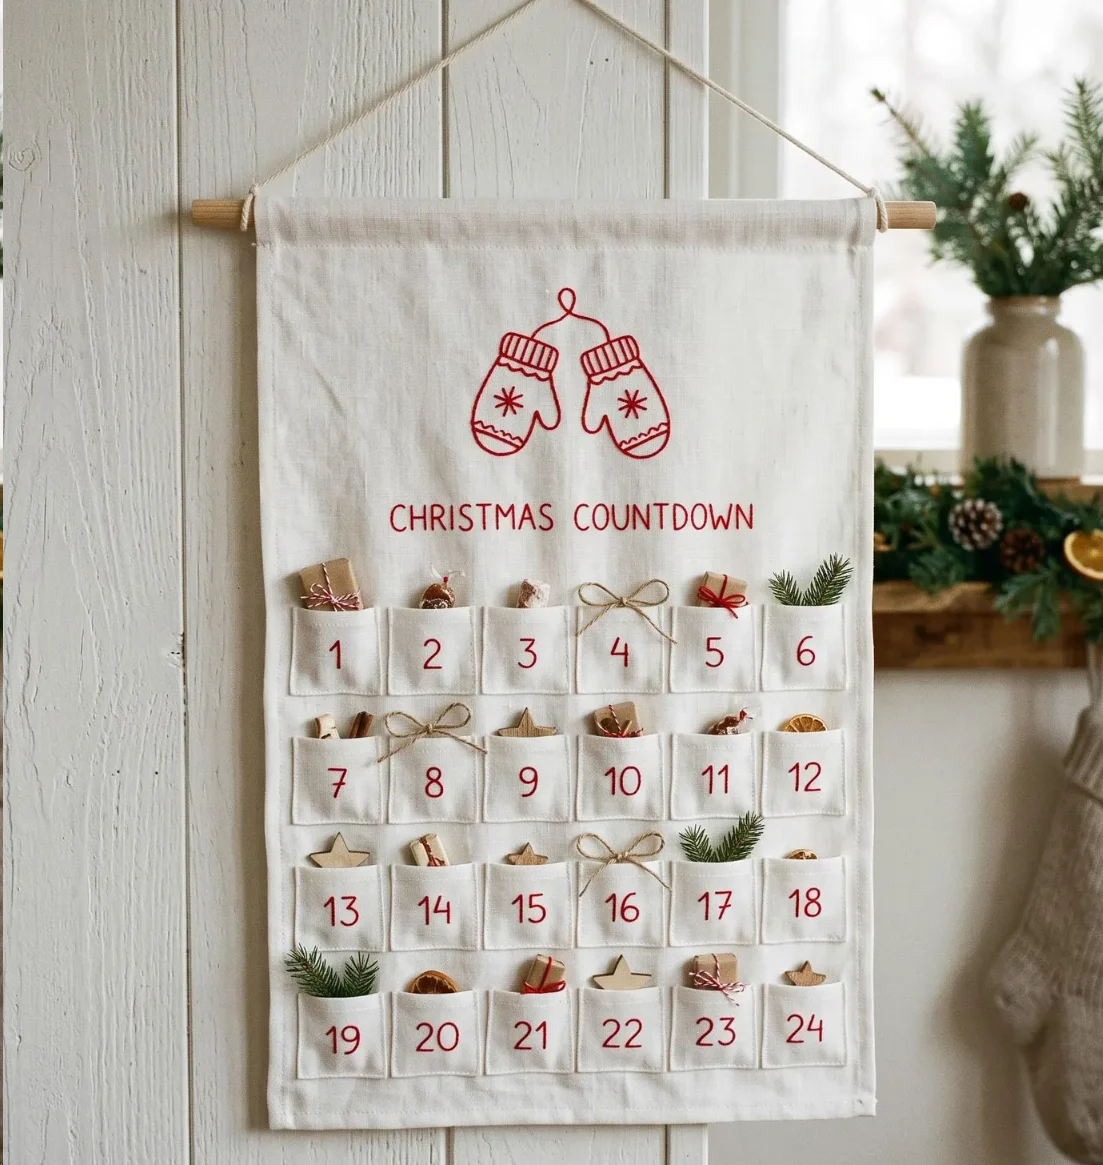
These are real designs from our catalog. The images show finishing inspiration, and the product pages describe the PDF patterns. Fabric, filling, hardware, sewing templates and calendar numbers are separate unless a listing explicitly says they are included.
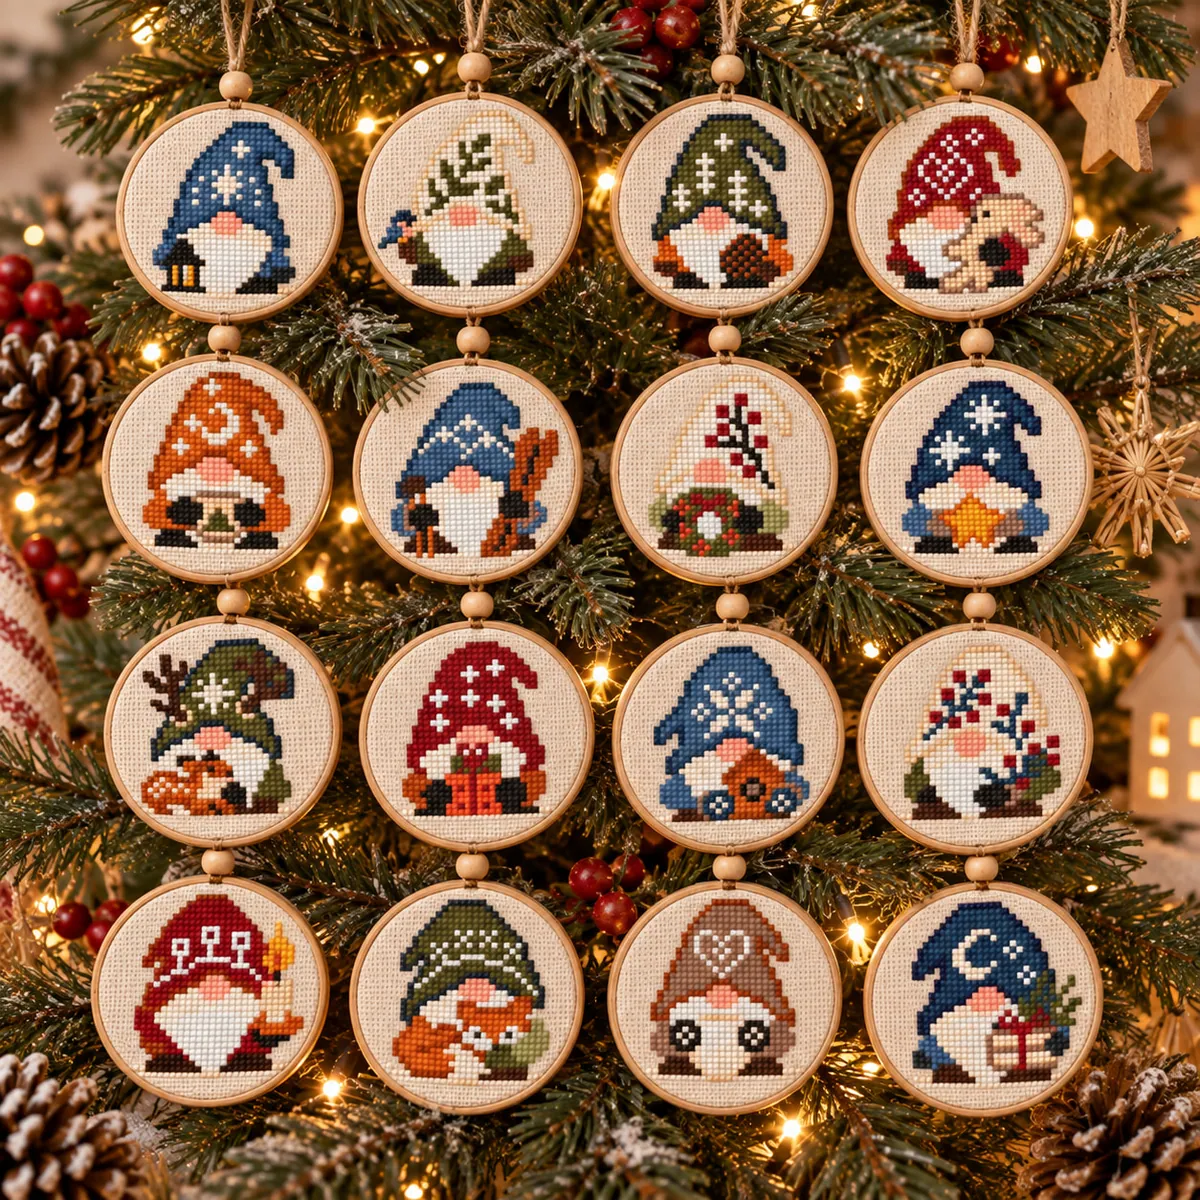 16 Mini Christmas Gnomes Ornaments SetView the pattern and included designs
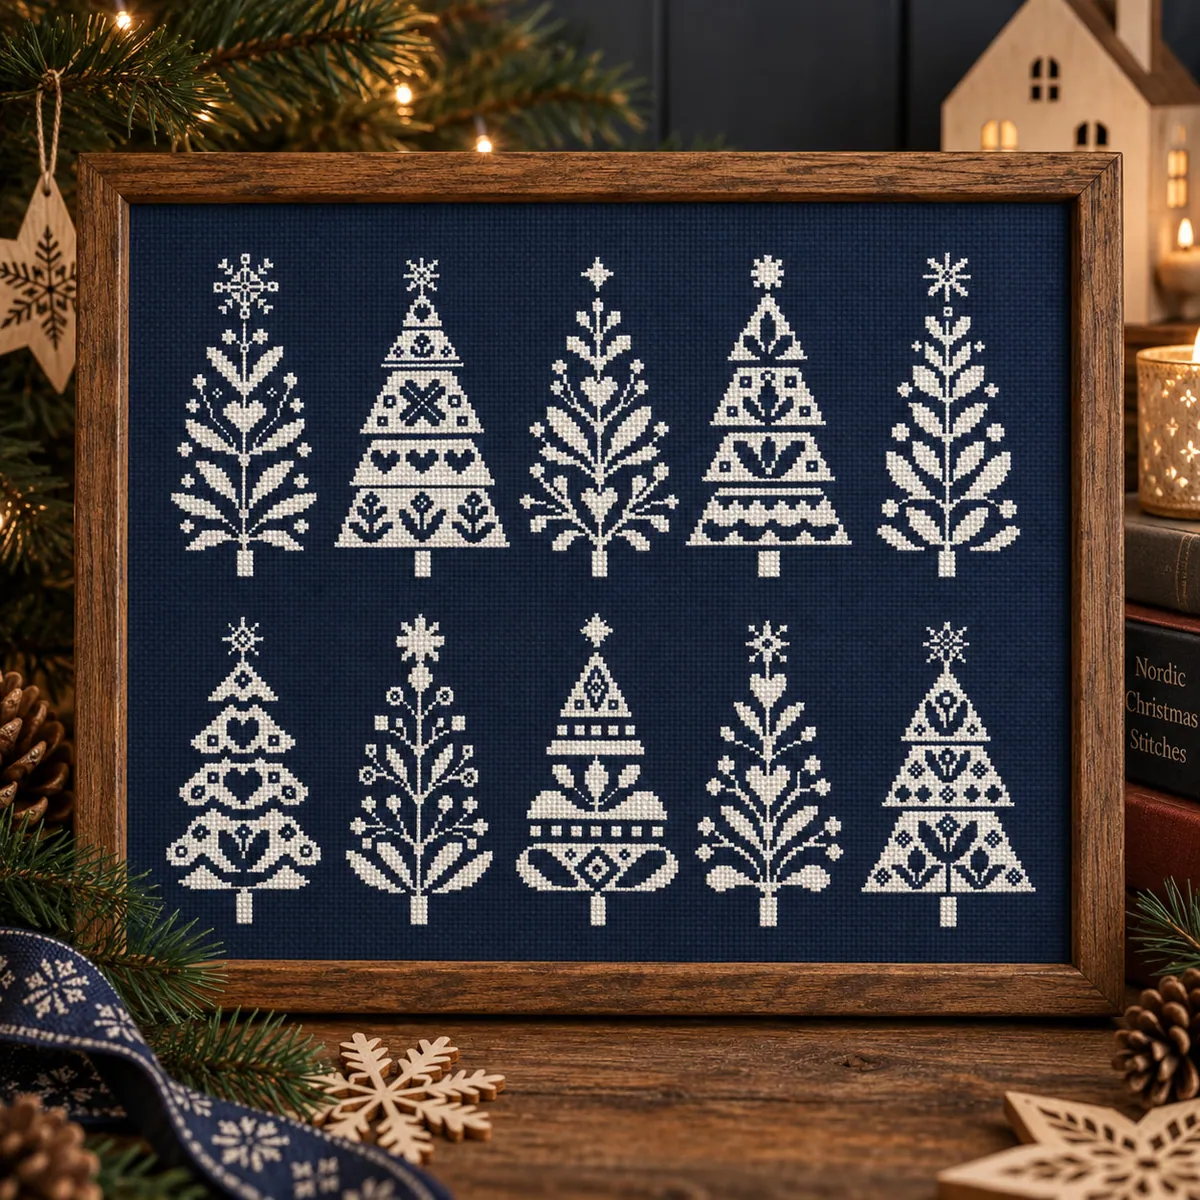 10 Nordic Christmas Trees SetView the pattern and included designs
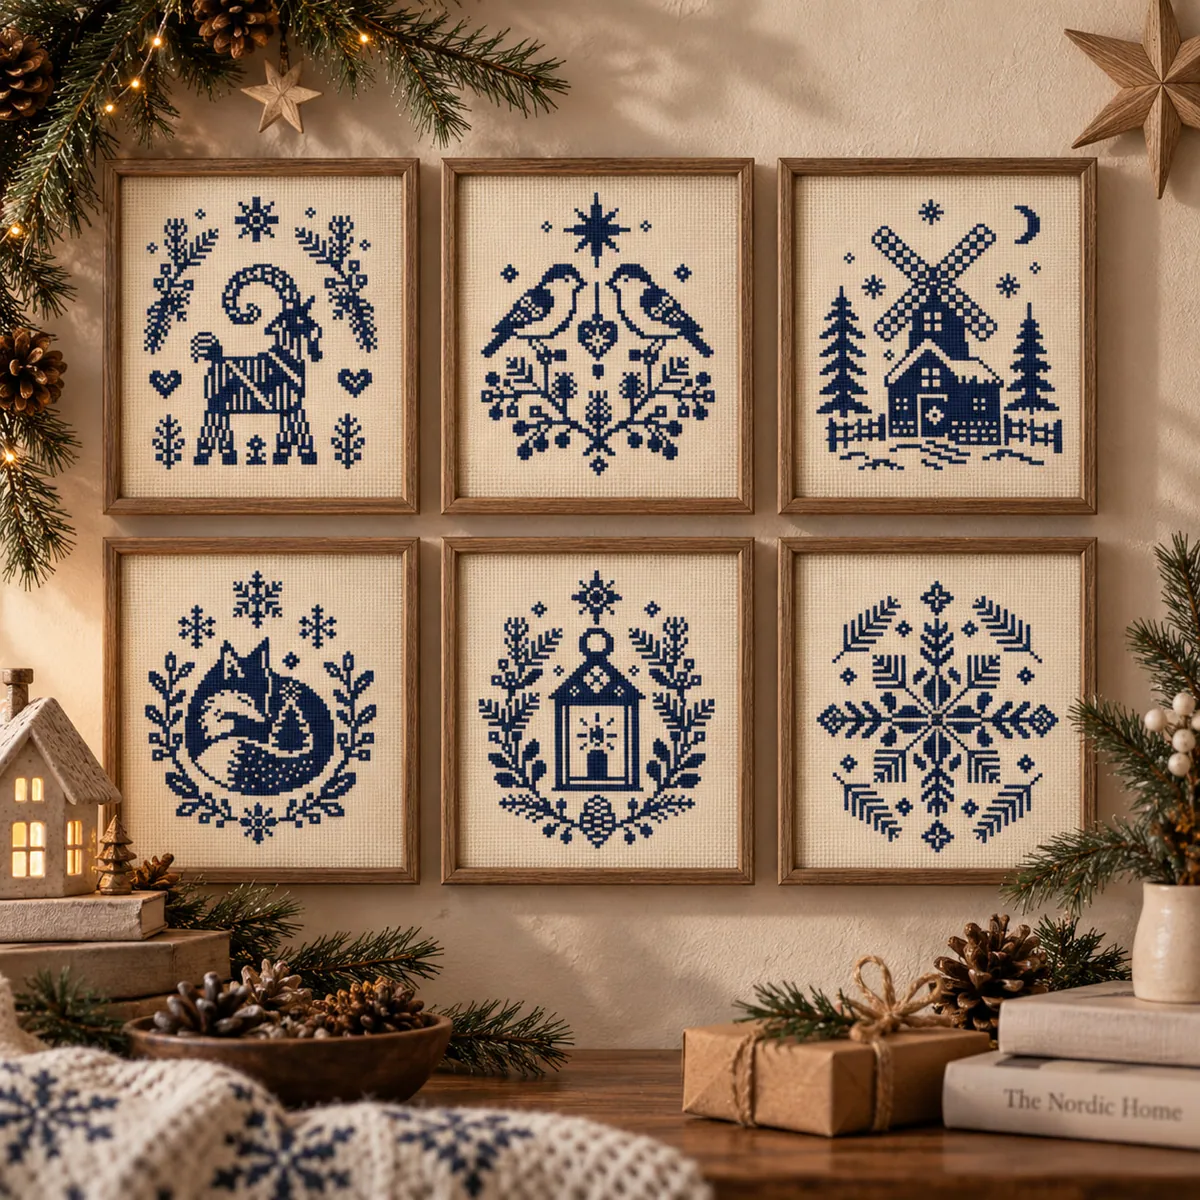 Christmas Nordic Winter MotifsView the pattern and included designs
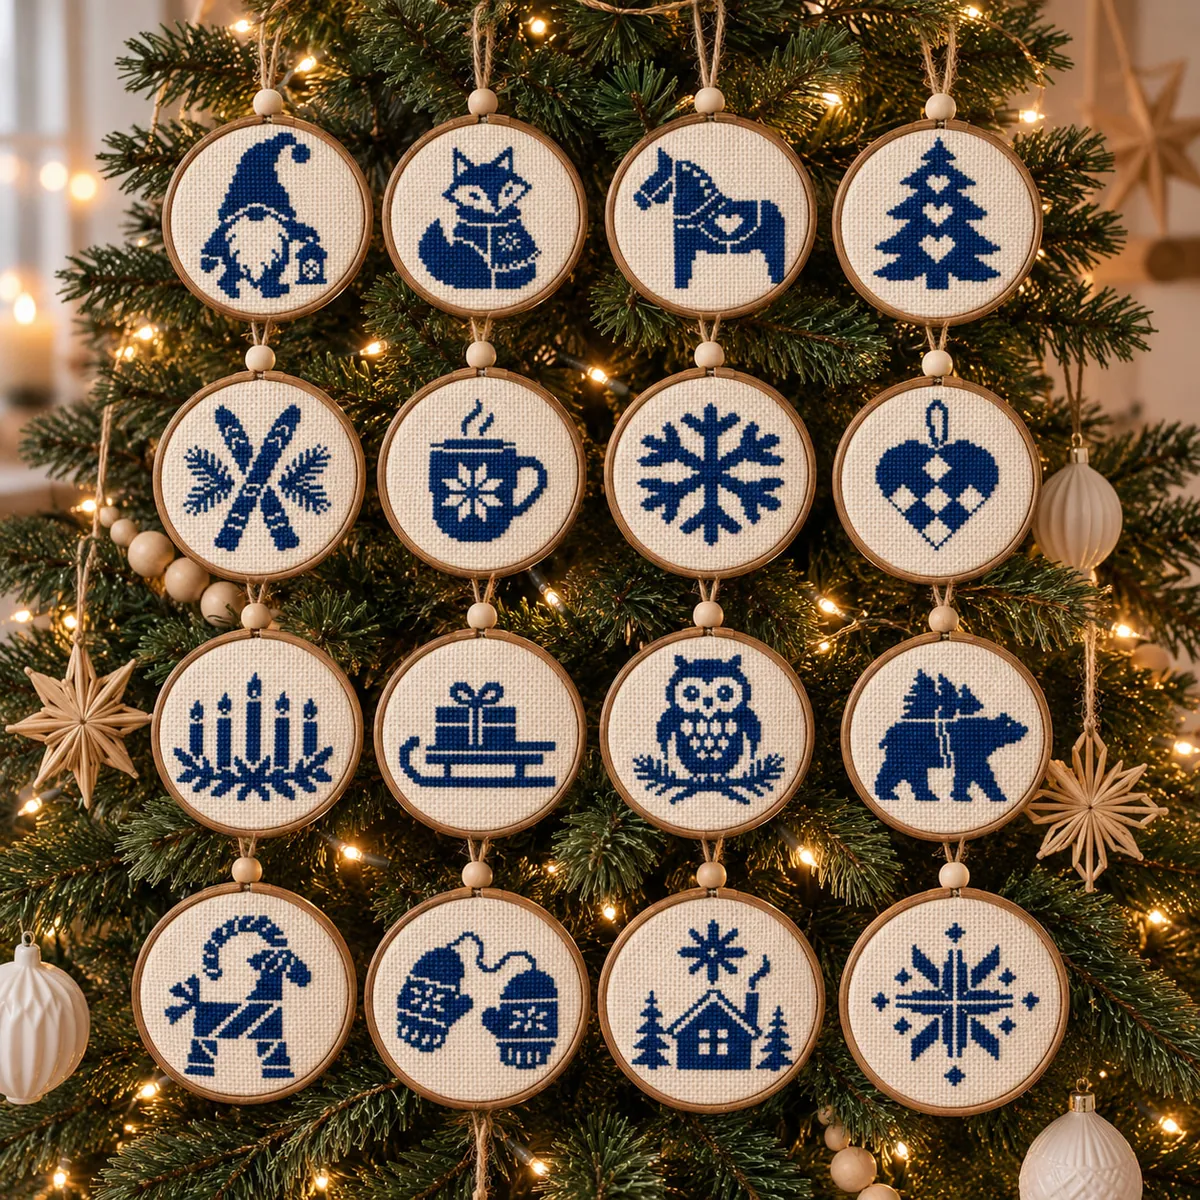 Christmas Nordic Ornaments MonochromeView the pattern and included designs
Measure the individual motif you choose. A set’s overall stitch count or width is not the size of each piece. To make 24 days with 16 gnomes, repeat eight favourites or combine them with another set.