

Choose one motif, then choose the pillow size
Start with an individual design from our 16 Mini Christmas Gnomes Ornaments Set, or choose a tree from the 10 Nordic Christmas Trees Set. A set's overall dimensions may describe the complete layout. Count the width and height of the particular motif you intend to stitch, including its backstitch details.
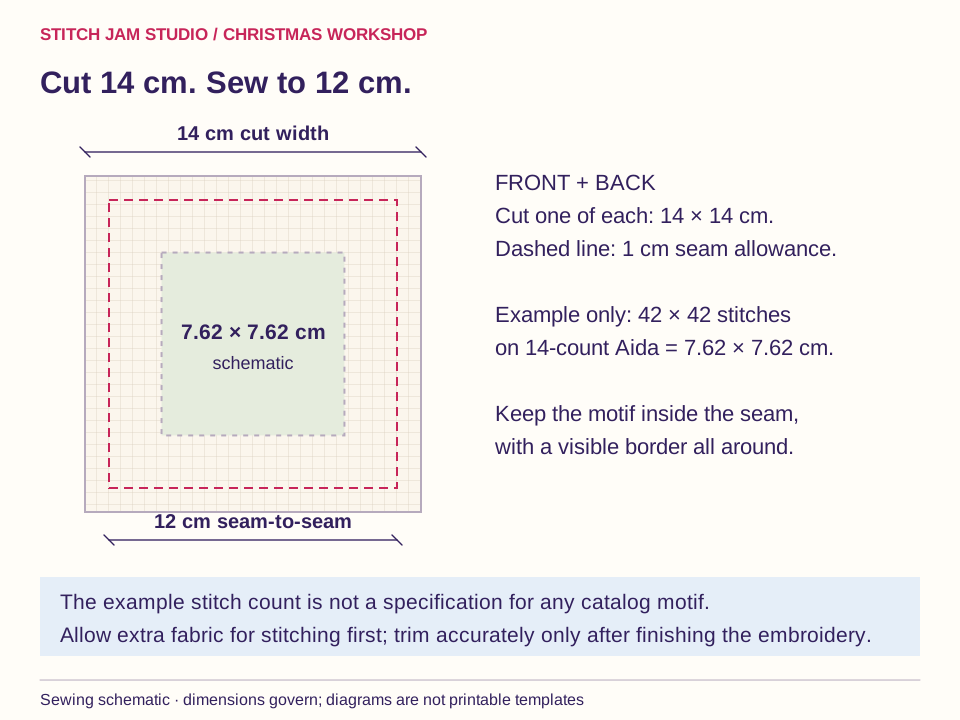
For full crosses worked over one Aida square, stitched size in centimetres = stitch count ÷ fabric count × 2.54. Calculate width and height separately. A teaching example of 42 × 42 stitches on 14-count Aida measures 7.62 × 7.62 cm; this is not a claimed size for either linked product. Inside a 12 cm pillow, that leaves about 2.19 cm from the design to each seam. Choose a larger pillow if your motif needs it.
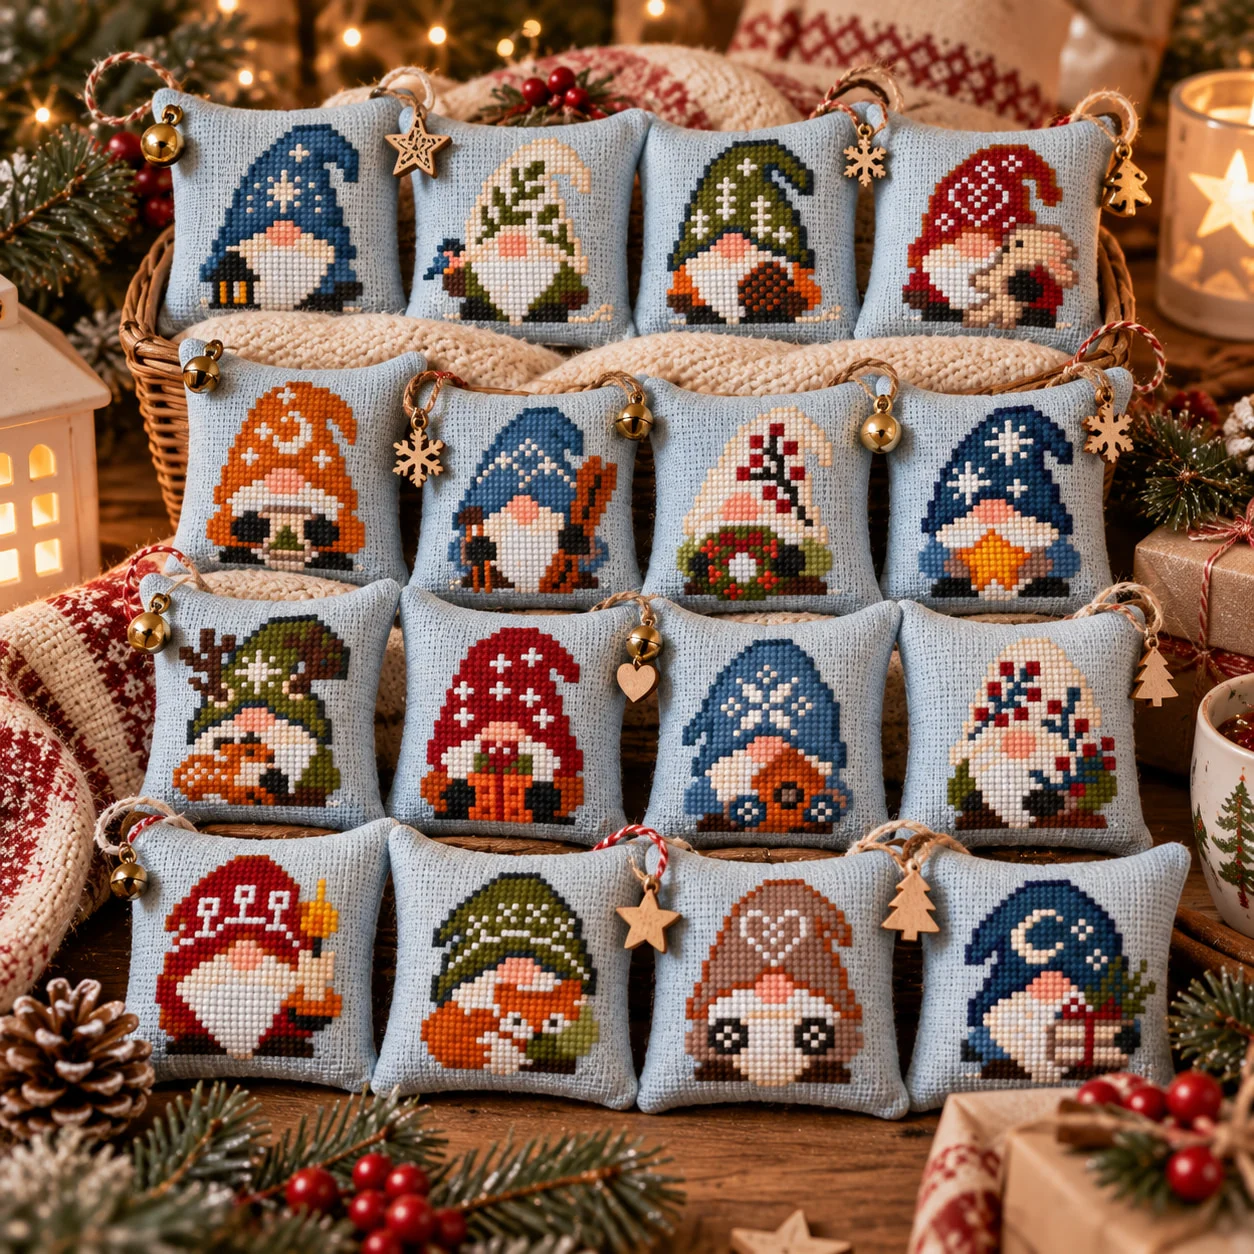
Gather the materials
You need the finished embroidery, stable woven cotton for the back, matching sewing thread, a hand-sewing needle, a little washable polyester filling, scissors, a ruler, pins or clips, a blunt point turner and a 14 cm length of narrow ribbon for the hanger. A sewing machine is convenient; small, firm backstitches can also make the structural seam.
The final cutting list is one embroidered front and one cotton back, both 14 × 14 cm. All four seam allowances are 1 cm, producing a 12 × 12 cm seam-to-seam square before stuffing. Begin the embroidery on a larger piece with comfortable hoop margins; do not try to stitch while gripping a final-size allowance.
1. Finish the embroidery before trimming
Check for missed crosses and secure loose ends on the reverse. If cleaning is needed, follow the thread and fabric care instructions and test colorfastness first. Let the embroidery dry fully. Press gently from the reverse over a clean towel so the crosses are supported rather than crushed.
Prewash the backing if that suits its care instructions and your intended care for the ornament. Press it flat. Mark the embroidery's centre with temporary thread. Draw a 12 cm square seam outline around the centred design, keeping the Aida grid square. Add 1 cm outside each side and cut the resulting 14 cm square. Overcast the raw edges without drawing them tight.
2. Baste the hanging loop to the front
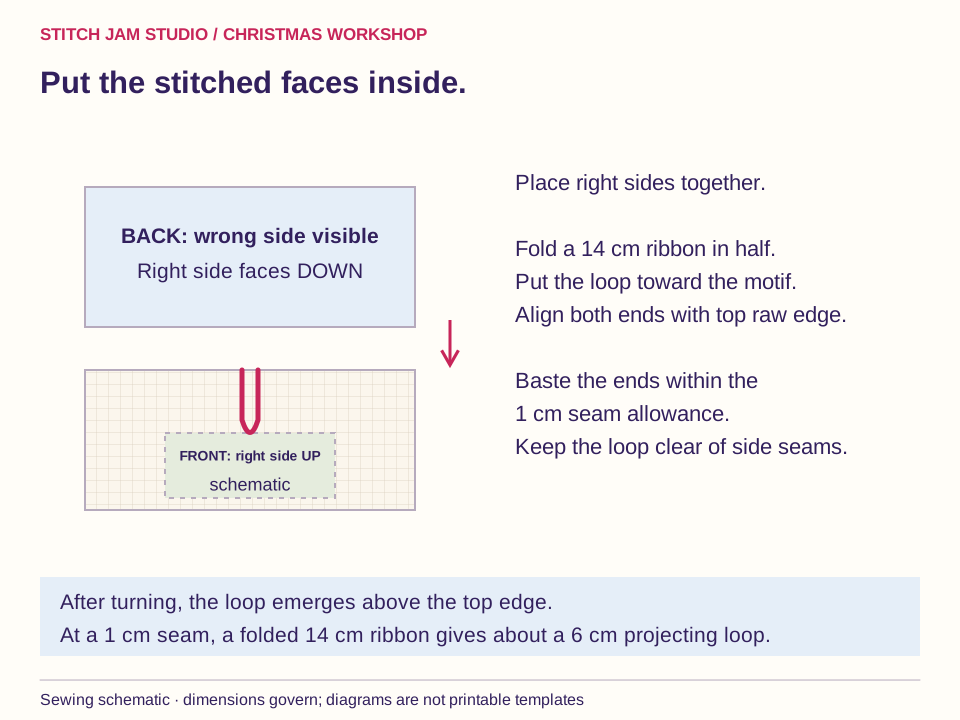
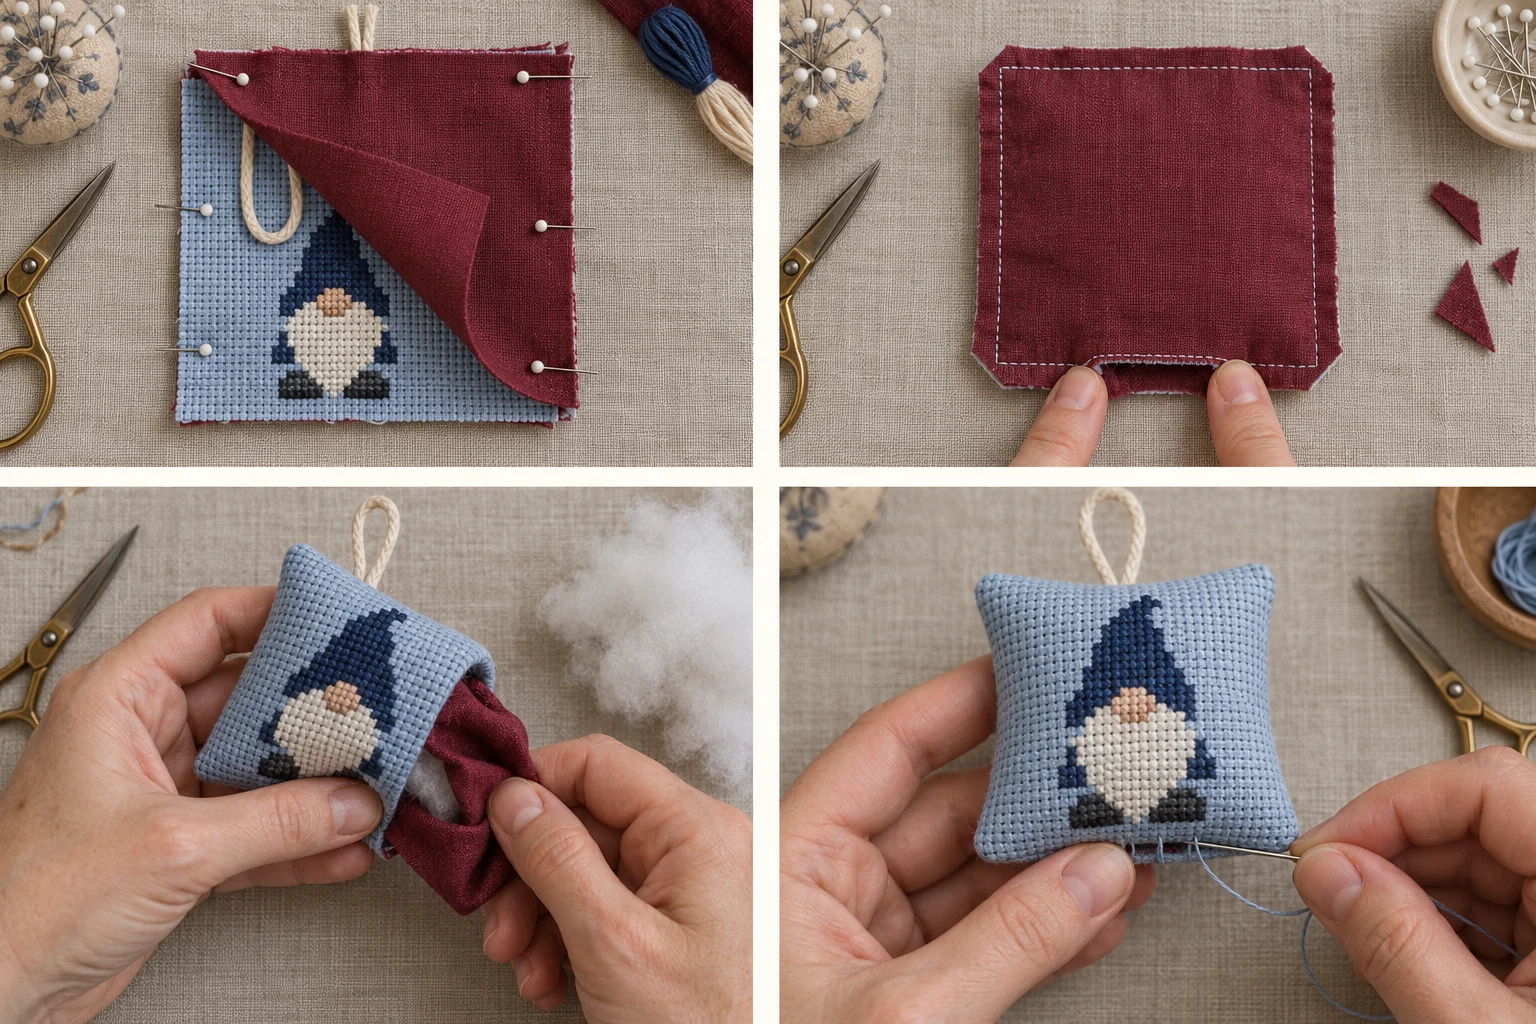
Lay the front with the embroidery facing up. Fold the 14 cm ribbon in half, keeping its two ends together. Centre those ends at the top raw edge, with the folded loop pointing downward toward the motif. Baste across the ends within the 1 cm seam allowance.
The ribbon will turn outward when the pillow is turned right side out. With 1 cm caught inside the seam, each half has about 6 cm projecting beyond the finished edge. Keep the folded loop safely away from the side seams. A separate bow can be added later; the ribbon captured by the structural seam carries the pillow.
3. Sew around the square and leave an opening
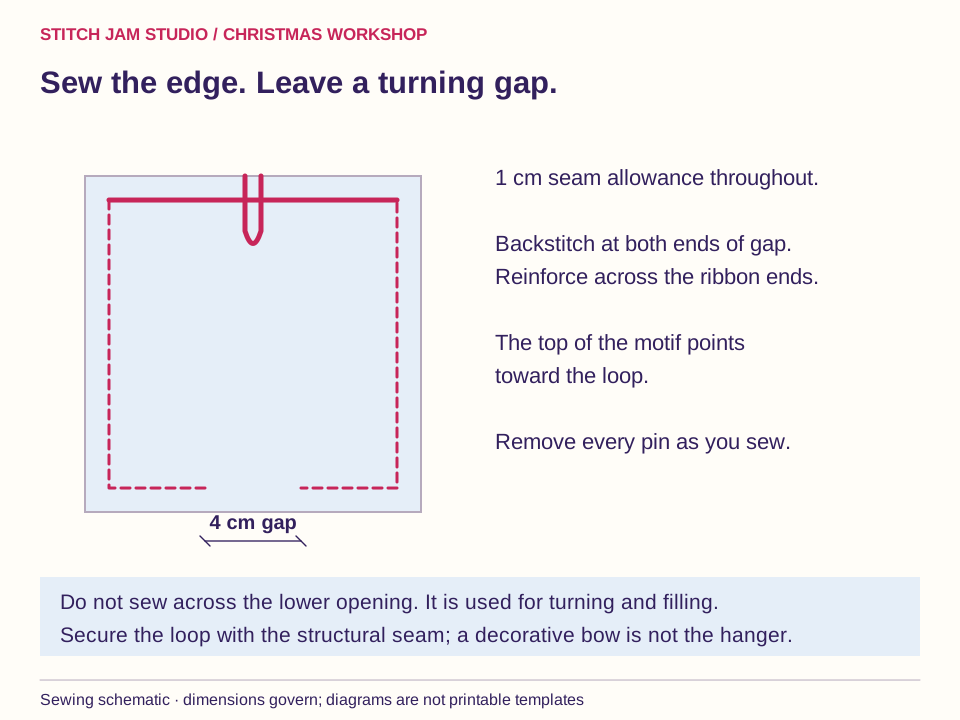
Place the cotton back over the embroidery, right sides together. Match corners and raw edges, then pin or clip. Mark a 4 cm turning opening at the centre of the bottom edge. Sew on the 12 cm outline, beginning at one end of that opening and finishing at the other.
Use a 1 cm seam allowance throughout. Secure the beginning and end with a few reverse stitches; reinforce the section that crosses the ribbon ends. At each corner, stop with the needle down, raise the presser foot, pivot and continue. Remove pins before they reach the needle. Check both sides for skipped stitches before turning.
4. Reduce corner bulk and turn gently
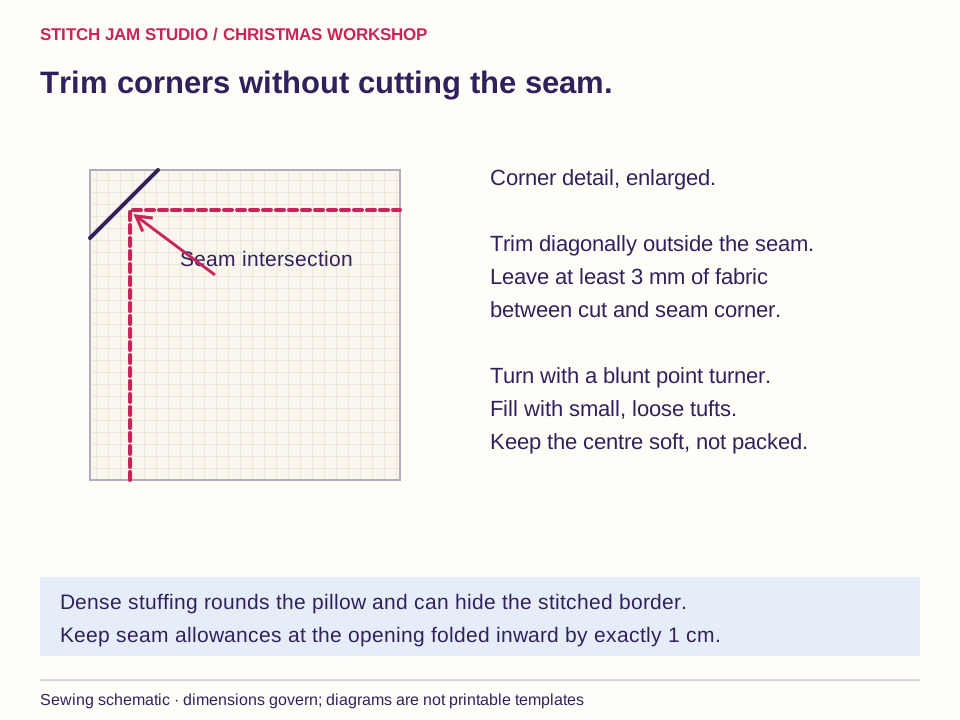
Clip a small diagonal from each outer fabric corner, leaving at least 3 mm between the cut and the seam intersection. Do not trim close to the seam along the whole pillow: woven Aida still needs a secure allowance. If an edge is fraying, secure it before going further.
Turn the pillow through the bottom opening a little at a time. Use a blunt point turner to ease out the corners; a sharp scissor tip can puncture them. Smooth the seams with your fingers. At the opening, fold each allowance inward by 1 cm so the gap follows the same straight line as the sewn bottom seam.
5. Add a light, even layer of filling
Tease the filling into small tufts. Guide a little into each corner, then fill the centre gradually. Look at the front as you work: the motif should remain readable and its border should not roll into the side seam. A softly rounded pillow needs much less filling than a firm pincushion.
Check the Aida grid. If its squares stretch into diamonds or the seam is visibly strained, remove some filling. Keep stray fibres away from the opening. Hold the two folded edges together to check the final shape before sewing them closed; redistribute any lumps now.
6. Close with ladder stitch
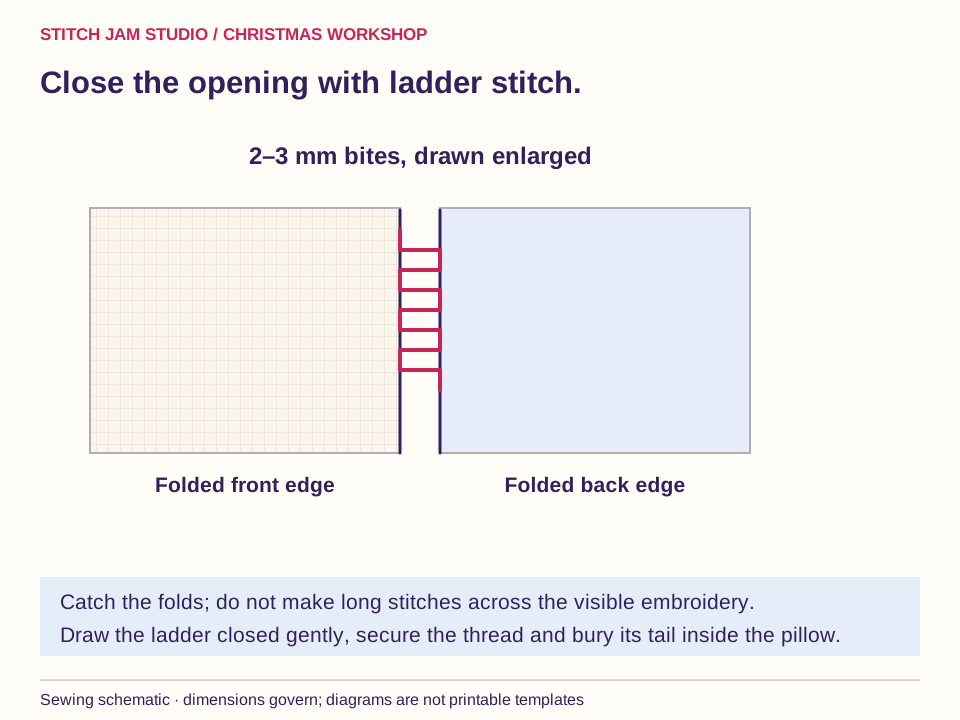
Hide a thread knot inside the opening. Take a small 2–3 mm bite along the inside of one folded edge, cross the gap, and take an equal bite inside the opposite fold. Continue alternating. After several stitches, draw the thread gently so the folds meet without puckering.
At the end, make two small securing stitches in the seam. Pass the needle into the pillow, emerge a short distance away, and snip the thread so its tail withdraws inside. The needle should catch the folded fabric, not make long visible stitches across the front of the embroidery.
7. Check, hang and plan the next one
Remove every pin, check the loop over a soft surface and inspect the closure from both sides. Decorative ornaments with cords or small embellishments belong out of young children's reach. Store them dry, with the hanging ribbon loose rather than wrapped tightly around the embroidery.
For two stitched faces, follow the double-sided ornament tutorial. For a flat silhouette, choose the felt-backed finish. A group of small pillows can also become the daily decorations in an Advent calendar without pockets.
The pocket-free countdown guide uses a 10 × 10 cm decoration space, so this larger worked example will not fit as written. Choose a smaller motif and reduce the body size while keeping the stated sewing or folding allowances. Shorten and trial-fit the hanger to about a 1 cm drop, or enlarge the calendar spacing to accommodate the original ornament and its approximately 6 cm loop.
Stitch Jam patterns to make it yours
These are real designs from our catalog. The images show finishing inspiration, and the product pages describe the PDF patterns. Fabric, filling, hardware, sewing templates and calendar numbers are separate unless a listing explicitly says they are included.
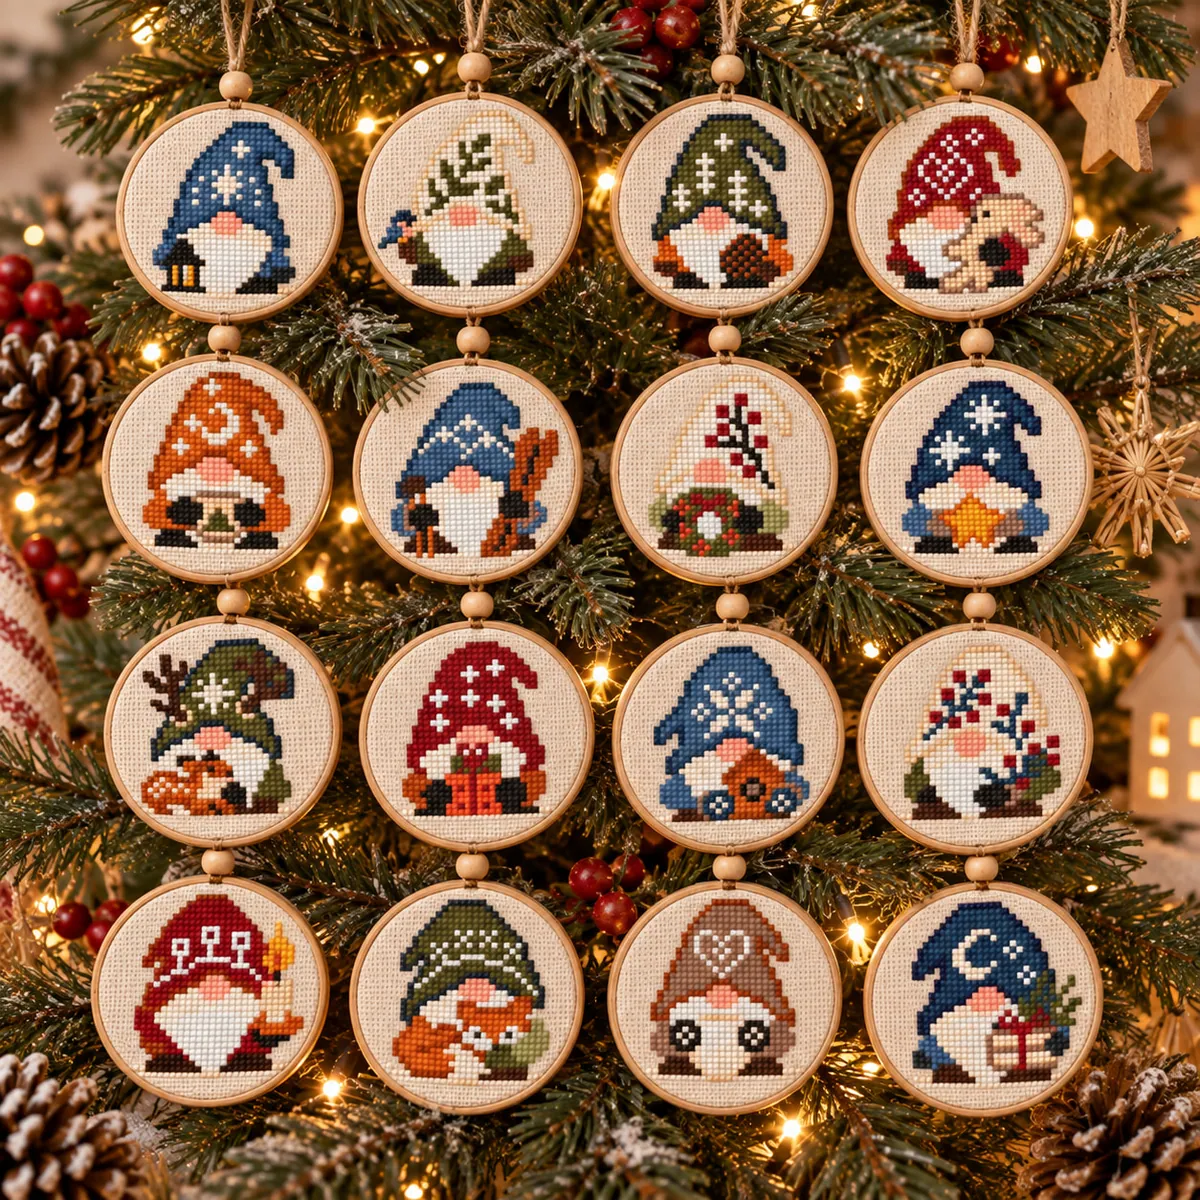 16 Mini Christmas Gnomes Ornaments SetView the pattern and included designs
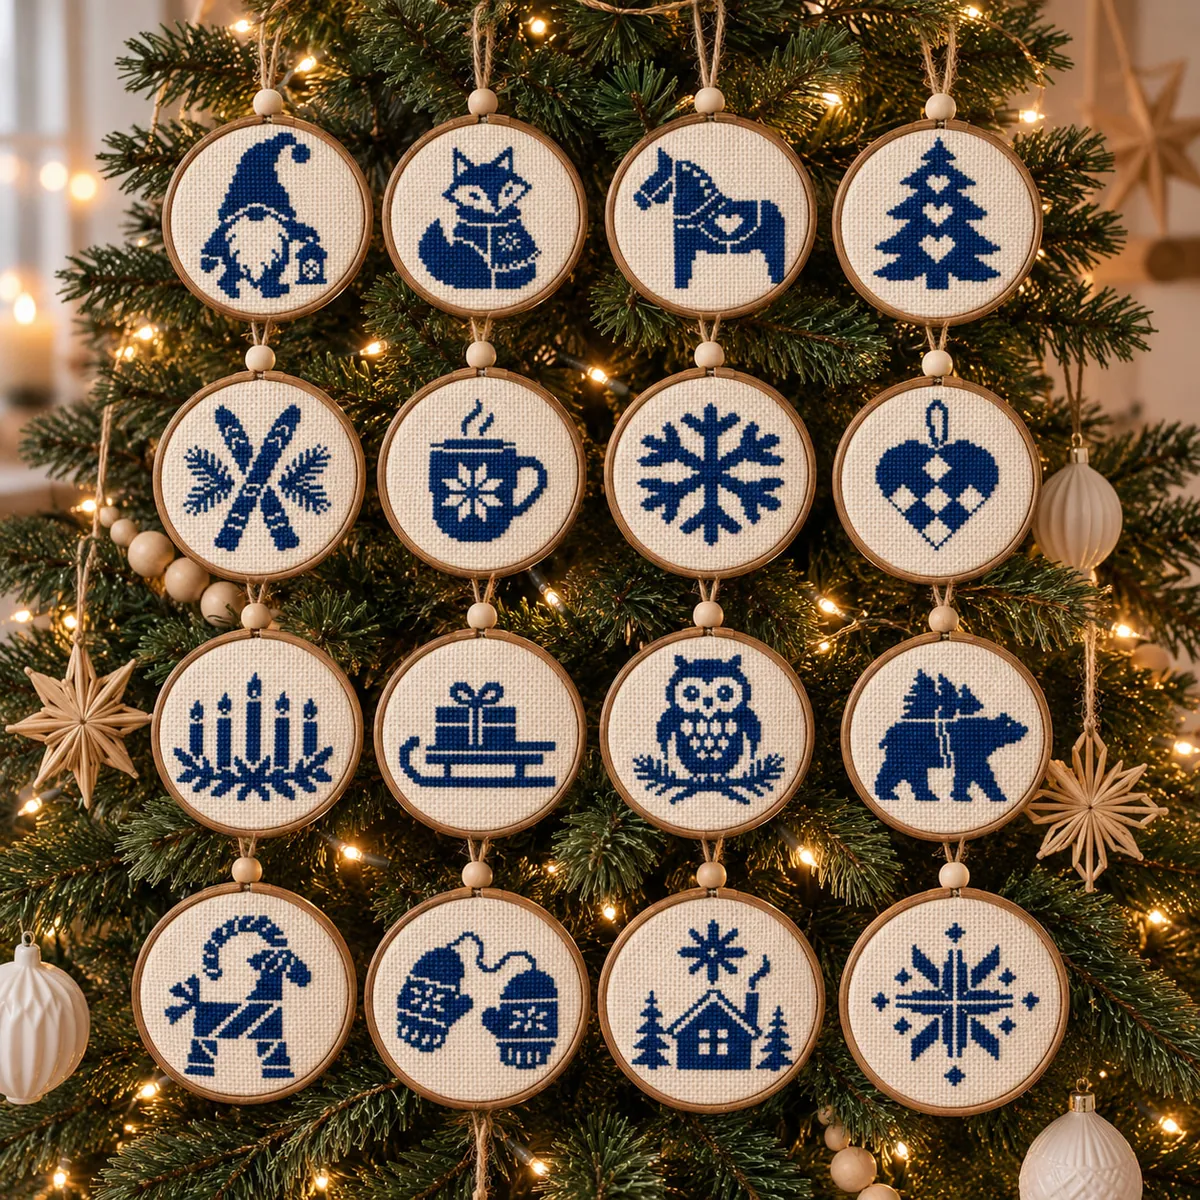 Christmas Nordic Ornaments MonochromeView the pattern and included designs
Measure the individual motif you choose. A set’s overall stitch count or width is not the size of each piece. To make 24 days with 16 gnomes, repeat eight favourites or combine them with another set.