

1. Choose how the countdown will grow
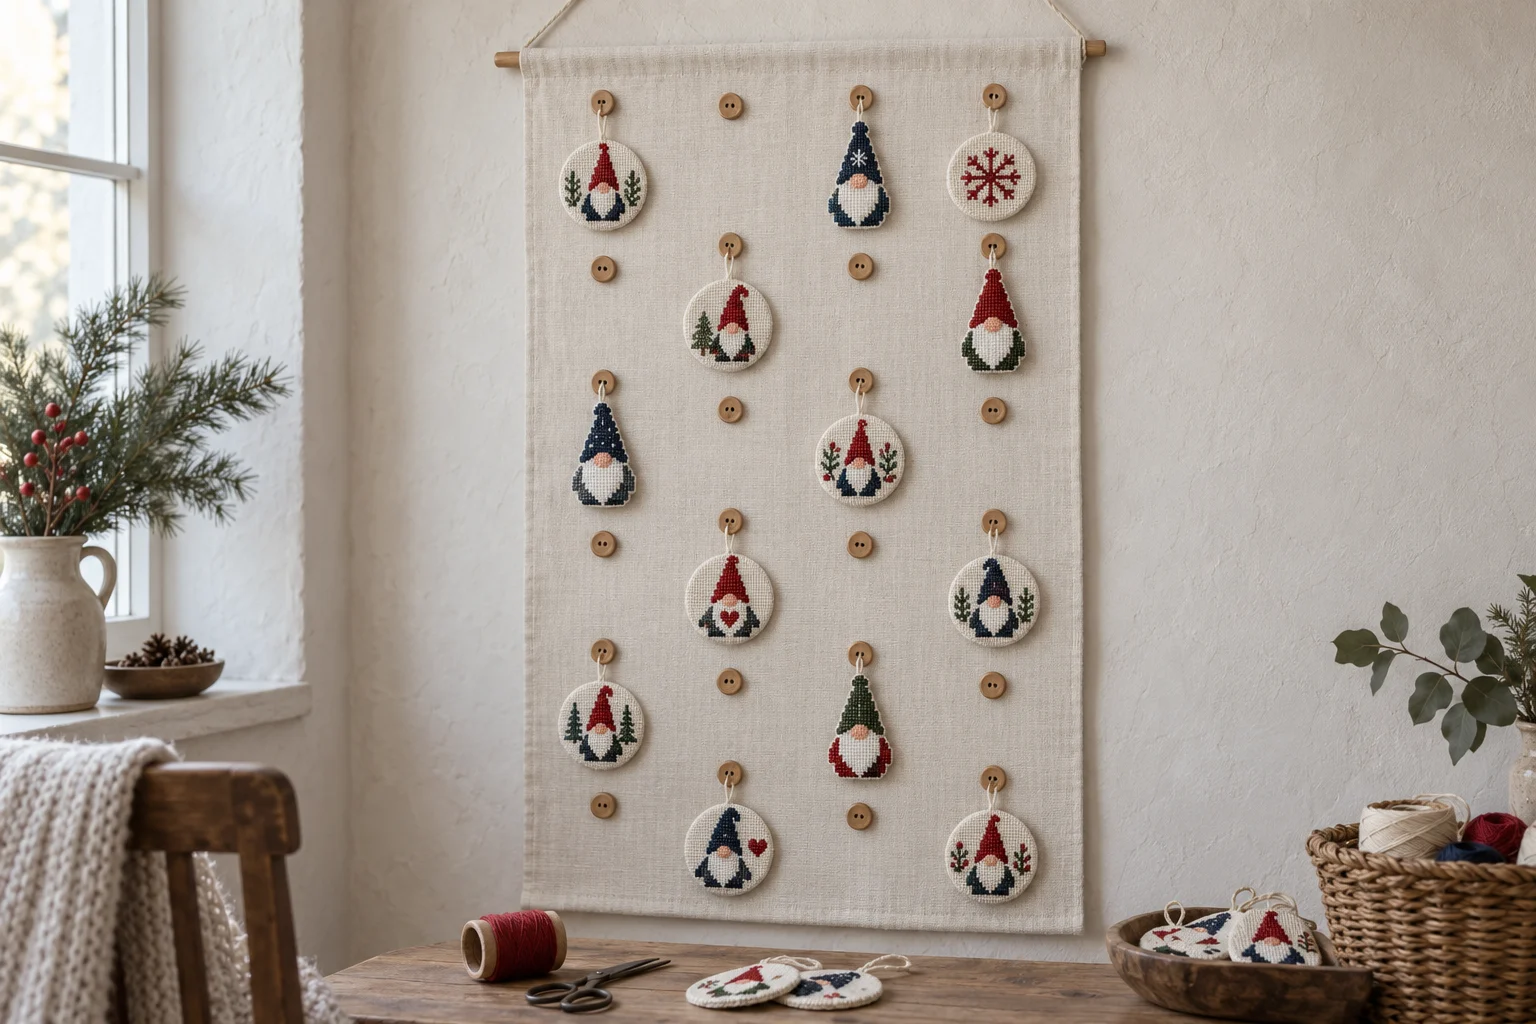
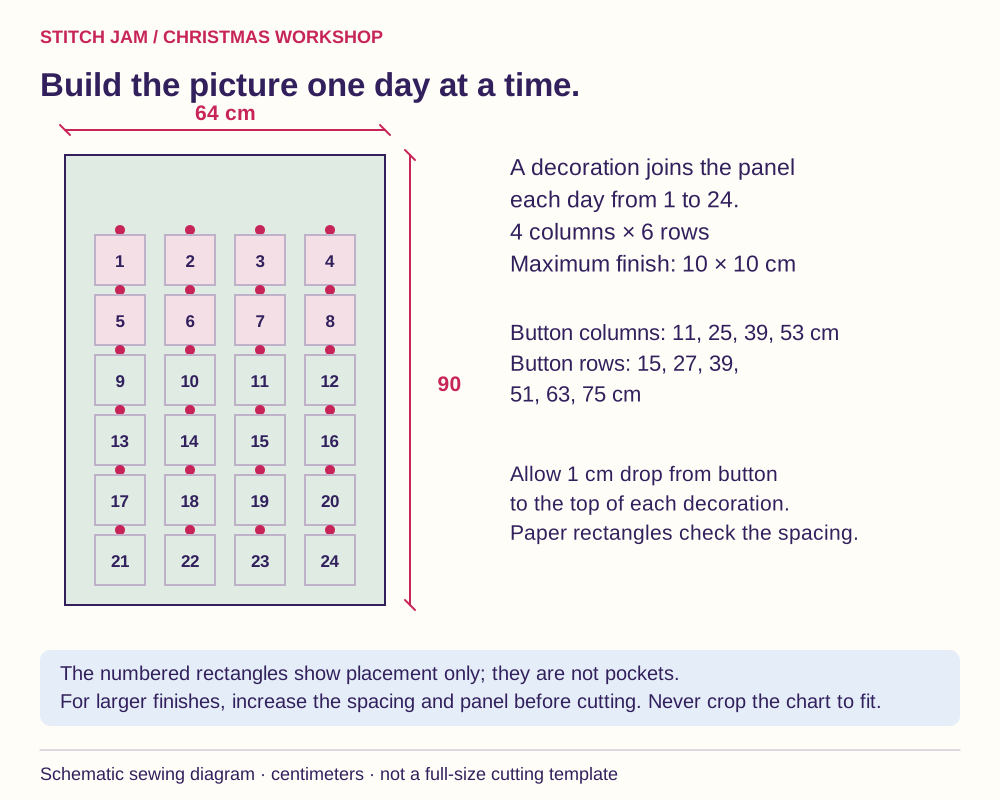
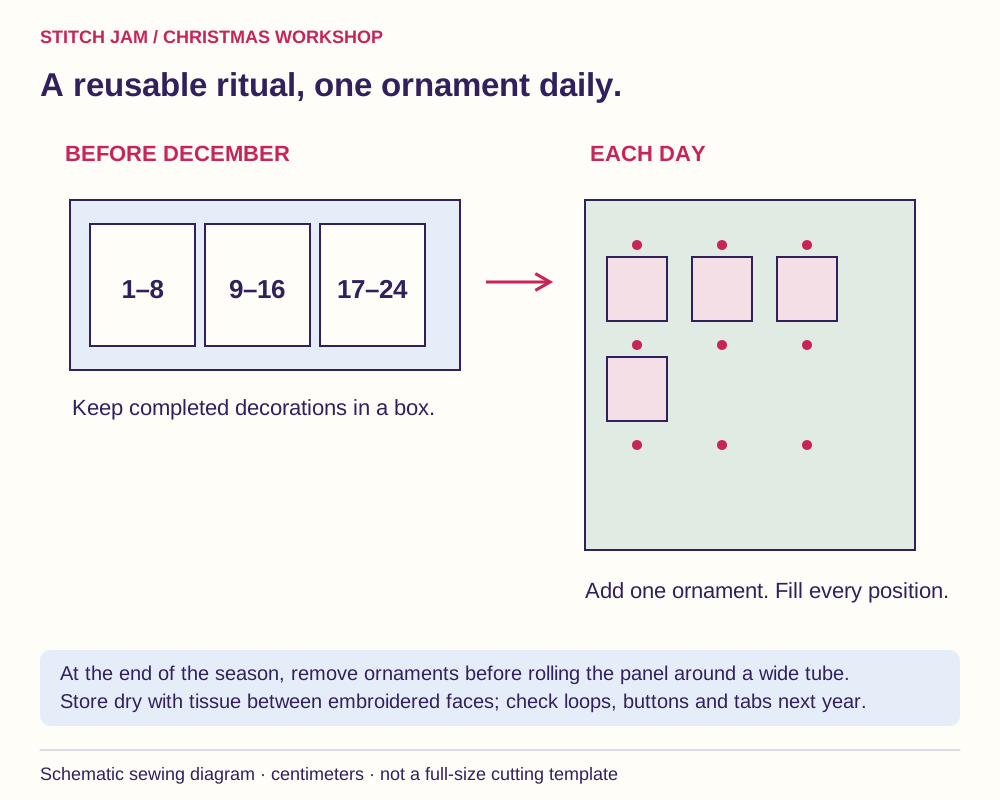
This plan uses 24 removable ornaments on a 64 × 90 cm finished fabric panel. Four columns and six rows make an easy sequence. A flat button at each position holds the ornament's loop. Begin with the ornaments in a separate box and hang the next one each morning; by December 24 the panel is full.
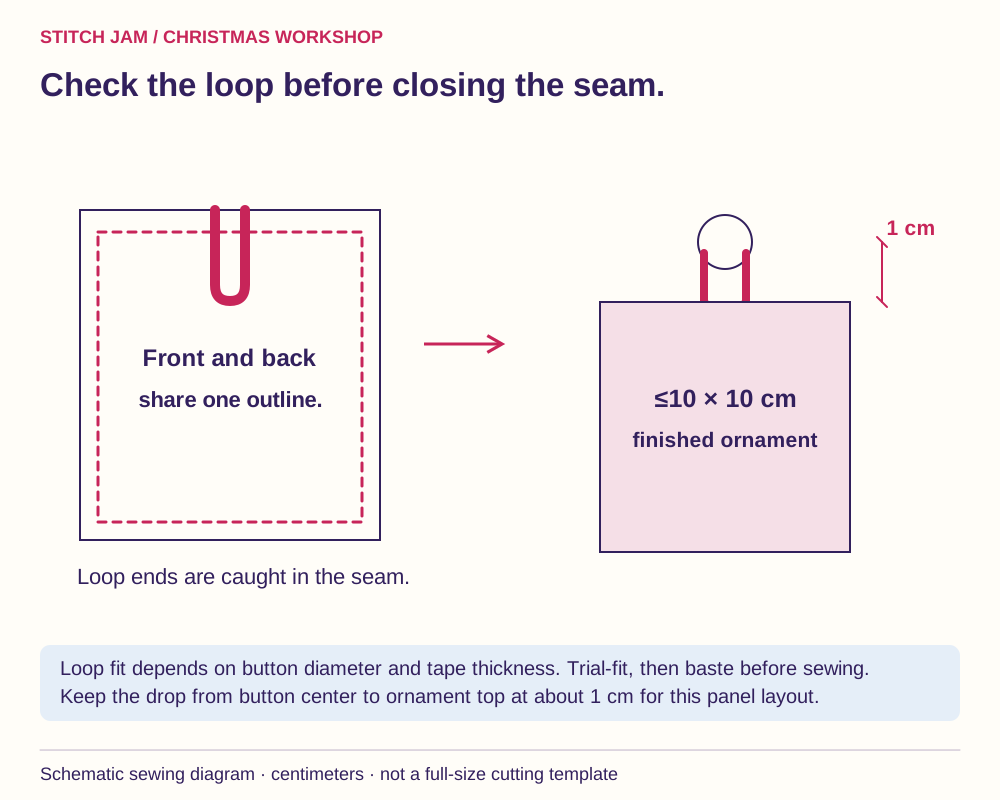
Each finish must fit within a 10 × 10 cm envelope, with about 1 cm between the button center and the ornament top. Those limits include any side trim, but exclude the short loop. Make paper shapes before buying backing materials. If your favorite finish is larger, enlarge the panel and spacing; do not squeeze the embroidery into a seam.
2. Curate a small stitched collection
The 16 Mini Christmas Gnomes Ornaments Set can supply 16 different days and eight repeated favorites. Repeat a character on another fabric color while retaining the chart's stitches, or repeat exactly for a familiar rhythm. Compare the Nordic monochrome ornaments if you prefer a restrained palette.
A measured tree from the 10 Nordic Christmas Trees Set or a Nordic Winter Motif could decorate the header or anchor a larger calendar. Count the chosen motif itself; a set's overall chart dimensions cannot tell you whether one ornament will fit.
For Aida over one square, divide chart stitches by fabric count, then multiply by 2.54 for centimeters. An illustrative 40 × 40-stitch motif at 14-count is approximately 7.26 cm square before borders. This is not a measured catalog motif. Reserve enough extra fabric for the finish you choose.
3. Prepare the panel pieces
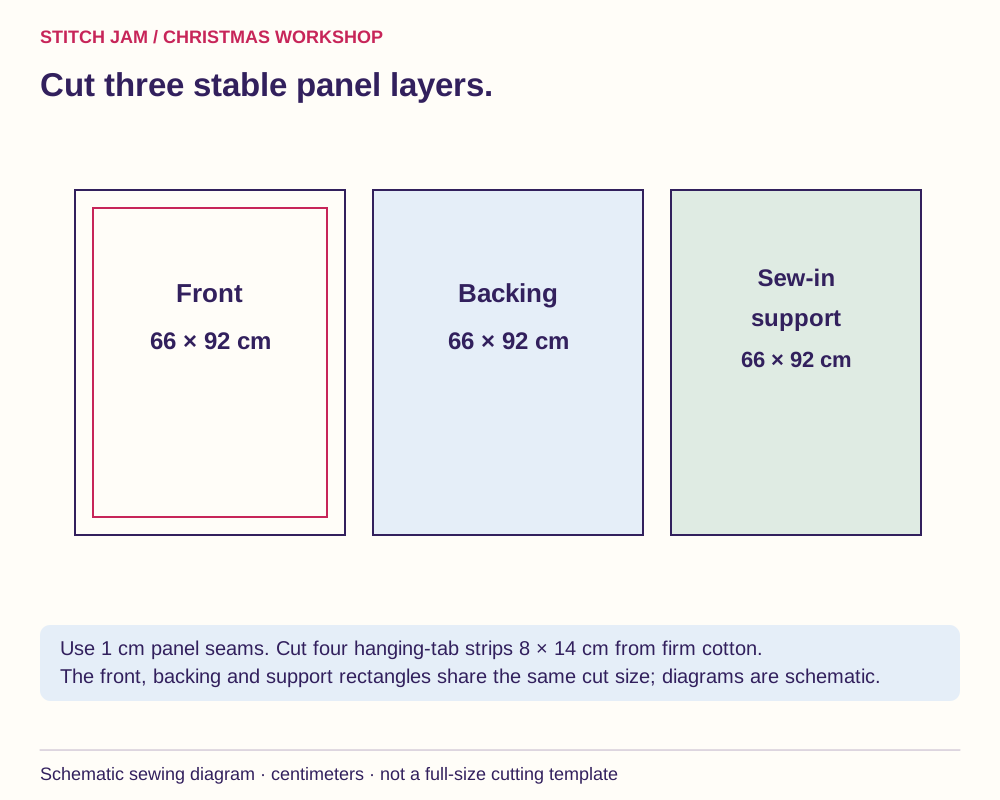
- Panel front, cotton backing and firm sew-in support: one 66 × 92 cm piece of each.
- Four hanging-tab strips in firm cotton: 8 × 14 cm.
- Twenty-four flat sew-on buttons, approximately 15 mm wide, plus sewing thread and small support patches if needed.
- Your chosen Aida, chart floss, ornament backing, hanging tape and optional light stuffing.
- Needles, sewing machine or hand-sewing supplies, ruler, basting thread, scissors, pins, iron and a smooth dowel with suitable wall fixing.
Prepare fabrics according to their care labels. The support keeps repeated attachment points from stretching; it should bend comfortably. Avoid a very loose weave for the panel unless it is stabilized appropriately. The panel seam allowance is 1 cm throughout.
4. Finish one ornament before stitching the set
Choose your construction: a flat felt-backed finish, a lightly stuffed pillow or a two-sided stitched ornament. These linked tutorials use their own example sizes. For this panel, either make a smaller finish that still gives the selected motif its proper border or enlarge the panel to fit the linked example.
Make a complete sample, including its hanging loop and trim. Lay it over a 10 × 10 cm paper square. Do not hide an oversized corner behind the next ornament: it will be harder to lift on and off. If making two embroidered faces, keep both finished outlines equal and orient both designs toward the hanging loop.
5. Mark the button grid and numbers
Mark the finished panel boundary 1 cm inside the cut edge. From that finished left edge, button centers sit at 11, 25, 39 and 53 cm. From the finished top, rows sit at 15, 27, 39, 51, 63 and 75 cm. Arrange paper ornaments below these points and check the header space and bottom margin.
Put small numbers above the buttons where they remain visible, or number the reverse of each ornament and use a separate sequence card. Stitch, paint or print the numbers yourself; neither numbered tags nor a countdown alphabet is promised in the linked pattern PDFs. Complete header embroidery and permanent numbers while the front is still flat.
6. Sew the buttons through the support
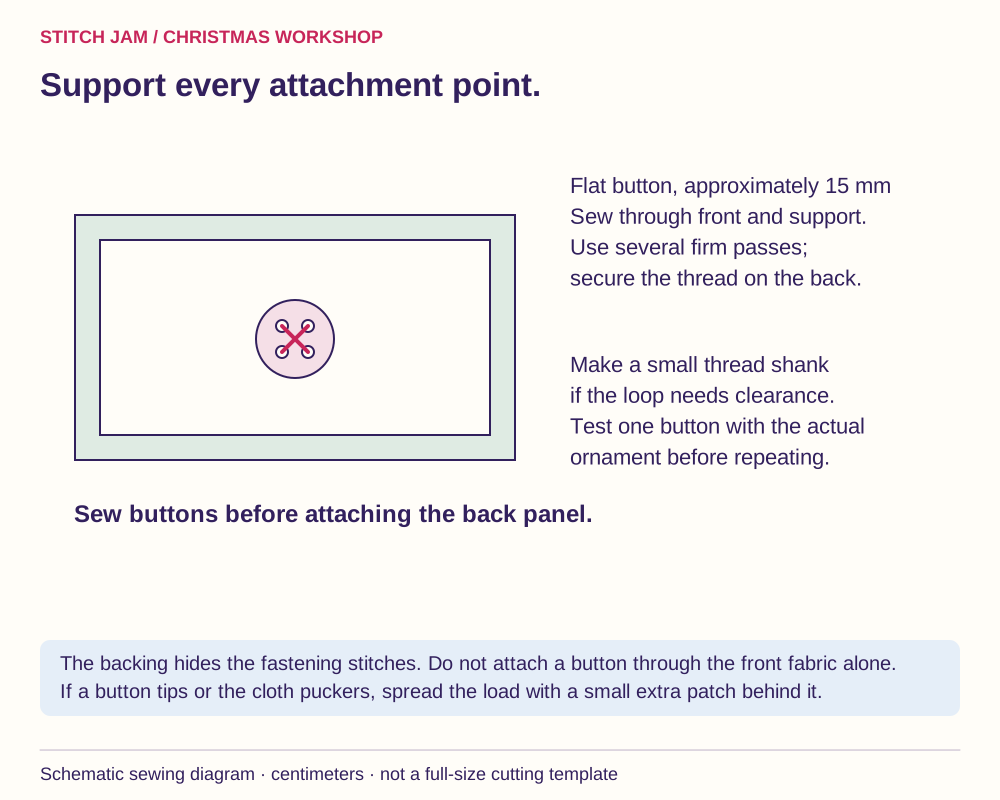
Baste the support to the wrong side of the panel front. Sew the first button through both layers with several secure passes. Give the thread a small shank if the loop needs space beneath the button; it should slip over the button without dragging at the panel. Fasten the thread securely on the reverse.
Hang your completed sample and inspect the fabric. If the button tips forward or a soft cloth puckers, add a small firm patch behind that point to spread the load. Repeat only when the sample hangs comfortably. Keep all fastening stitches on the front-and-support assembly so the backing can cover them later.
7. Match the loops to the buttons
Use a short folded length of narrow woven tape for each ornament. Its exact length depends on your button diameter, fabric thickness and chosen seam allowance, so fit a trial loop around the actual button first. Aim for the ornament top to hang about 1 cm below the button center, as planned in the grid.
For a sewn ornament, baste both tape ends between the right sides at its top, with the loop pointing inward before sewing and turning. The ends must cross the seam line by the full seam allowance; reinforce that seam. For a flat felt-backed finish, attach the loop securely to the backing before closing the perimeter. Tug gently to check the attachment.
8. Enclose the panel and its hanging tabs
Press both long edges of each 8 × 14 cm tab strip to the center, then fold again to make a 2 cm-wide strip. Edge-stitch both sides. Fold each length in half. Baste the raw ends together at the top raw edge of the front, with tab centers 8, 24, 40 and 56 cm from the finished left edge and loops pointing inward.
Place the backing right sides together with the front. Sew a 1 cm perimeter seam, leaving a 15 cm bottom opening. Reinforce the seam across the tabs, trim the corner bulk and turn carefully. Press the plain edges. Close the opening with ladder stitch or edge-stitching. The pocket-calendar guide shows this same tab construction.
9. Rehearse a full calendar
Slip the dowel through all four tabs and support both ends. Hang every finished ornament once, starting with the top row. Check that outlines and loops do not overlap, the bottom row clears the panel edge and the whole panel hangs flat. Its fixing must support the complete display, not only the empty cloth.
This is a decorative calendar, not a tested toy. Keep buttons, hanging loops and loose trim away from very young children and pets. If a fastening distorts, reduce the weight or reinforce it before daily use. You can keep ornaments flat with felt backing instead of adding heavy charms.
10. Begin the countdown and store it for next year
Place the 24 pieces in a box, in order if you want to reveal a planned color arrangement. Add one each morning. A handwritten card can accompany each ornament with a small shared activity; it stays in the box until that day, so the panel itself needs no pockets.
For a 12-day version, use four columns and three rows on a 64 × 54 cm finished panel, cut 66 × 56 cm. Keep the first three button rows and choose 12 favorites. At the end of the season, remove the ornaments, separate embroidered faces with clean tissue and roll the dry panel loosely around a wide tube. Check buttons, loops and tabs before the next December.
Want hidden gifts instead? Choose the detachable-bag calendar. A larger favorite motif can become a Christmas cushion to sit beside the display.
Before repeating the construction
The measurements form an original project plan, so sample your actual fabric, finish and fastening together. DMC's Aida information explains why fabric count changes the size of a fixed chart. The sewing diagrams show only assembly; purchased charts remain in your own pattern files.
Stitch Jam patterns to make it yours
These are real designs from our catalog. The images show finishing inspiration, and the product pages describe the PDF patterns. Fabric, filling, hardware, sewing templates and calendar numbers are separate unless a listing explicitly says they are included.
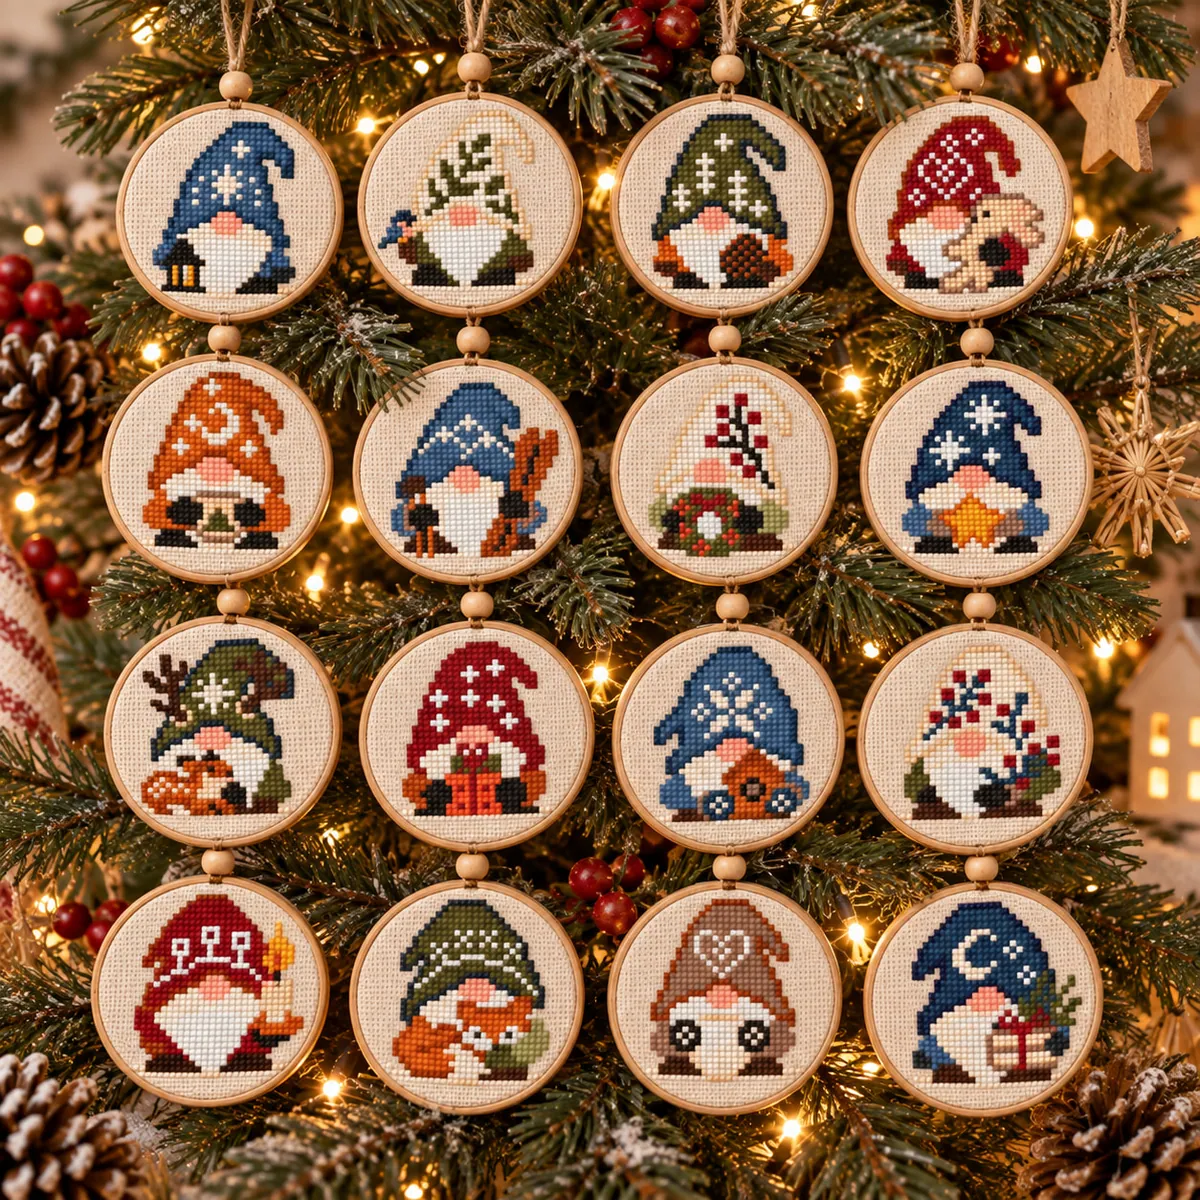 16 Mini Christmas Gnomes Ornaments SetView the pattern and included designs
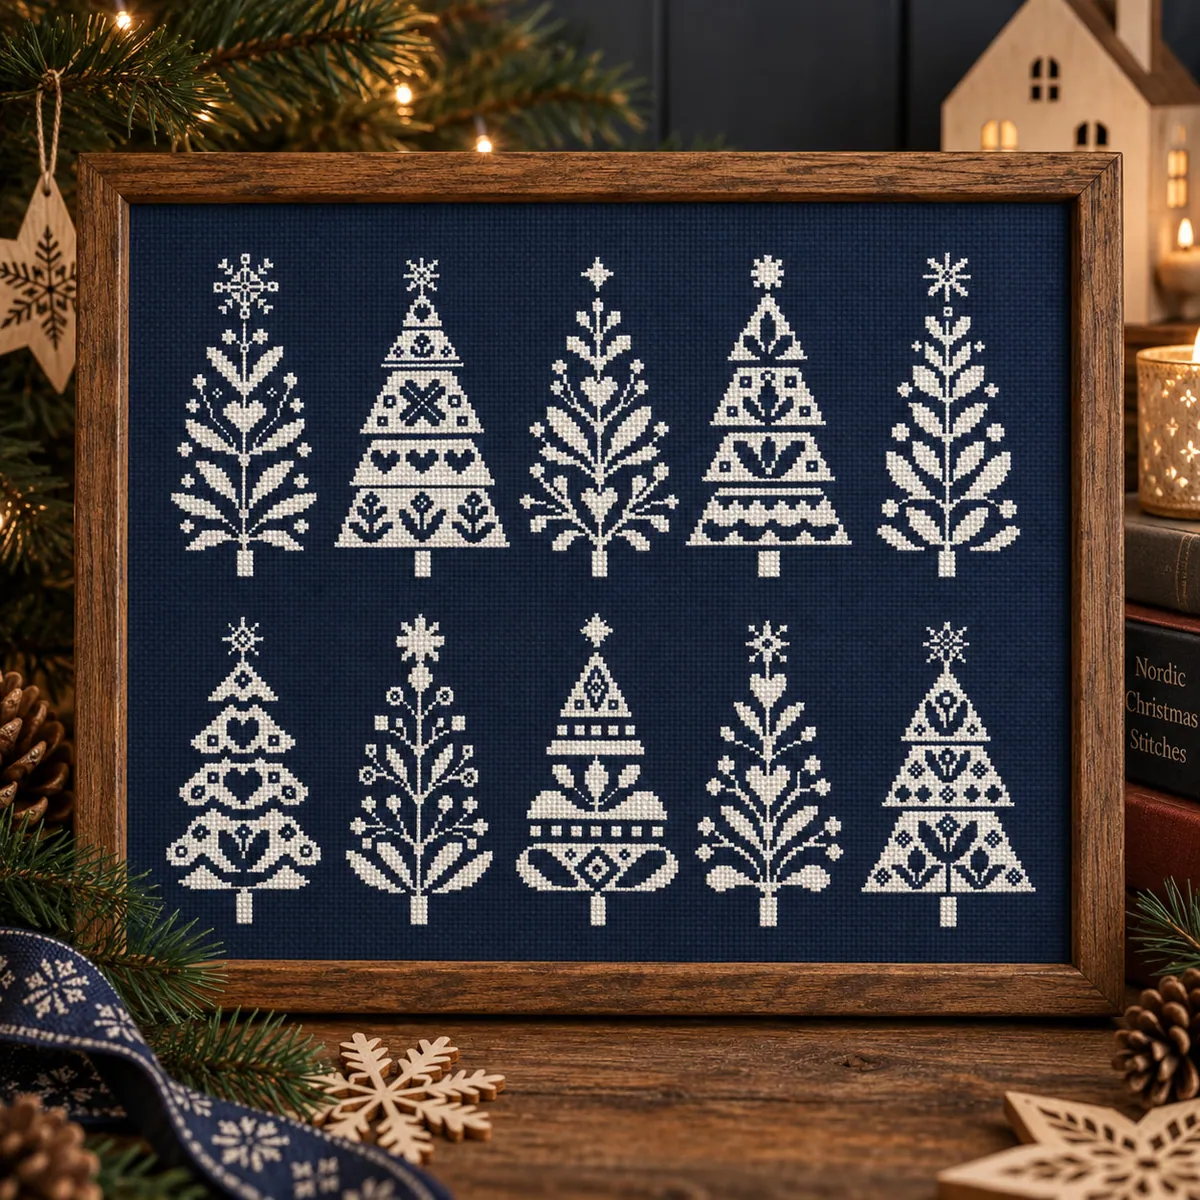 10 Nordic Christmas Trees SetView the pattern and included designs
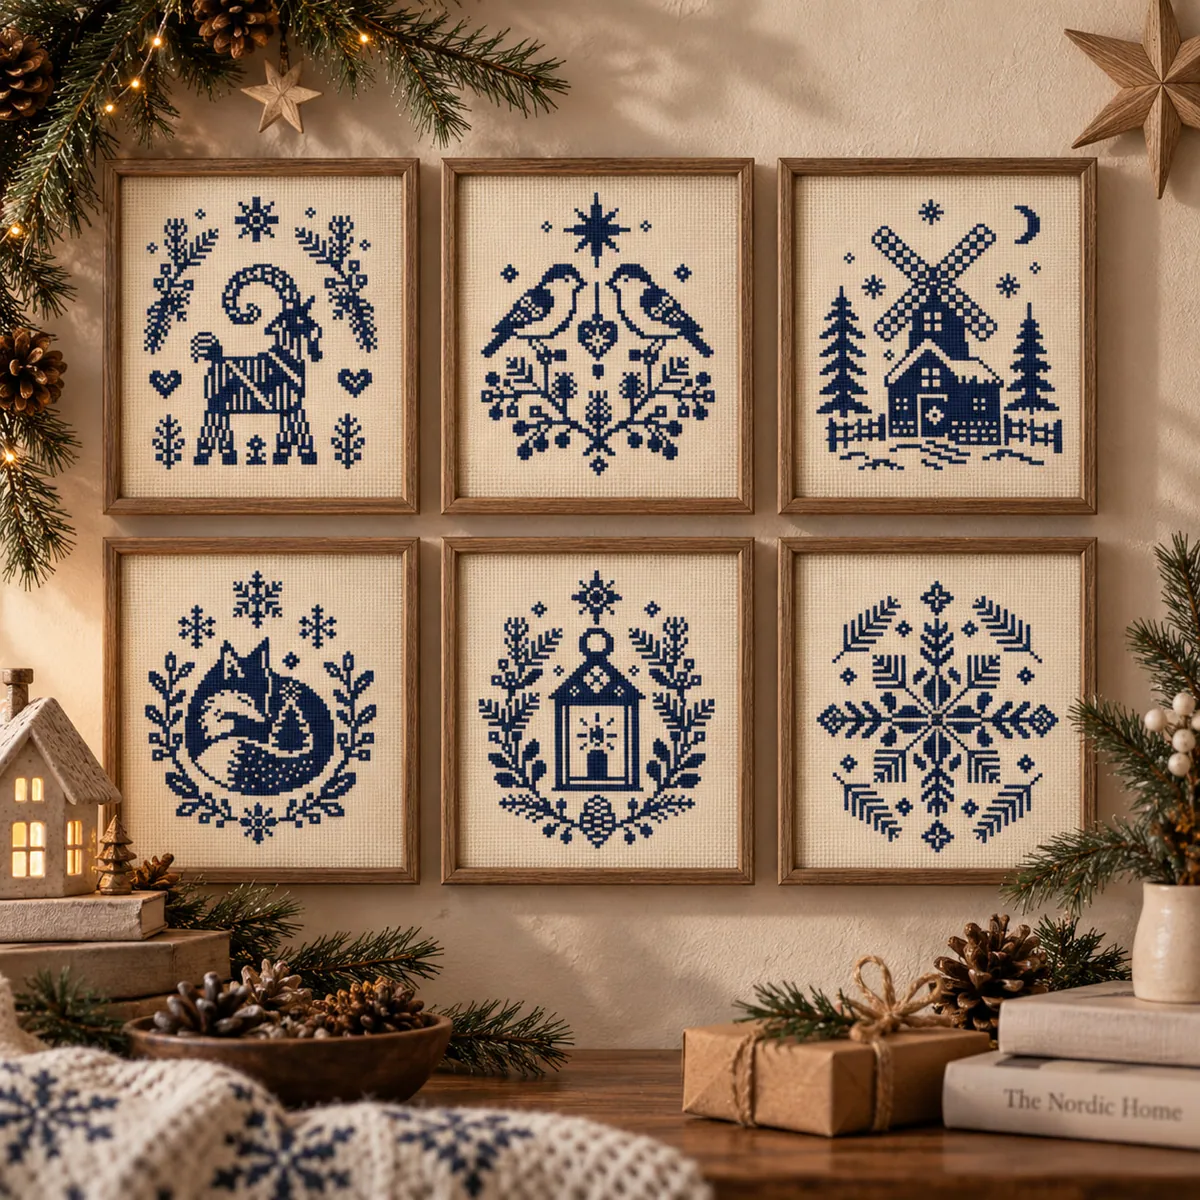 Christmas Nordic Winter MotifsView the pattern and included designs
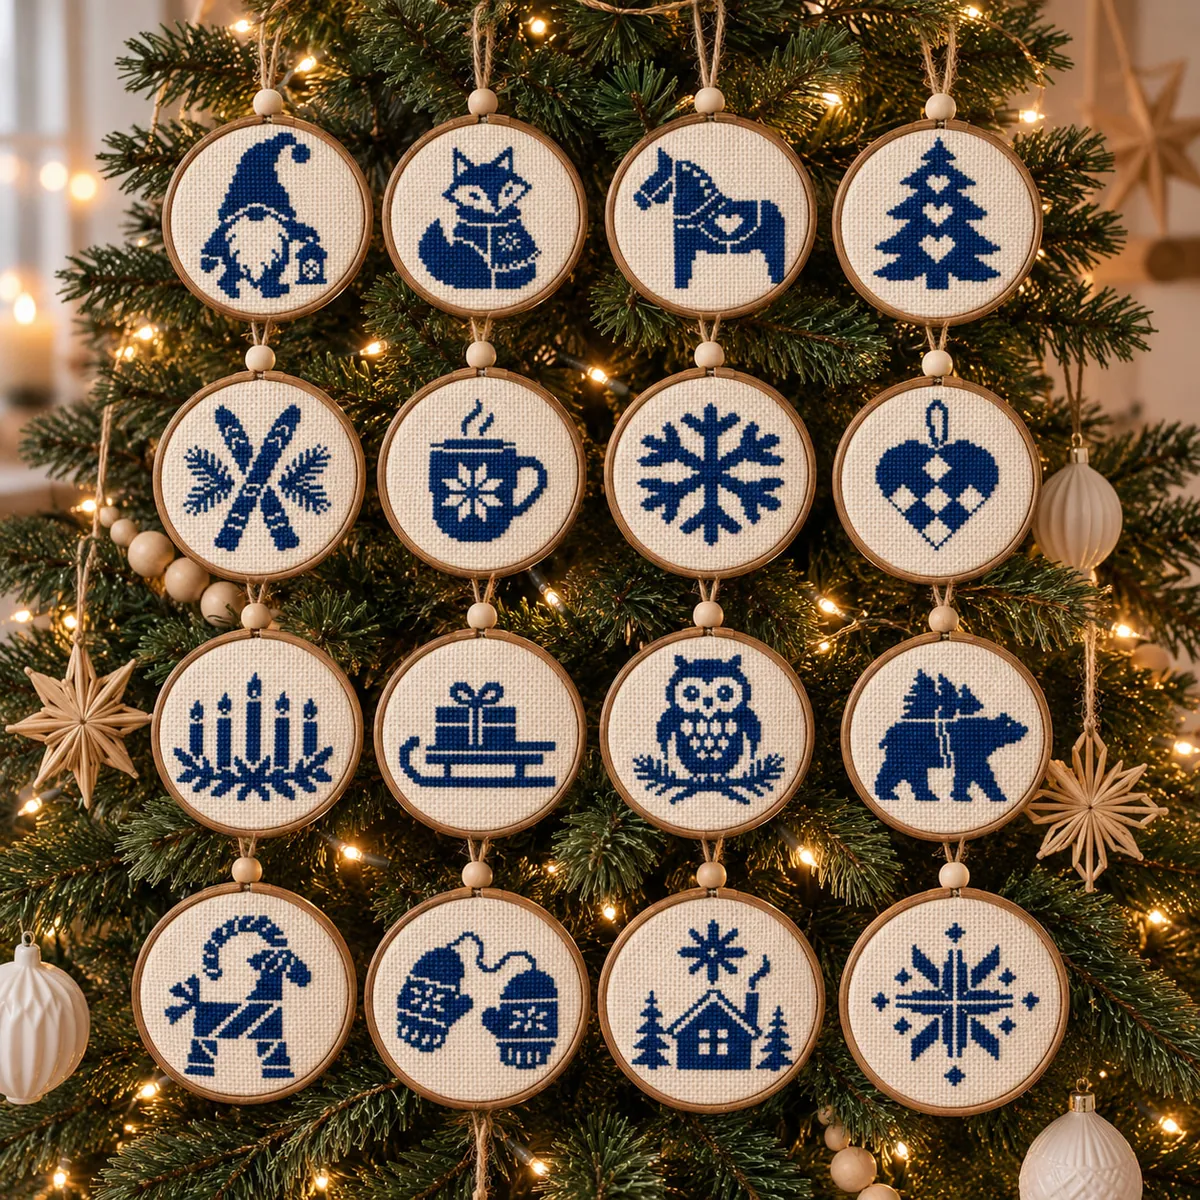 Christmas Nordic Ornaments MonochromeView the pattern and included designs
Measure the individual motif you choose. A set’s overall stitch count or width is not the size of each piece. To make 24 days with 16 gnomes, repeat eight favourites or combine them with another set.