

Plan the front around the embroidery
A favourite character from the Cozy Holiday Gnomes Set can be the focus of a cushion. A balanced arrangement of motifs from the Christmas Nordic Ornaments Monochrome collection is another option. Plan the whole arrangement on paper before stitching, including the spaces between separate designs.
On Aida worked over one square, the stitched width in centimetres is width in stitches ÷ fabric count × 2.54; repeat for height. A hypothetical 140 × 140 stitch arrangement on 14-count measures 25.4 × 25.4 cm, leaving 7.3 cm from its edges to the seams of a 40 cm cover. This is a calculation example, not a dimension promised for either product. Use the actual selected chart or arrangement, including backstitch extensions.
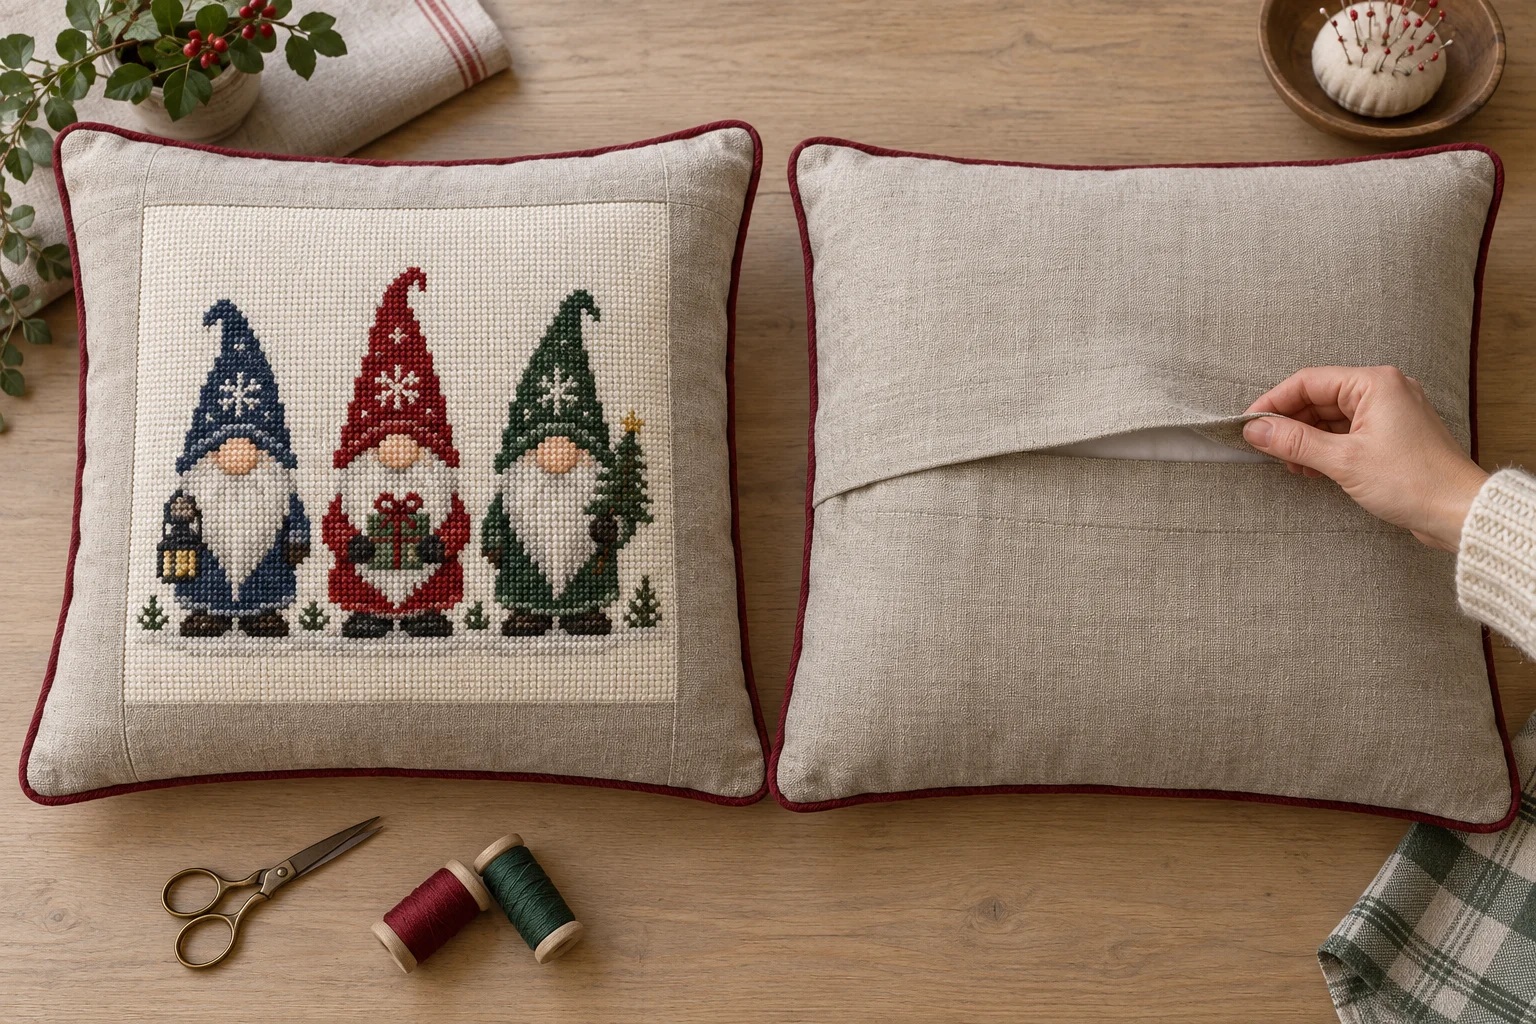
The cutting list for a 40 cm cover
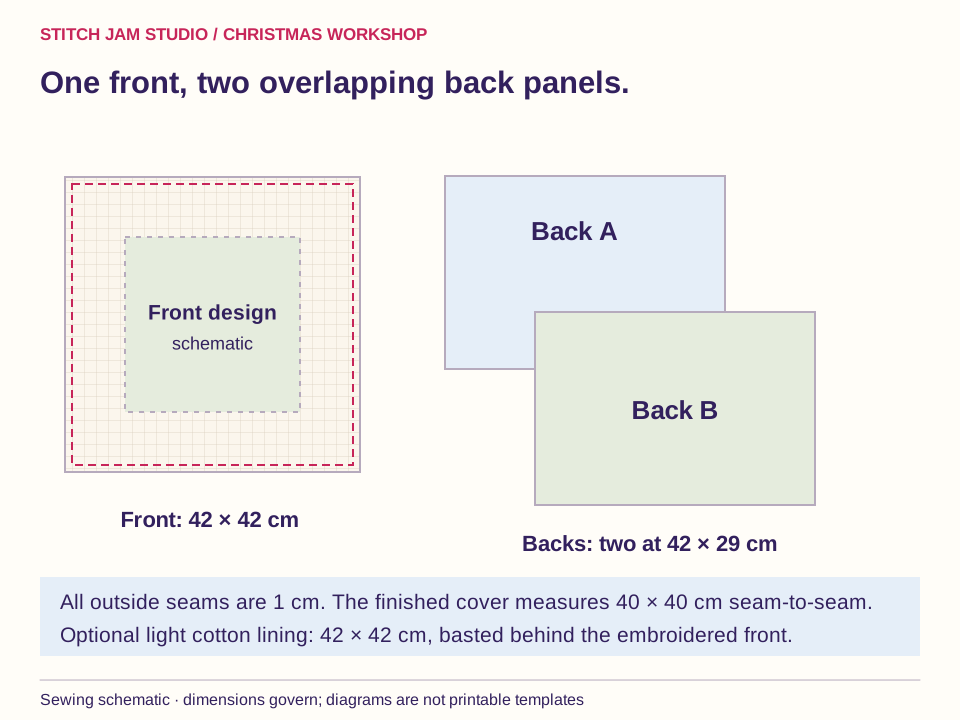
Cut the completed embroidered front 42 × 42 cm. Cut two stable woven cotton backs, each 42 cm wide × 29 cm high. All outside seam allowances are 1 cm. Each back will have one 42 cm edge double-hemmed by 1 cm plus 1 cm, leaving a 42 × 27 cm panel before assembly.
An optional lightweight cotton lining behind the embroidery is also cut 42 × 42 cm. It can hide the insert through pale or open-weave cloth and protect loose thread ends. You also need a measured 40 × 40 cm cushion insert, sewing thread, scissors, ruler, pins or clips, an iron and a blunt point turner. Keep extra fabric around the embroidery while you stitch; make the final cut only after finishing it.
1. Prepare and square the finished embroidery
Check the embroidery for missed stitches and unsecured tails. Clean only according to the materials' instructions, with a colorfastness test first. Let the piece dry fully, then press from the reverse over a clean towel. Prewash and press the backing and lining fabrics when appropriate to the intended care.
Mark the embroidery's centre and draw a 40 cm square seam outline around it. Keep the Aida grid parallel to the outline; do not pull the fabric diagonally to force it square. Add 1 cm outside each side and cut 42 × 42 cm. Overcast the raw woven edges if needed, keeping the tension loose enough for them to remain flat.
2. Add a light lining if the front needs one
Place the lining against the wrong side of the embroidered front. Smooth both layers from the centre outward, matching all raw edges. Baste around the edge within the 1 cm seam allowance. Treat the two layers as one front for the remaining steps.
Choose a lining that supports the stitching without making the cover rigid. Hold the front over the intended insert to check whether the insert's colour shows through. If you prefer the unlined appearance, omit this layer. Neither lining nor backing changes the calculated size of the cross-stitch; avoid stretching the embroidery to match a fabric panel that was cut inaccurately.
3. Hem the inner edge of each back panel
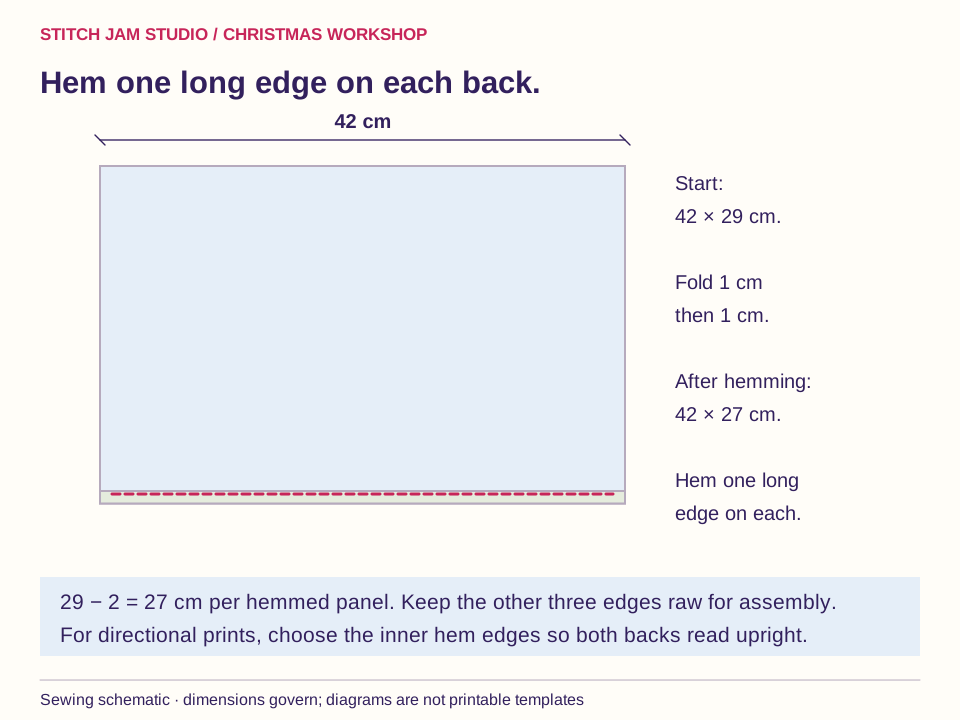
Choose one 42 cm edge on each back to become an inner opening edge. Fold that edge 1 cm to the wrong side and press; fold another 1 cm and press again. Stitch close to the inner folded edge so the raw cut is enclosed. Repeat on the second back.
Each hemmed panel now measures 42 × 27 cm. The other three edges remain raw. With a directional print, decide which panel sits at the top and which at the bottom before choosing the hem edges, so the printed design appears upright on both. A straight, accurately pressed hem helps the envelope opening lie flat.
4. Check the 12 cm overlap before sewing
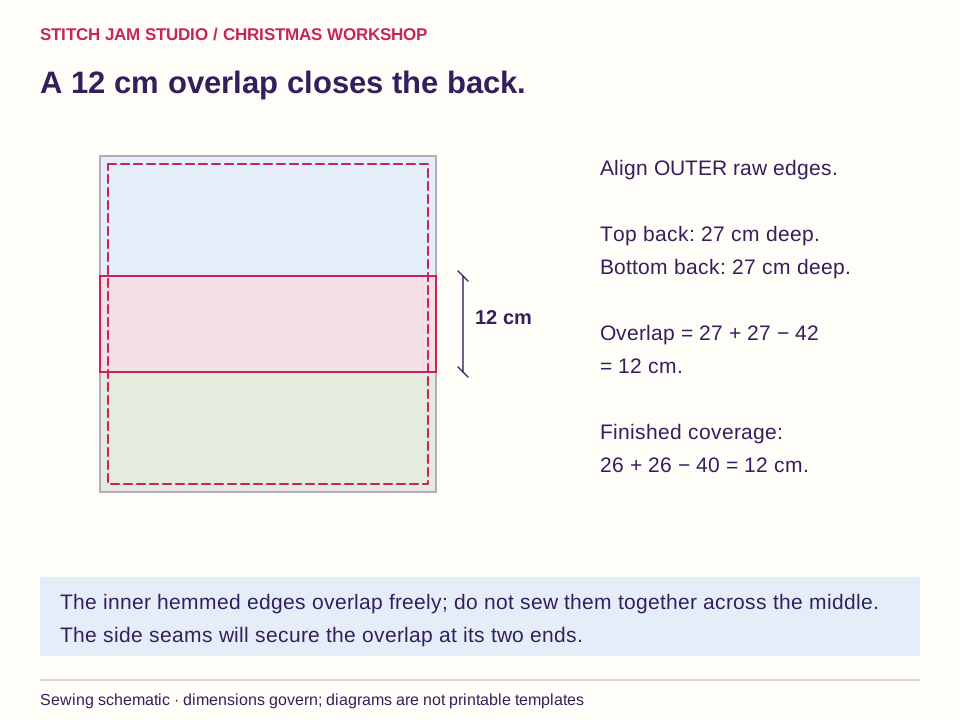
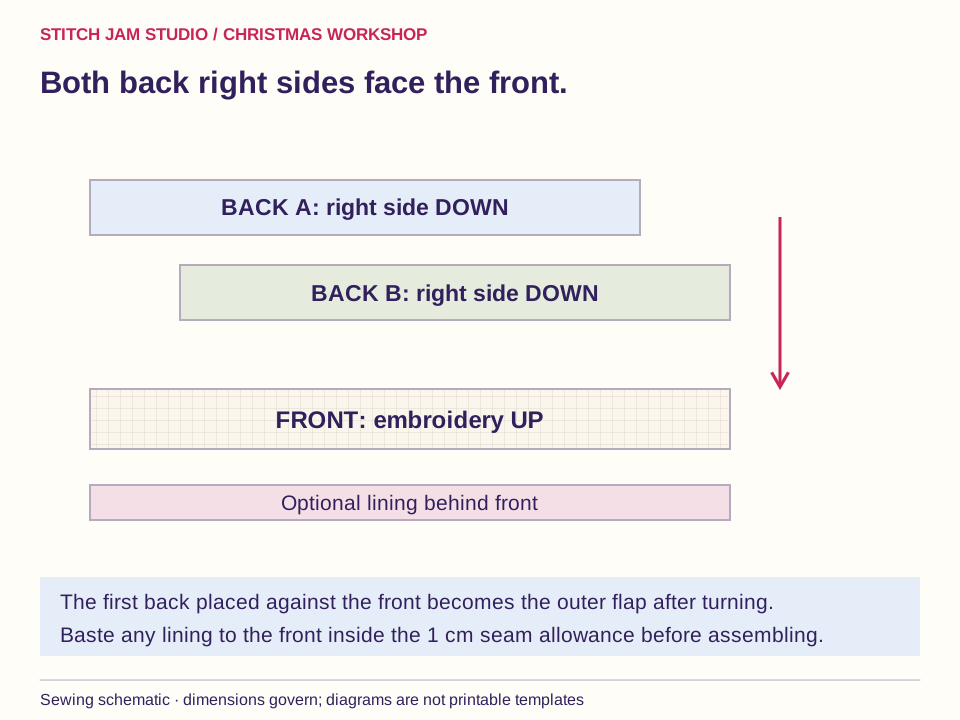
Place the front embroidery side up. Lay the first back over it with its right side down, aligning its raw outer edge with the front's top raw edge. The hemmed edge points toward the centre. Lay the second back right side down, aligning its raw outer edge with the front's bottom raw edge. Its hem points upward and overlaps the first panel.
The overlap is 27 + 27 − 42 = 12 cm. After sewing, each back covers 26 cm inside the finished 40 cm height, giving the same 26 + 26 − 40 = 12 cm overlap. Keep the hemmed edges free across the centre. The first back placed against the front becomes the outer flap when turned.
5. Pin the complete layer stack
Match the outer raw edges and corners. Pin or clip around all four sides, adding a pin where each hemmed edge meets a side seam. Check the stack: optional lining beneath the front, front embroidery facing upward, and both cotton backs with their right sides facing downward.
Smooth the overlap without pulling it tight. The centre hem edges are not sewn to each other or to the embroidered front. If one outer edge is longer, recheck cutting and hem measurements before continuing. Small inaccuracies can make an envelope opening twist, especially with a firm embroidered front and softer cotton backs.
6. Sew every outer edge and turn through the back
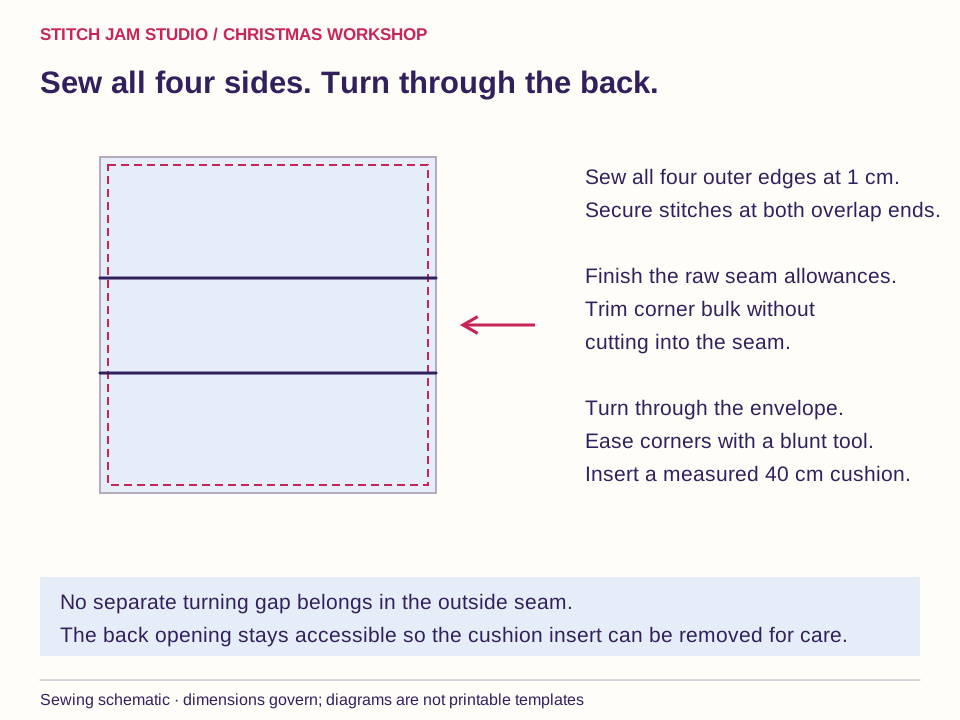
Sew around all four sides at a consistent 1 cm allowance. Secure the beginning and end, and reinforce where the side seams cross the hemmed opening edges. No separate turning gap is needed: the envelope opening provides access. Remove pins before the needle reaches them.
Inspect the seam, then finish the raw allowances with an overcast or zigzag stitch suitable for the fabric. Trim a little bulk from the outer corners without cutting into the seam; keep at least 3 mm beyond each corner intersection. Turn the cover through the back opening. Ease the corners with a blunt tool and smooth the seams gently.
7. Insert, check and care for the cover
Fold the insert gently and ease it through the envelope. Set each corner into place and smooth the front. Check that the back still overlaps comfortably and the motif remains centred. The cover's 40 × 40 cm measurement is seam-to-seam; the visual fit depends on how plump the particular insert is. Avoid forcing an oversized insert into the embroidery.
Remove the insert before cleaning and follow the most restrictive care needs of the embroidery, fabrics and thread. For a smaller matching decoration, try the pillow ornament. Use leftover cotton for reusable gift bags or detachable Advent bags. Our pocket Advent calendar offers a wall-hanging project for a coordinated holiday corner.
Stitch Jam patterns to make it yours
These are real designs from our catalog. The images show finishing inspiration, and the product pages describe the PDF patterns. Fabric, filling, hardware, sewing templates and calendar numbers are separate unless a listing explicitly says they are included.
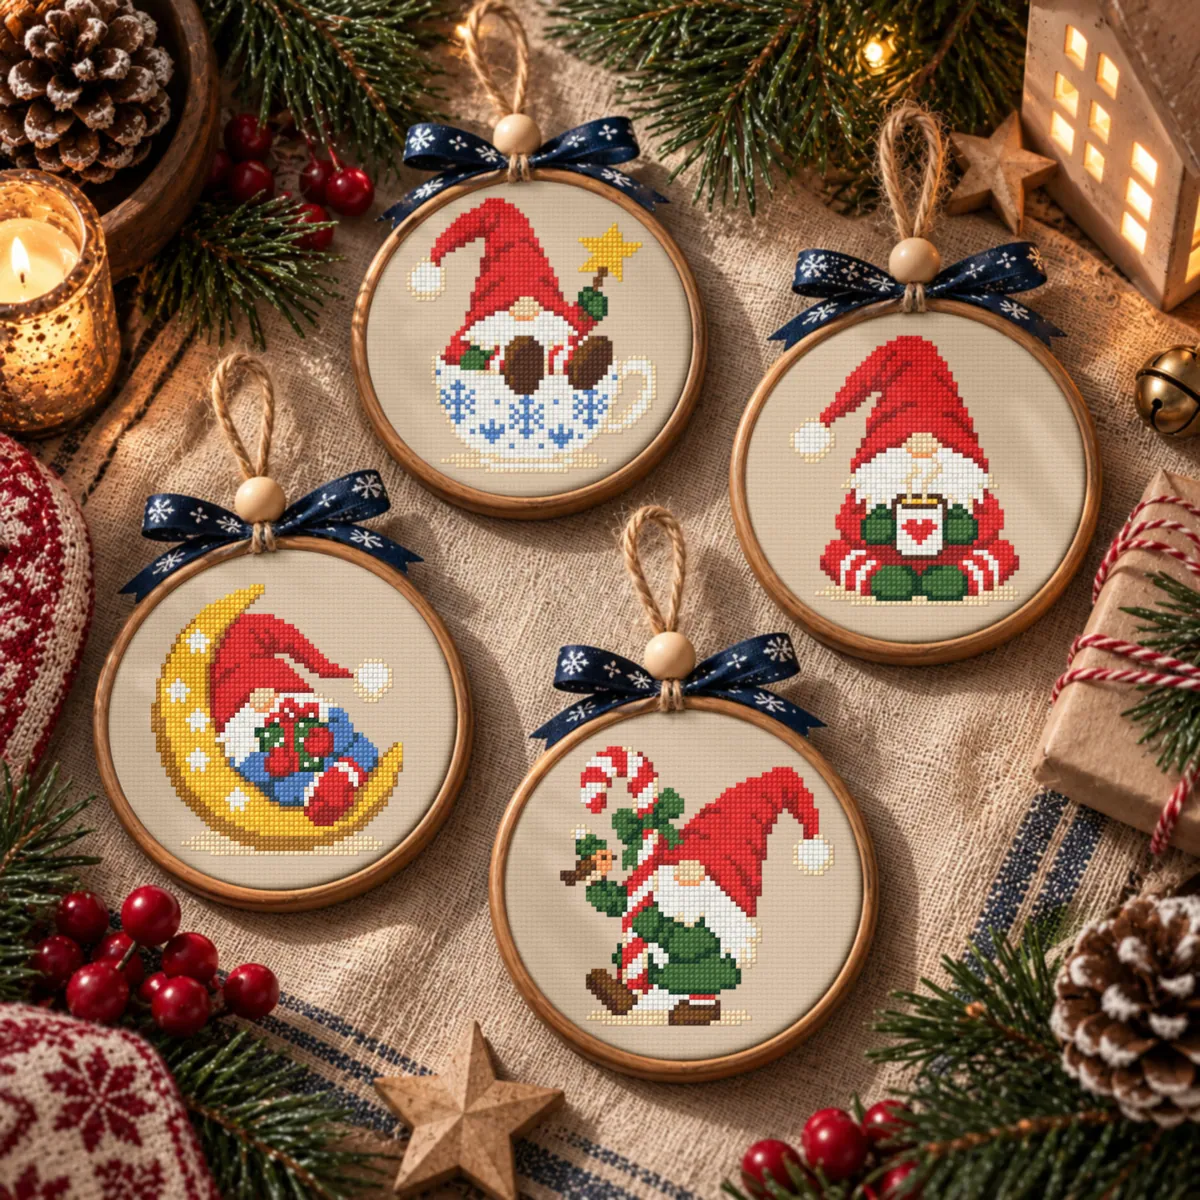 Cozy Holiday Gnomes SetView the pattern and included designs
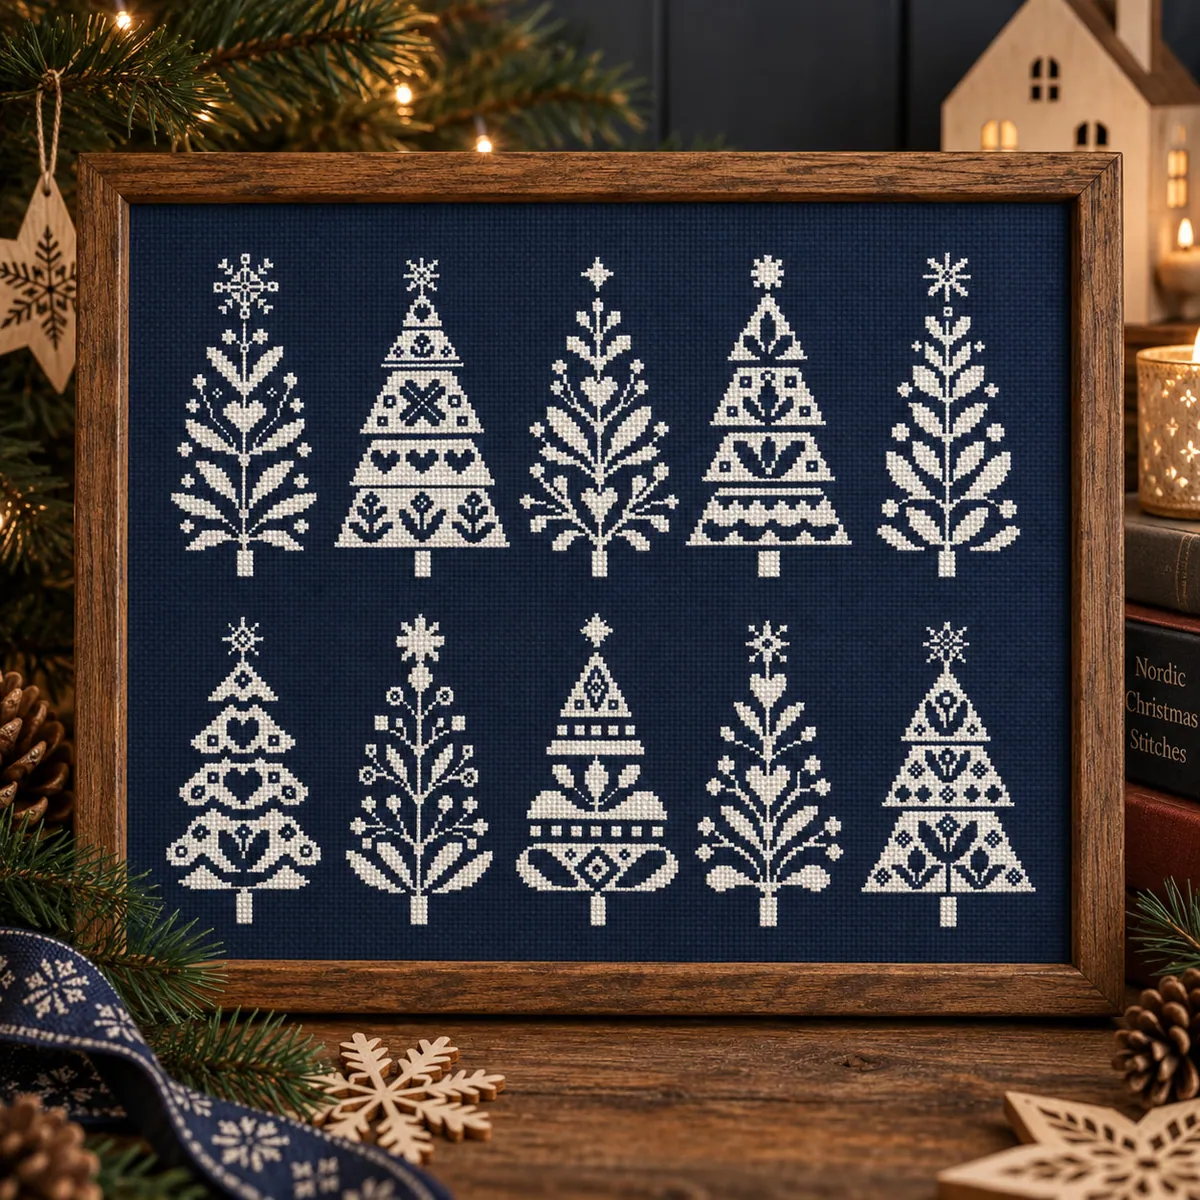 10 Nordic Christmas Trees SetView the pattern and included designs
Measure the individual motif you choose. A set’s overall stitch count or width is not the size of each piece. To make 24 days with 16 gnomes, repeat eight favourites or combine them with another set.